I am so very excited to share the CC and Mike Kane Project Remodel Reveal today!
This project has a special place in my heart because it was a remodel for my friend Cyndi Kane who lives in beautiful Pawhuska, Oklahoma. Cyndi has become a dear friend and is a constant source of encouragement to me. She believes in me even when I might be struggling to believe in myself. She thinks big and encourages me to dream even bigger than I could ever dare to dream on my own. She is the catalyst for CC and MIKE THE SHOP and has been instrumental in helping us launch our online e-commerce business. But most of all, Cyndi is a mentor, wife, mother, friend, and woman of faith whom I look up to and admire greatly. Being a part of transforming her home into a space that she and her family truly love and enjoy, has been a great honor for us!
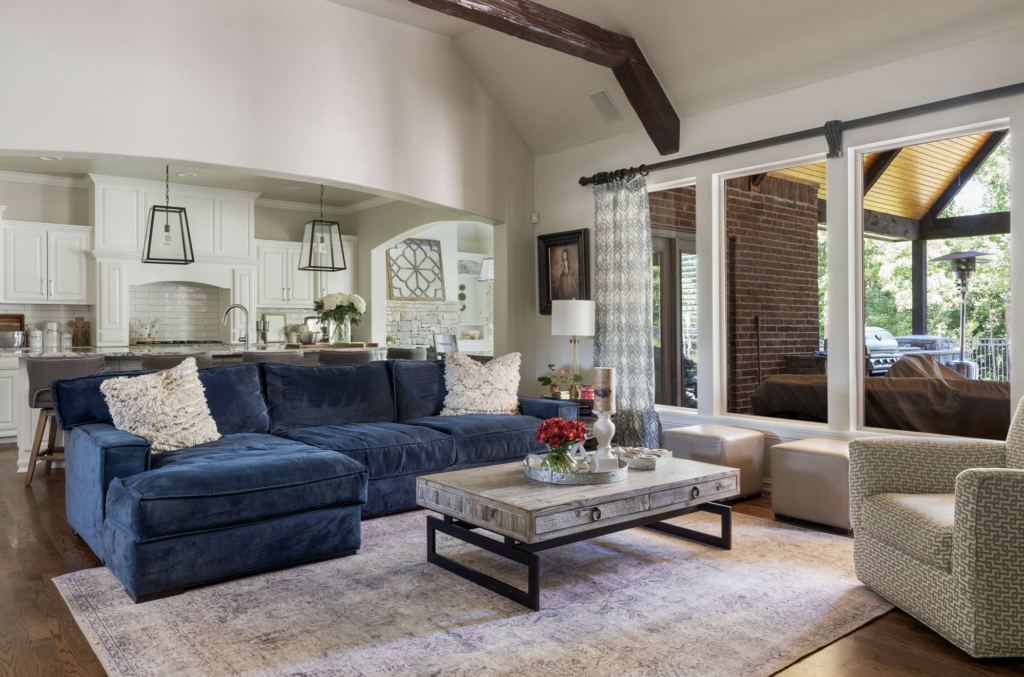
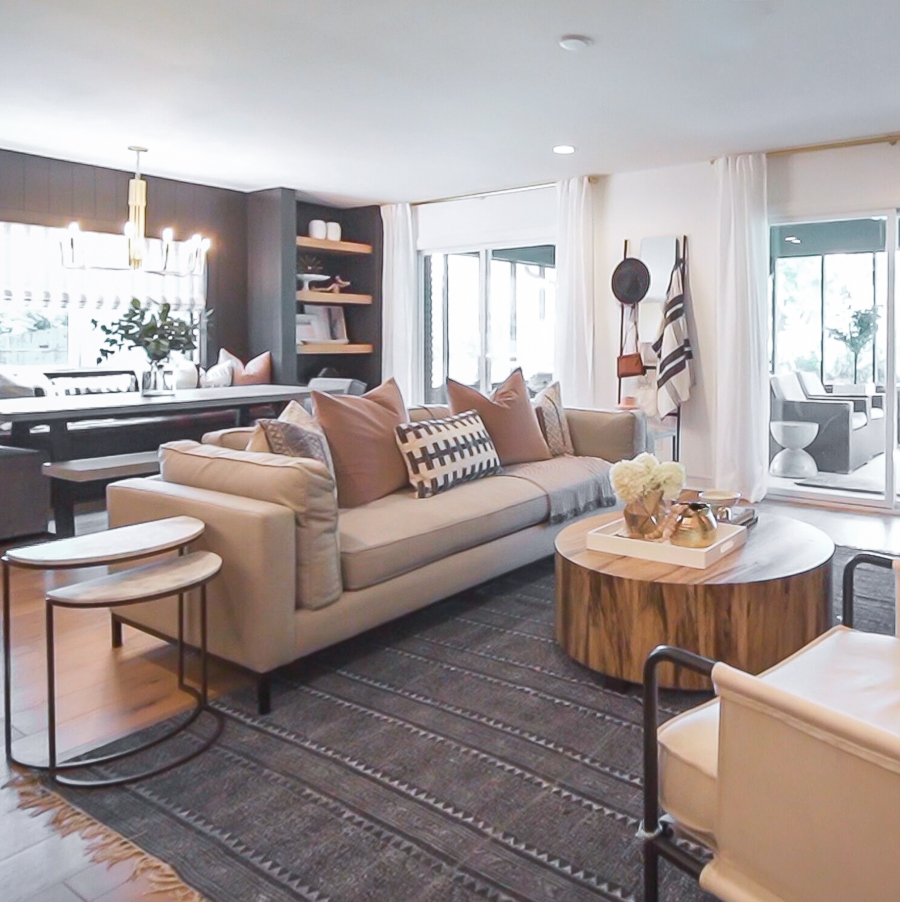
Alrighty, firt of all we have to talk background and set the stage for this remodel story. Cyndi lives in Pawhuska, Oklahoma. If you haven’t been to Pawhuska, it is one of my favorite places and you should definitely plan a visit. From the wide-open ranges of the Tallgrass Prairie Preserve, to the Pioneer Woman Mercantile, to P-Town Pizza and the new Pioneer Woman Boarding House, to Osage Outfitters (my favorite place to shop while in Pawhuska) to the art galleries full of one-of-a-kind Native American pieces, Pawhuska is a bustling little Oklahoma town that will leave you feeling energized, refreshed, and completely at peace after you visit. However, the best part of Pawhuksa, by far, is the people. As a result of this project and our friendship with Cyndi and her precious family, Michael and I have been able to meet so many people from the great town of Pawhuska. Their genuine kindness, authenticity, and love for one another are inspiring. Simply put, this is a town where people help one another and live by the golden rule. John Kane, Cyndi’s husband, is a fourth generation Pawhuskan. Is that a word? Pawhuskan? If not, I just made it one so just go with it-ha! So where am I going with all this talk of Pawhuska? Well, I feel like before I can share this remodel, I need you to truly know the amazing people behind it, and also you need to know that Cyndi and John live in a beautiful home on the top of a hill in Pawhuska that once belonged to John’s grandparents. I mean, how cool is that? Judge John Kane, Cyndi’s husband, is a lawyer as was his father before him, and his grandfather before him. All of them have practiced law in Pawhuska. Talk about a really cool legacy. Hopefully, you are starting to get a picture of how incredibly cool it was to be a part of this project. It makes my heart oh so happy thinking about the Kanes entertaining family and friends around their big kitchen island and in their beautiful new living room (did I mention that white couch is stain resistant Crypton fabric and is resistant to everything from dog prints to wine to anything kids and grandkids can throw at it?! Because it is, which is pretty incredible since Cyndi is going to have her first grand-baby pretty soon and still has teenagers in the house). Yep. I’ve rambled on and on and basically what I want to say is, gosh, we feel so incredibly blessed to have been a part of this remodel but even more-so, to call the Kane family our friends.
OK! So now that you have the background you need to have about the Kanes, and about Pawhuska, and about this being a third generation home that was built by John’s grandparents….let’s finally talk about the remodel!
Cyndi had a very clear vision of where she wanted to go with the remodel. Many of the pictures she showed me had an industrial vibe with a lot of wood and brick and stainless steel. I also absolutely loved Cyndi’s eclectic side, being a self-professed lover of eclectic design myself. I knew we needed to incorporate some interesting elements in the design like brick backsplash, a black statement wall, an art ledge, and large natural wood sliding barn doors on the tv wall. Over time, Cyndi and I came up with a concept and design for her living room and kitchen that we both loved, and I want to share the design boards with you so that you can see how this process of remodeling works.
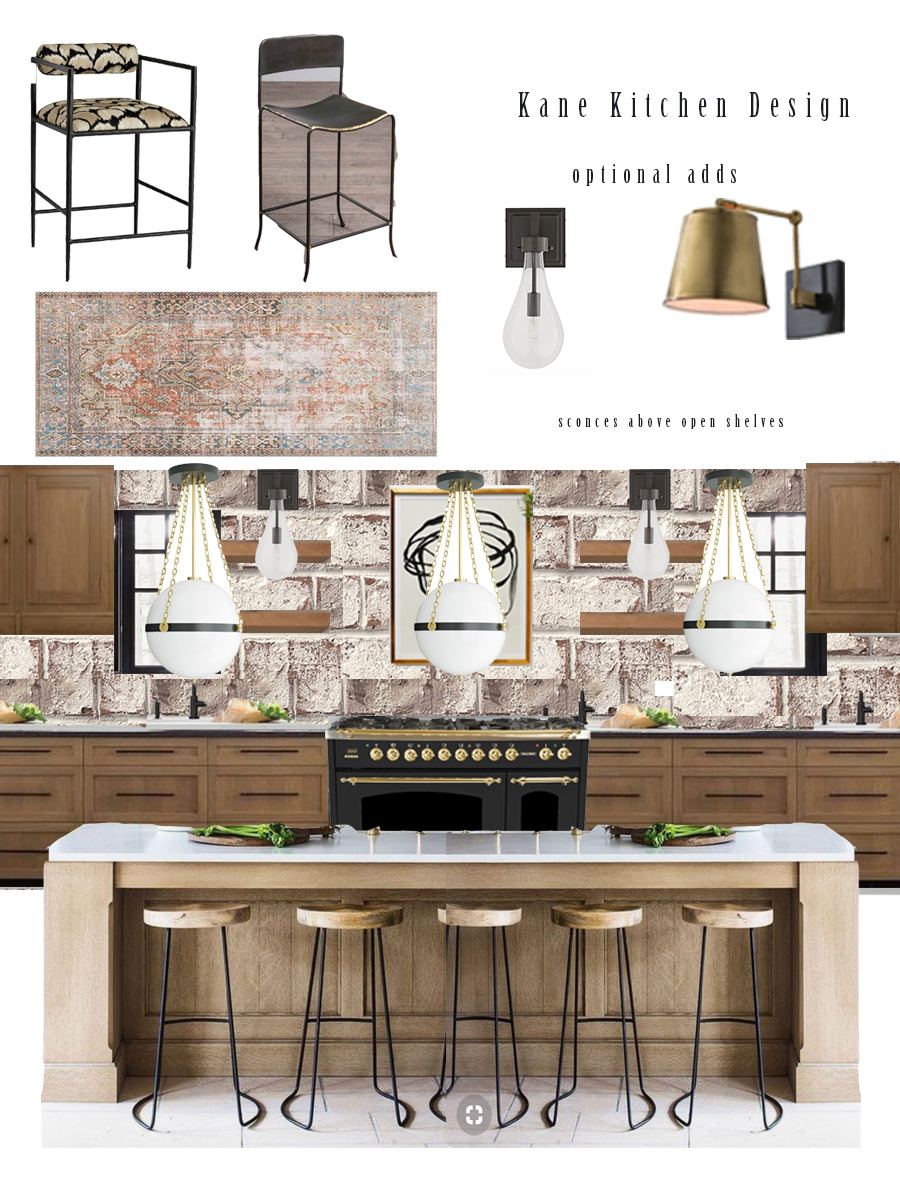
DESIGN BOARD FOR THE KANE PROJECT
Shop the Kane Remodel Kitchen Products here (more detailed info on products listed below):
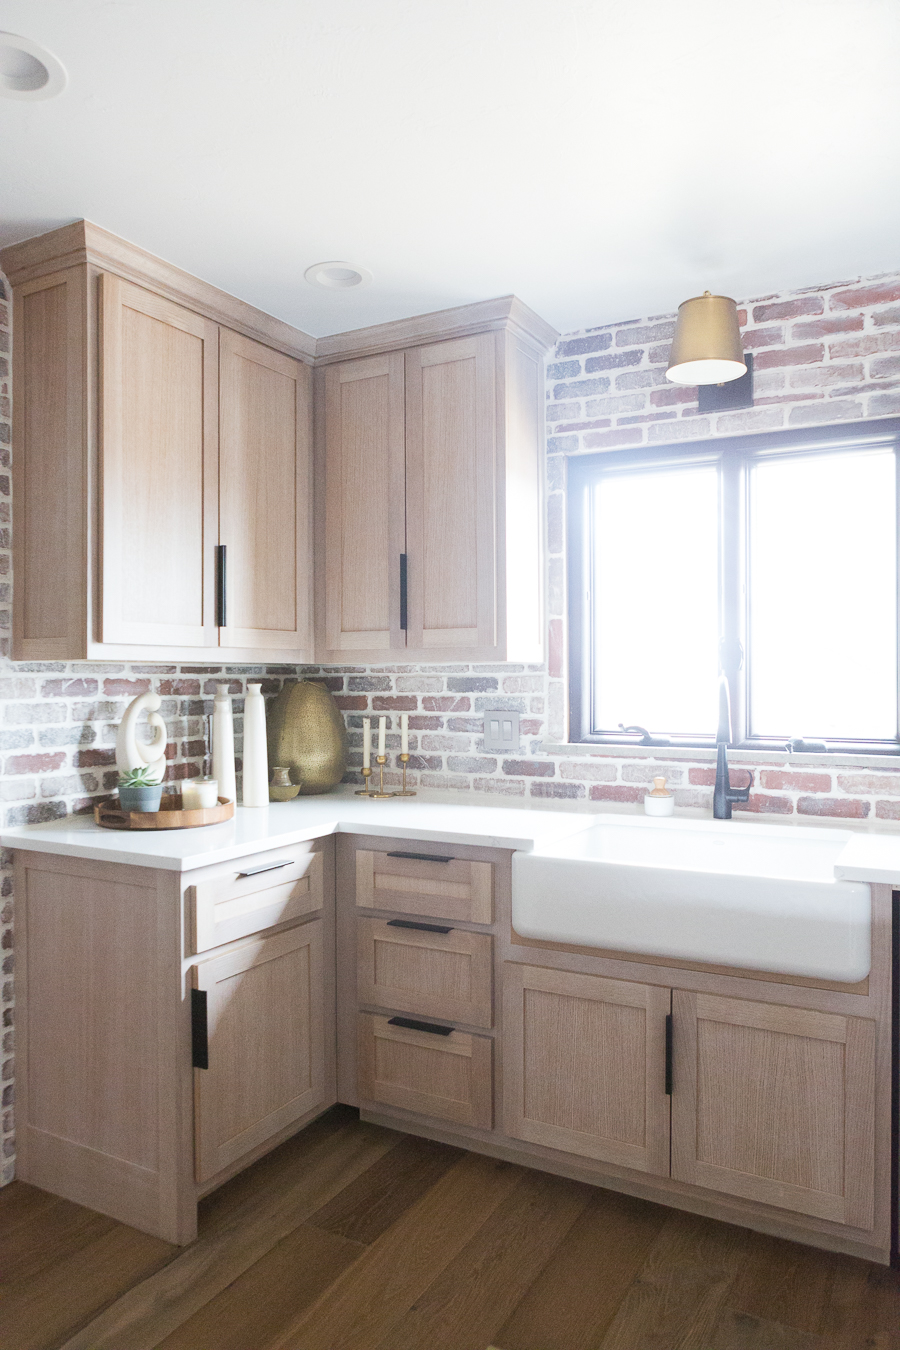
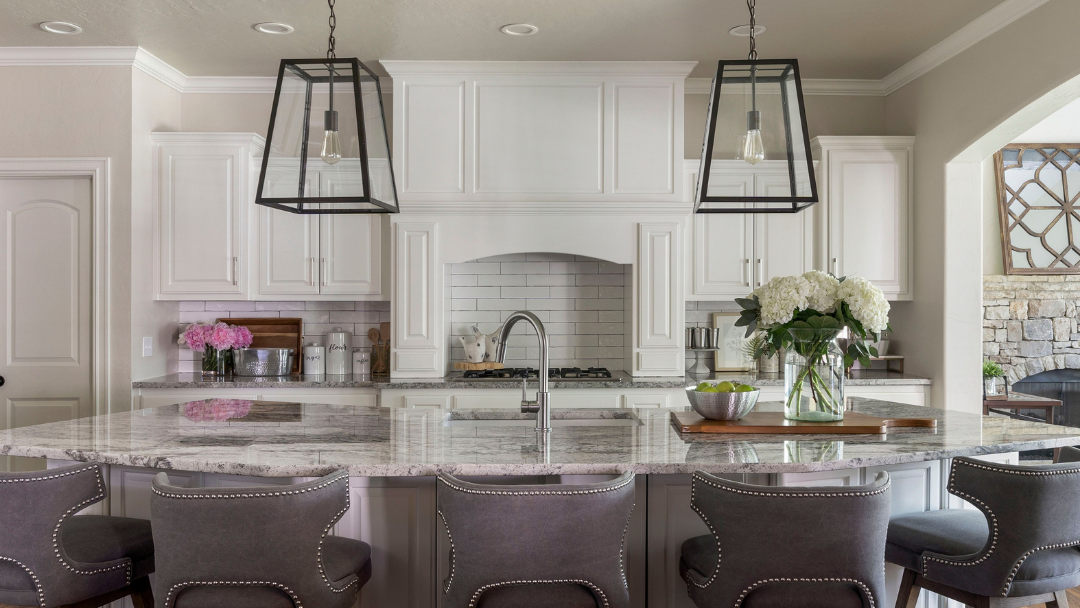
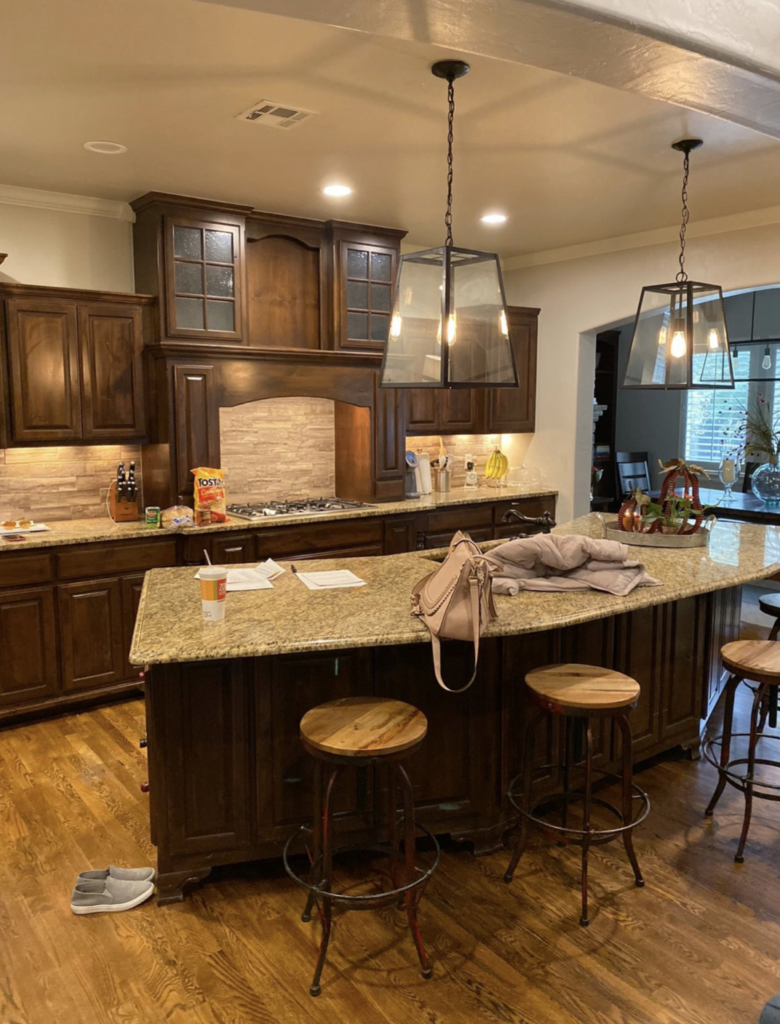
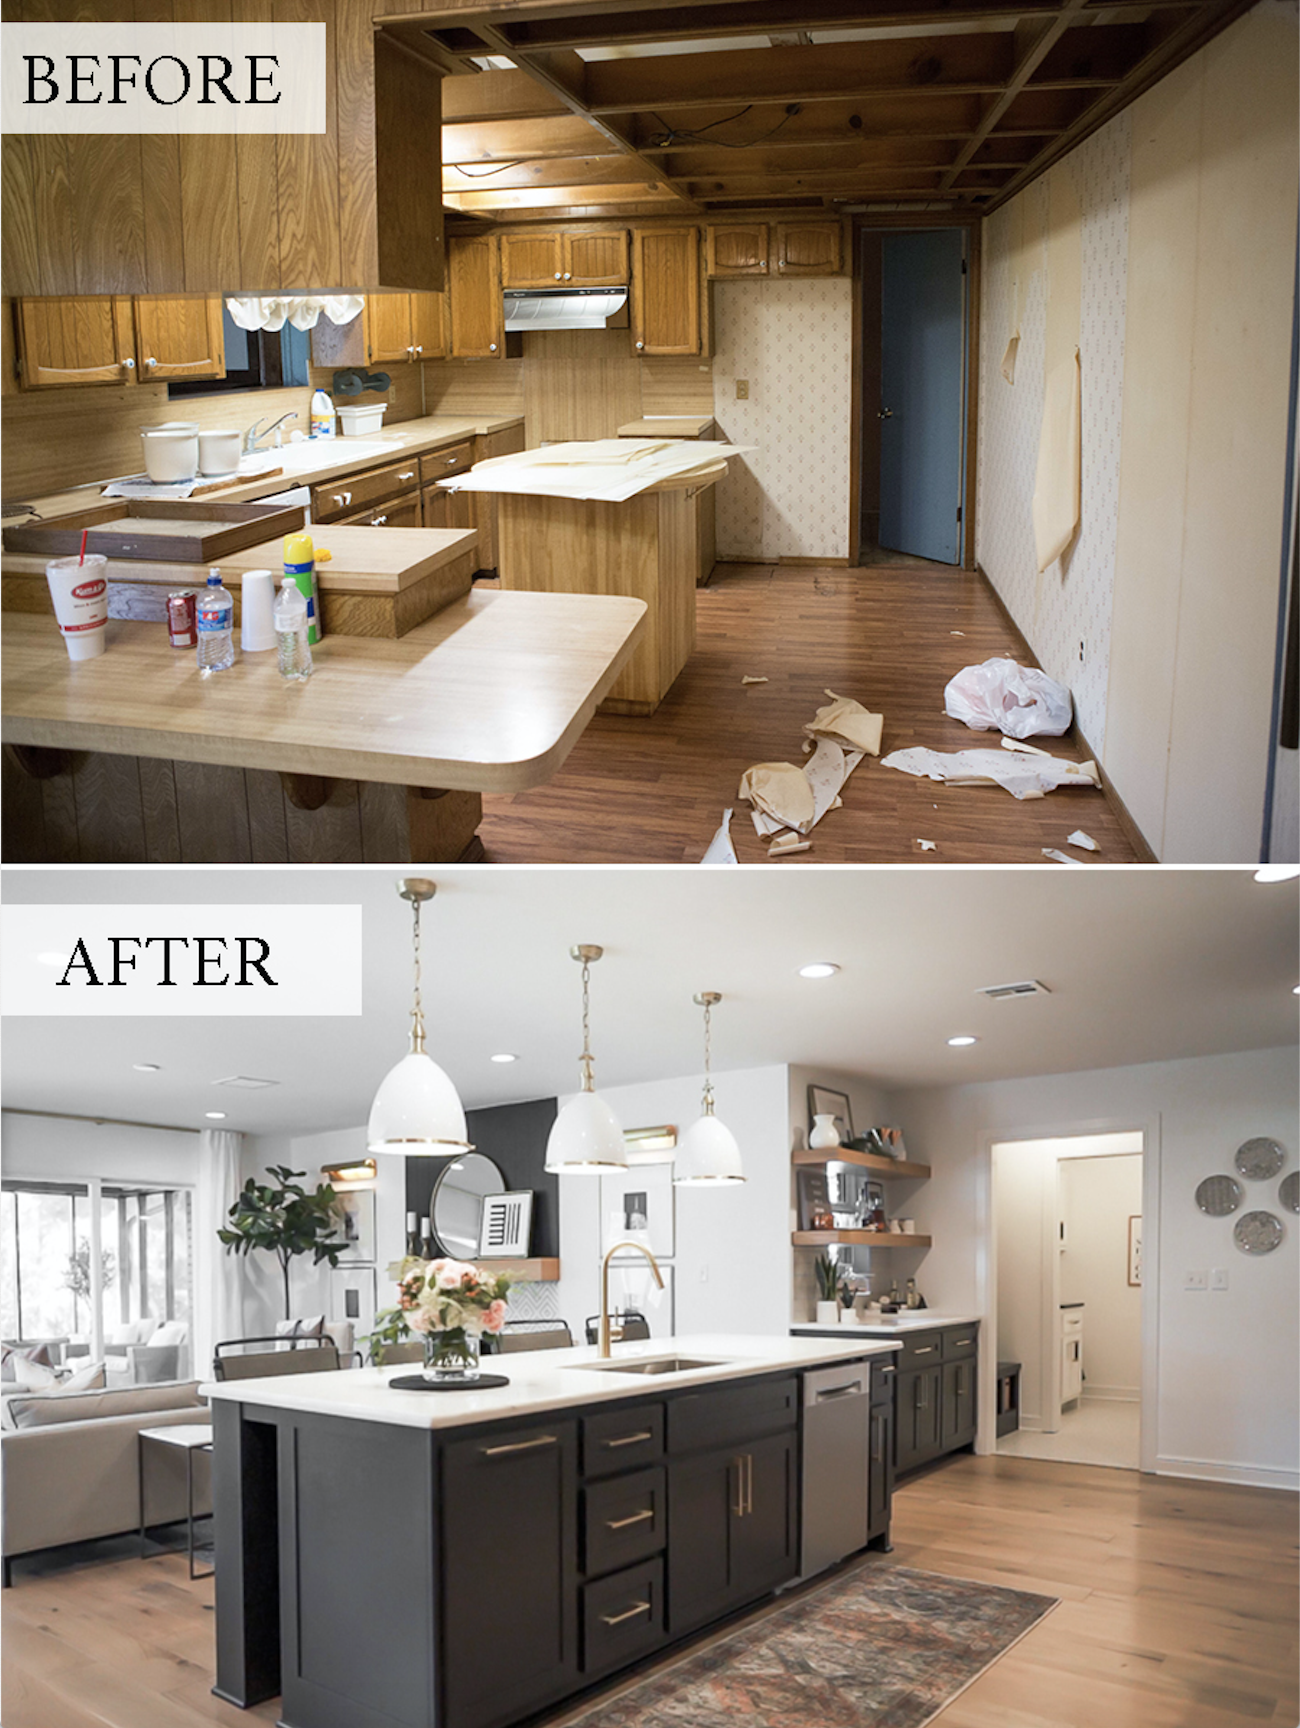
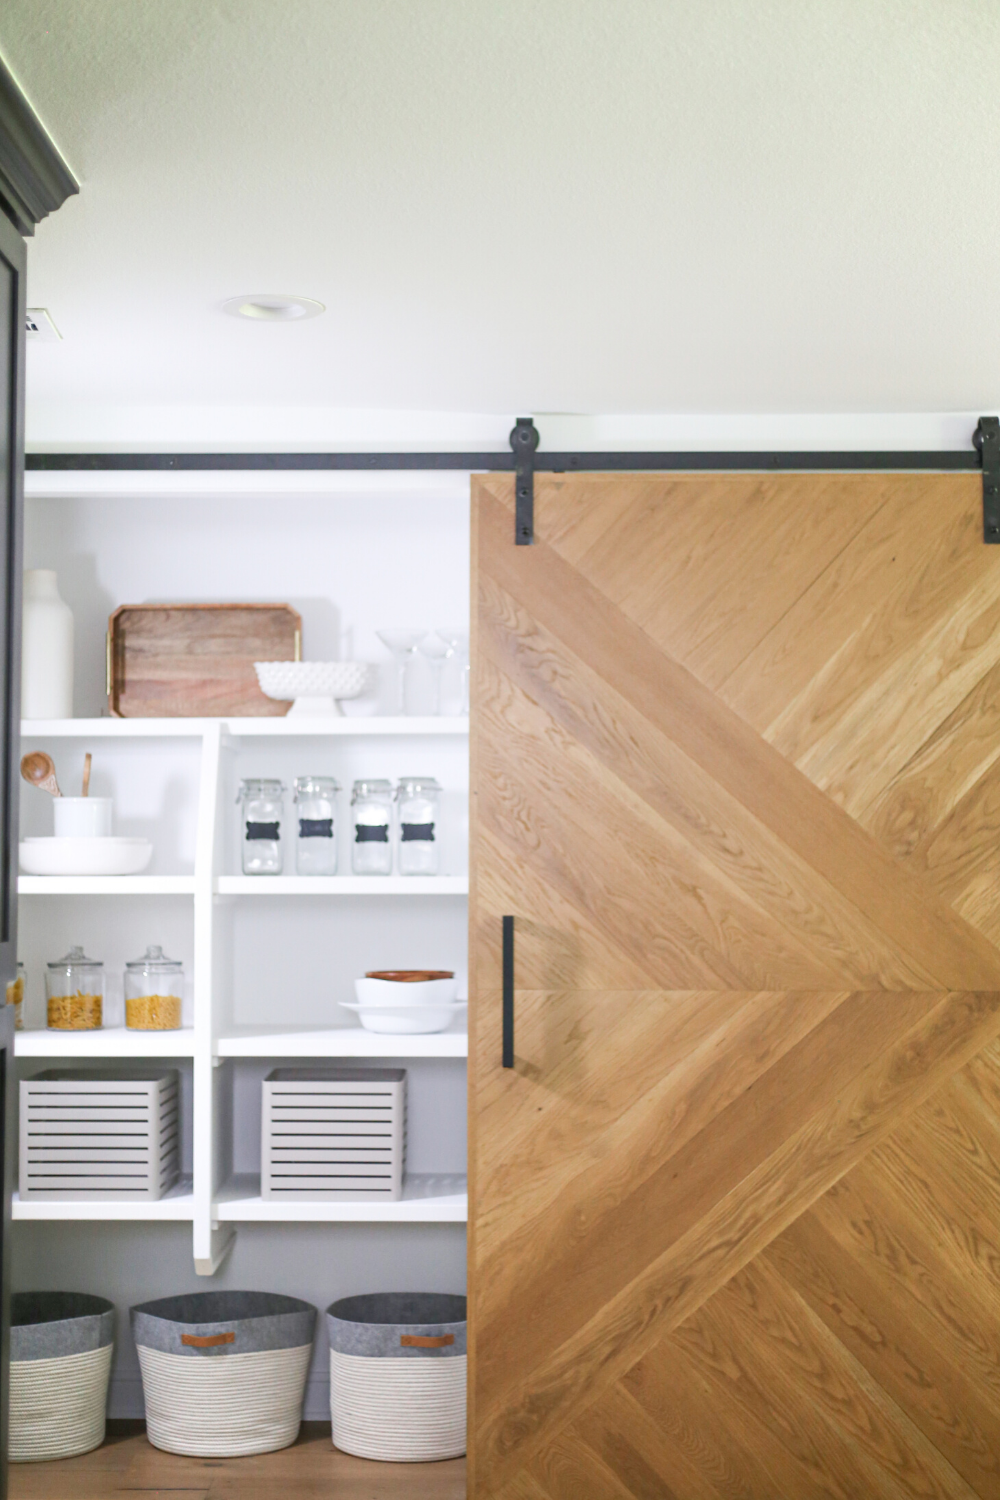
From the first time I visited Cyndi’s house and met her family, I knew the goal of the kitchen remodel would be to rework with kitchen space and allow for more room and a better flow in the kitchen area. The Kanes entertain often and their large kitchen island is truly the heart of their home. However, the fridge was the focal point of the kitchen and the stove was in an area that really didn’t make sense and impeded the flow of guests and family members throughout the kitchen. In addition to this, the kitchen became very congested when people tried to walk to the fridge and open the door and the dimensions of the kitchen island made it difficult for guests to freely roam around, grab a drink or a bite to eat from the fridge, and have a seat at the large bar. It was our goal to not only fix the flow of the kitchen but also give a fresh, updated look to the entire space. Based on numerous meetings and discussions and inspiration photos that Cyndi shared with me, I came up with the design board above for their kitchen remodel. Cyndi really wanted to incorporate brick, open shelving, and natural wood cabinets so we did all of the above. She also has a very eclectic style that resonates with my soul. As you know, I love patterns, textures, color, and consider myself a girl with eclectic style as well. Cyndi loves art and wanted to incorporate art in the kitchen as well so instead of a vent hood, Cyndi put a large piece of custom art—a photograph her husband, John, took of their beloved Catholic Church in Pawhuksa. So without further ado, let’s see the before and afters of the Kane kitchen remodel….
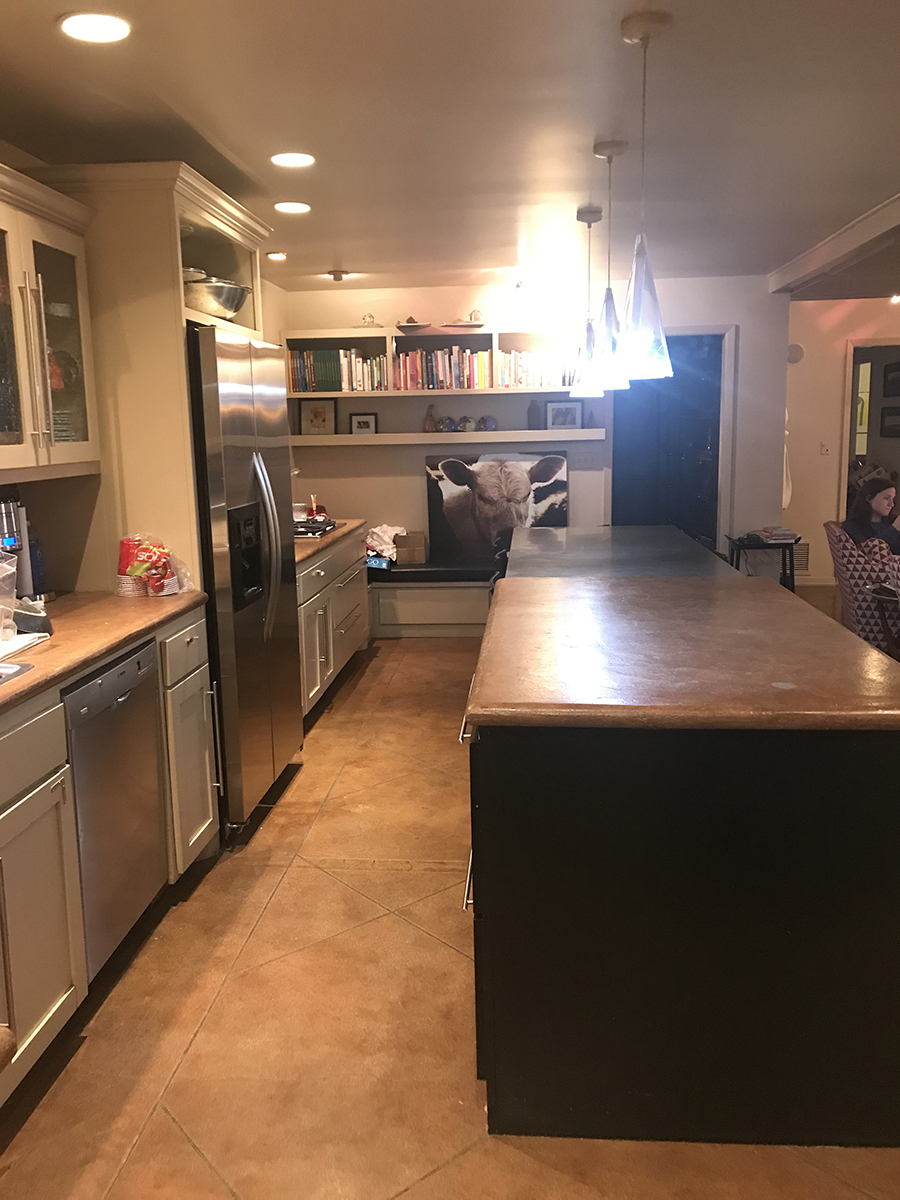
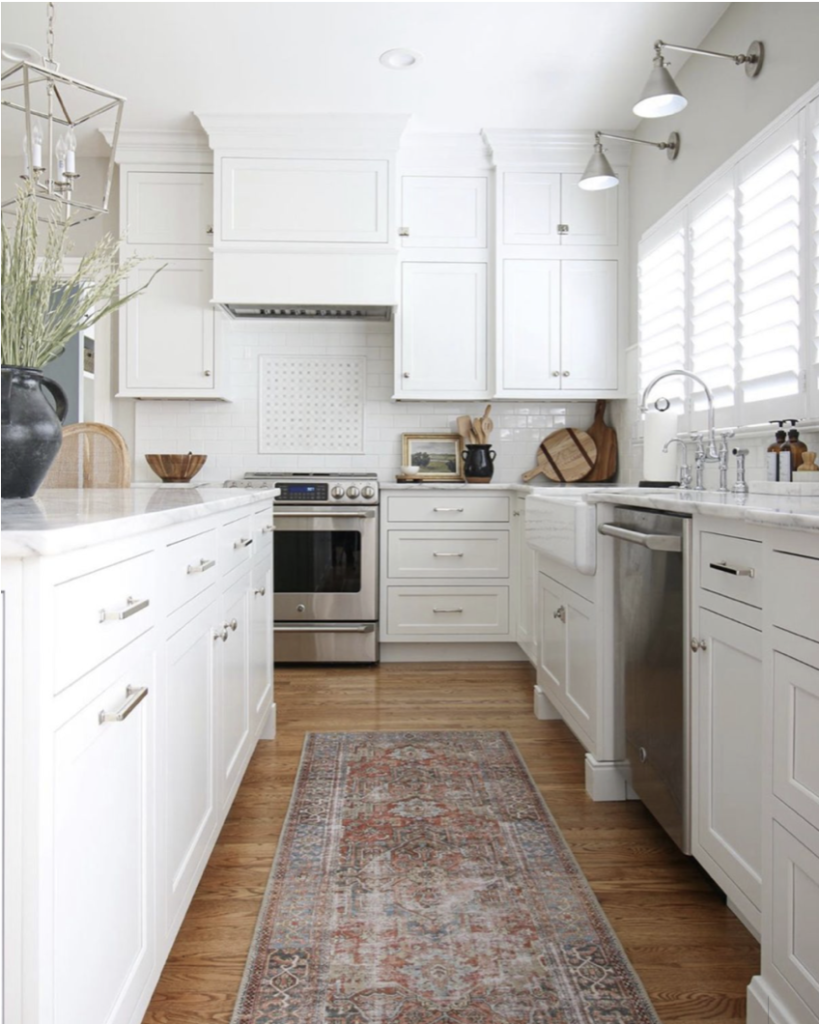
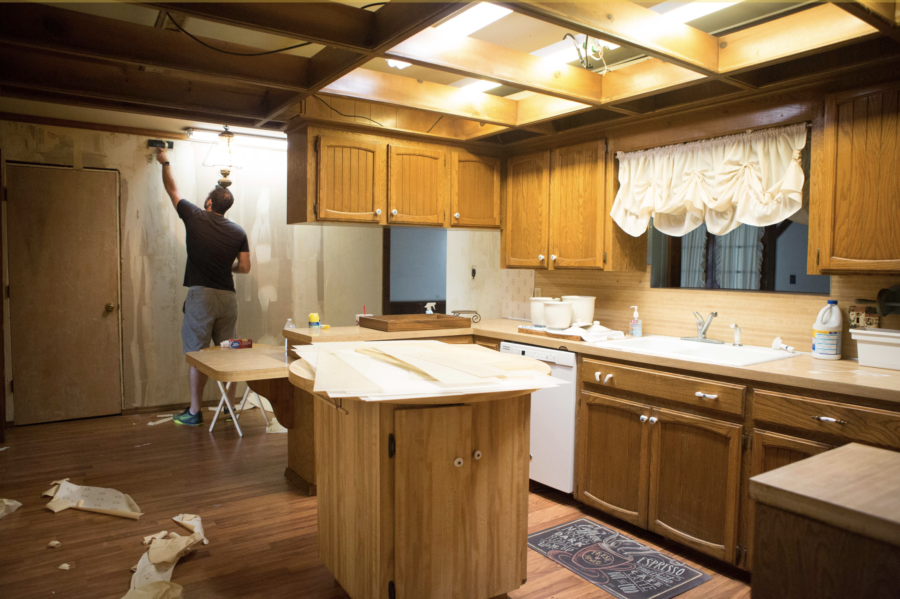
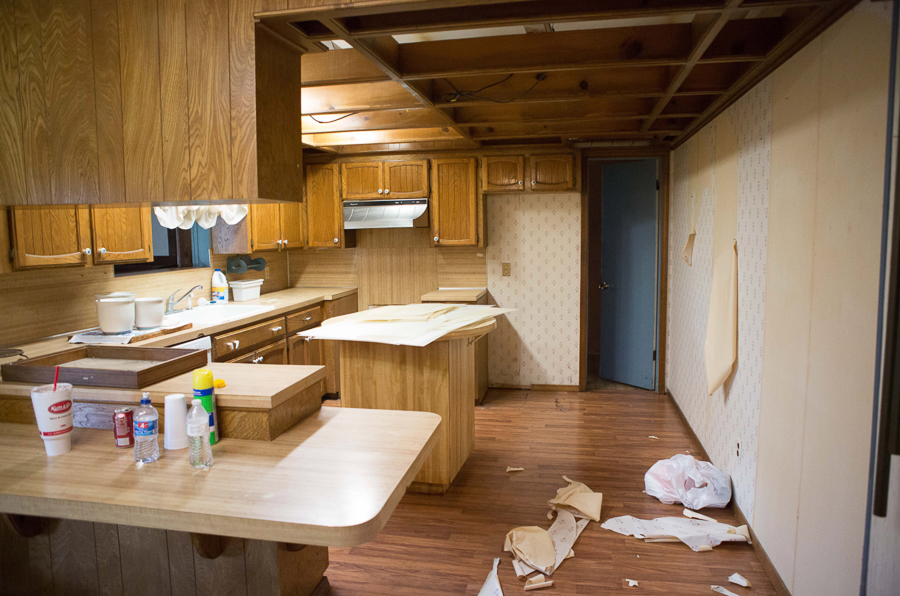
BEFORE PICTURE OF CYNDI’S KITCHEN
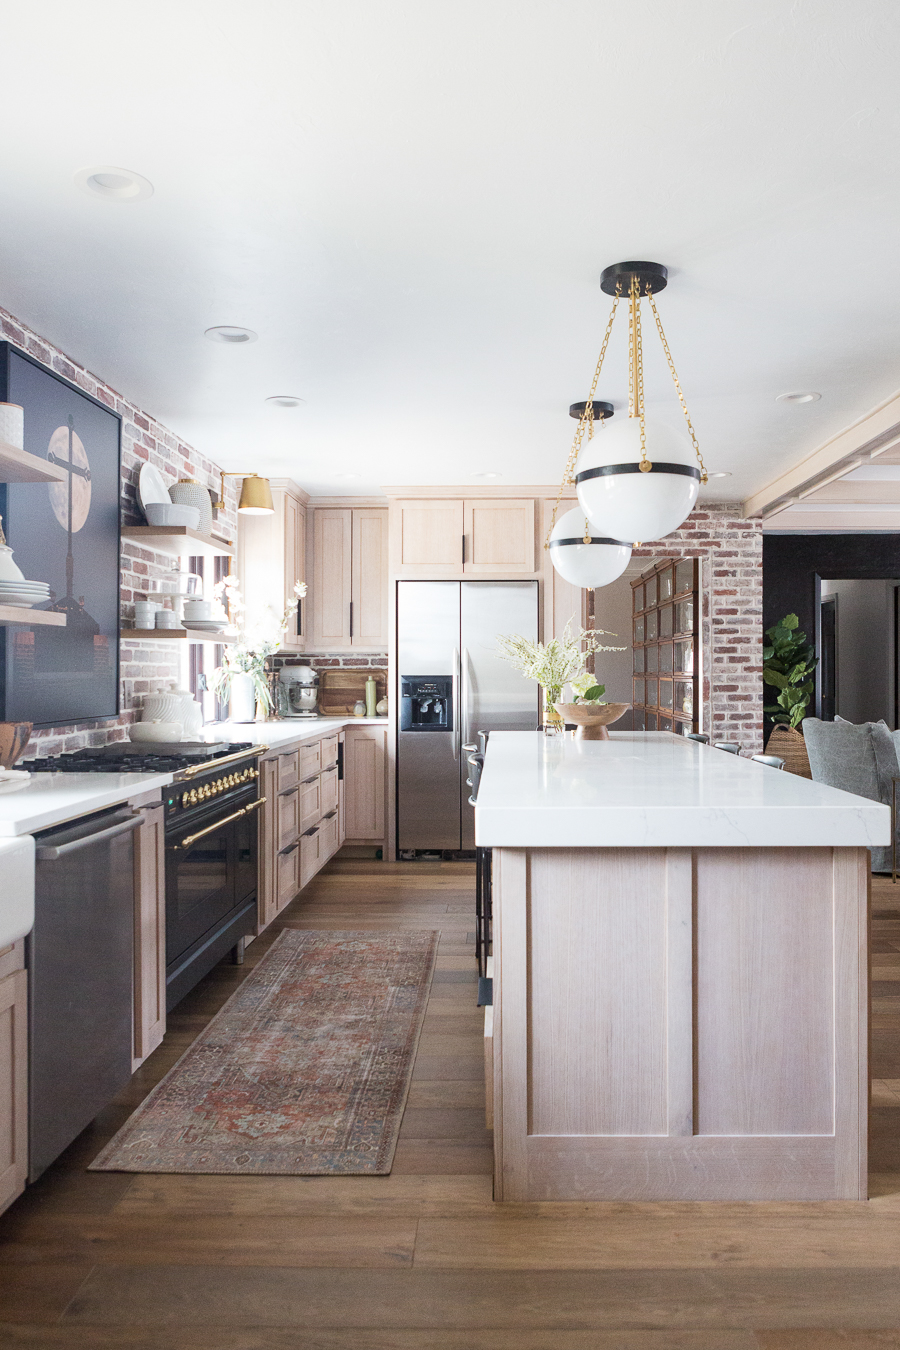
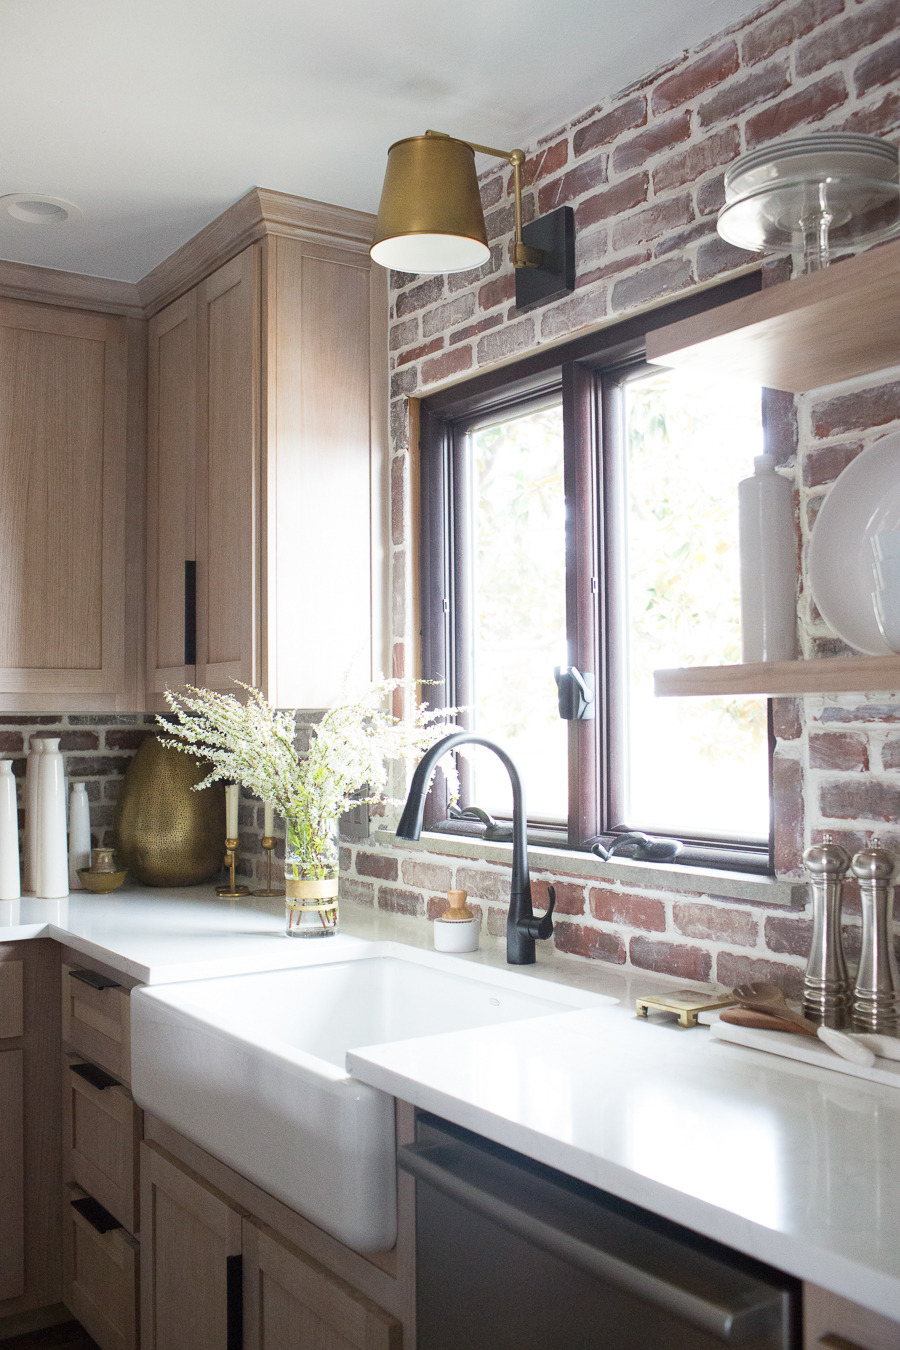
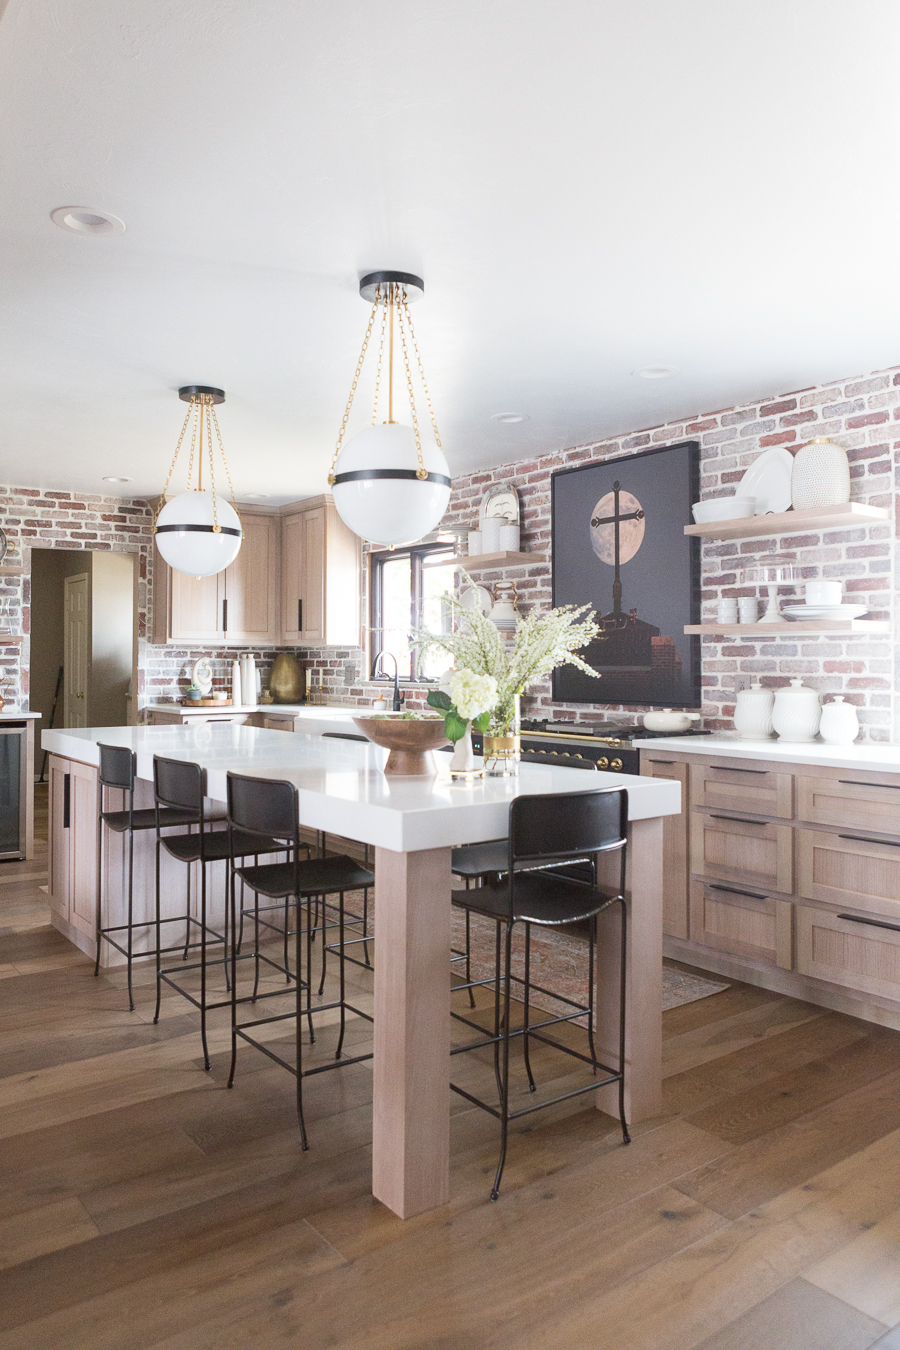
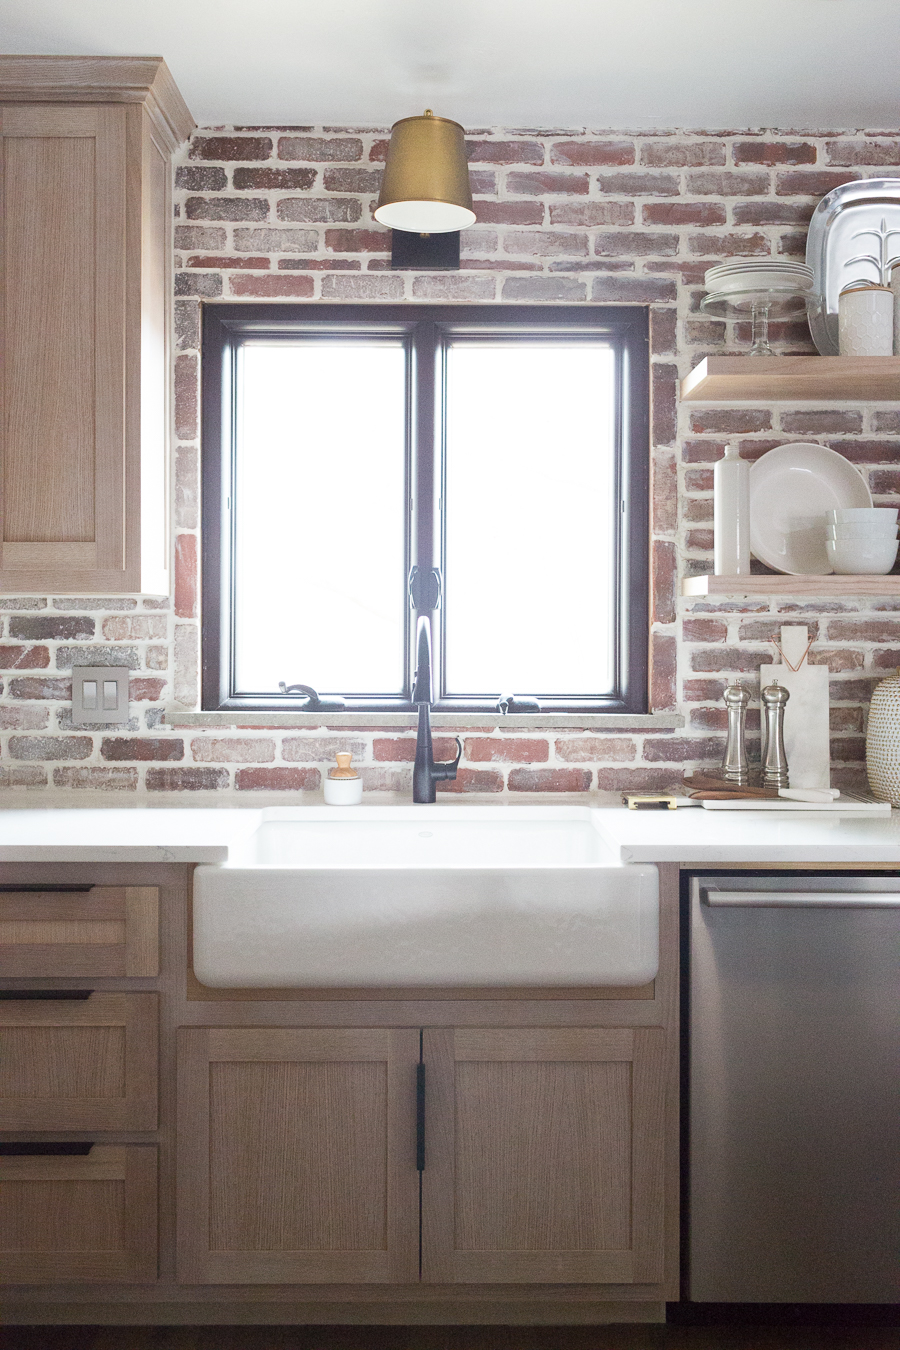
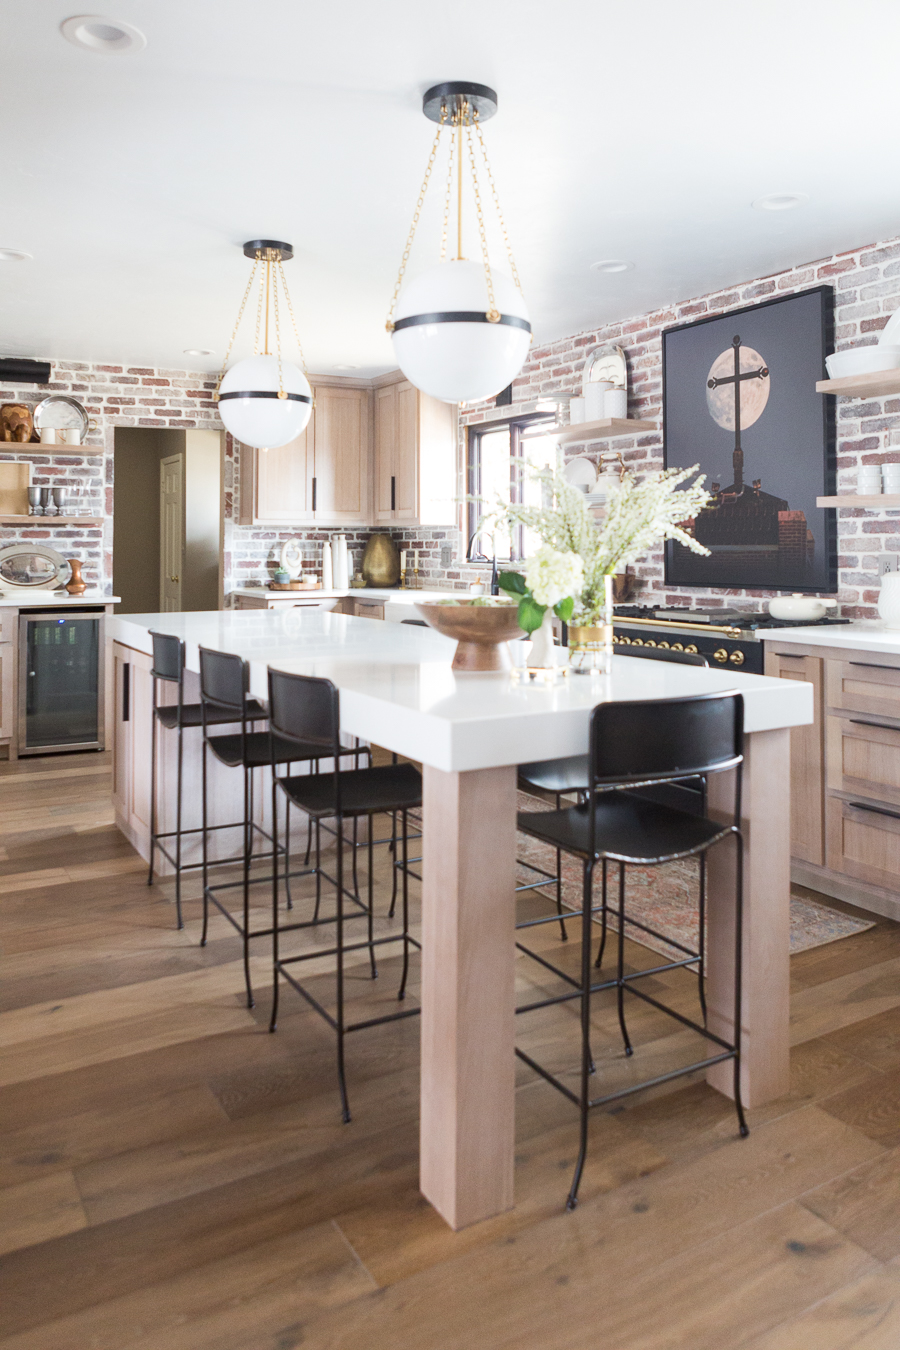
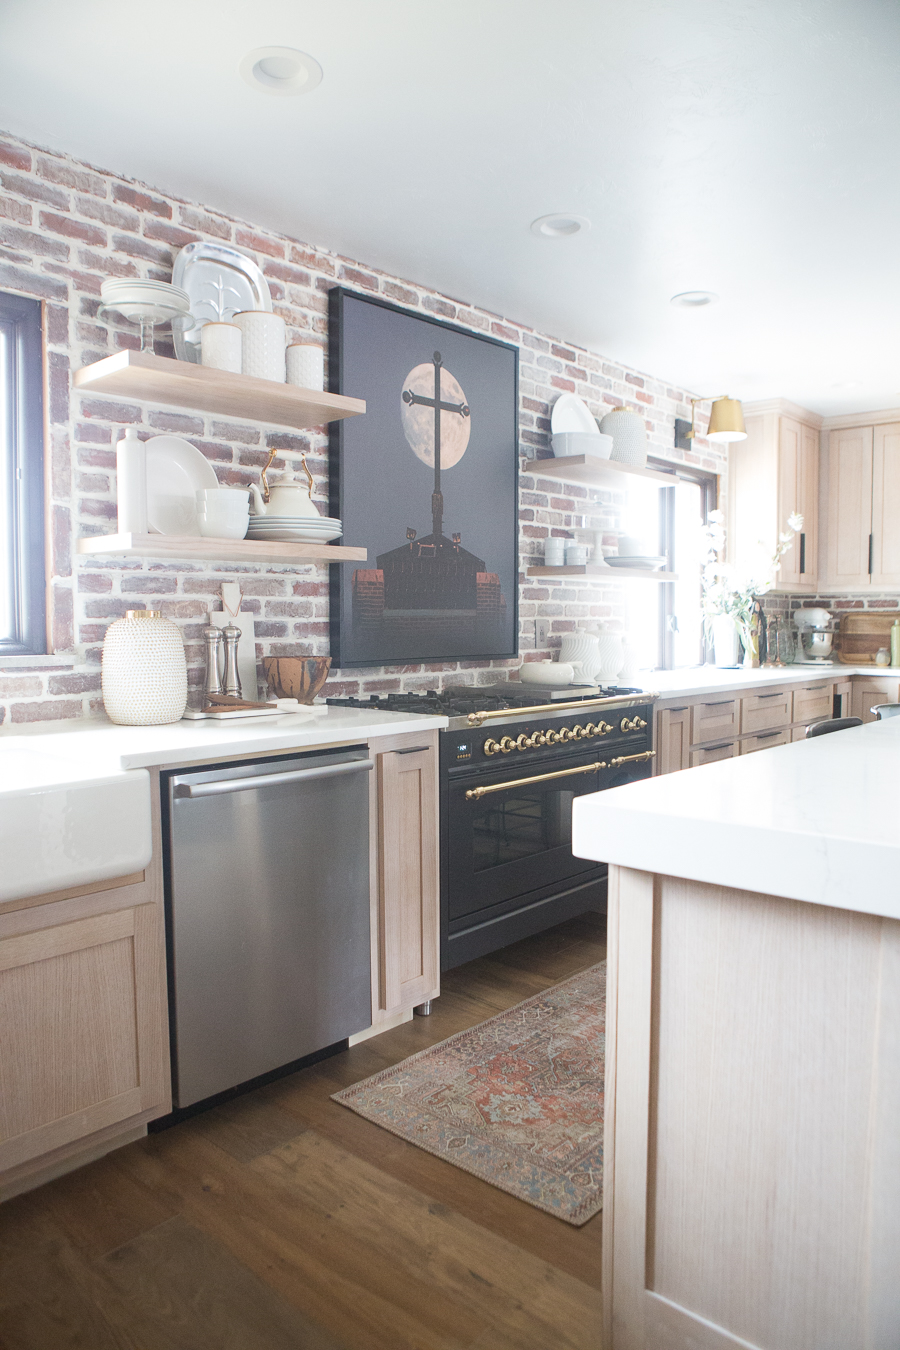
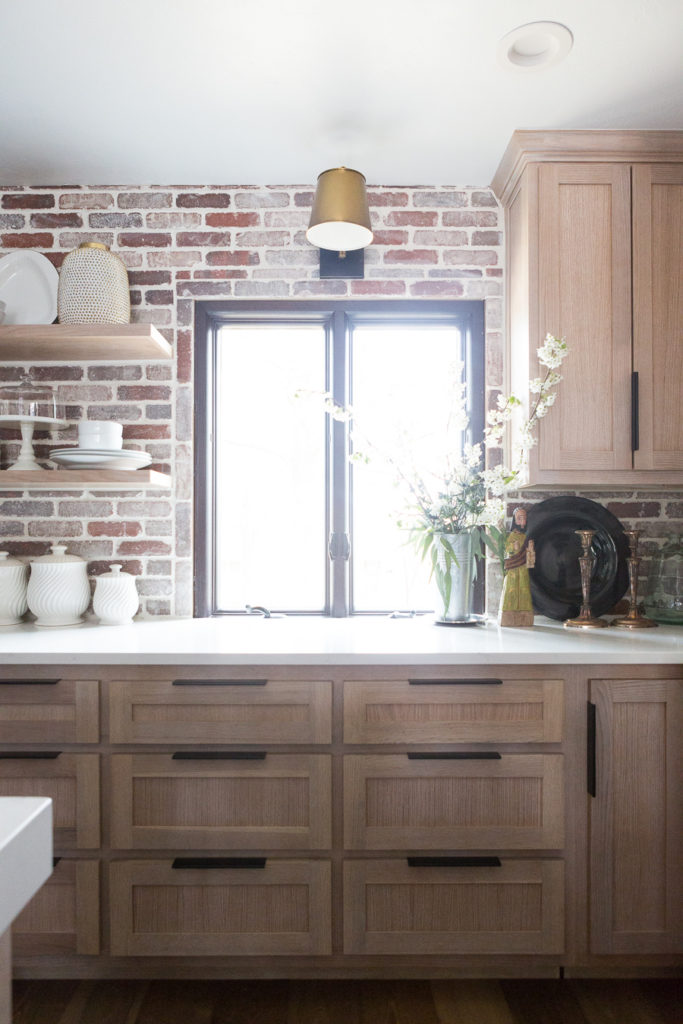
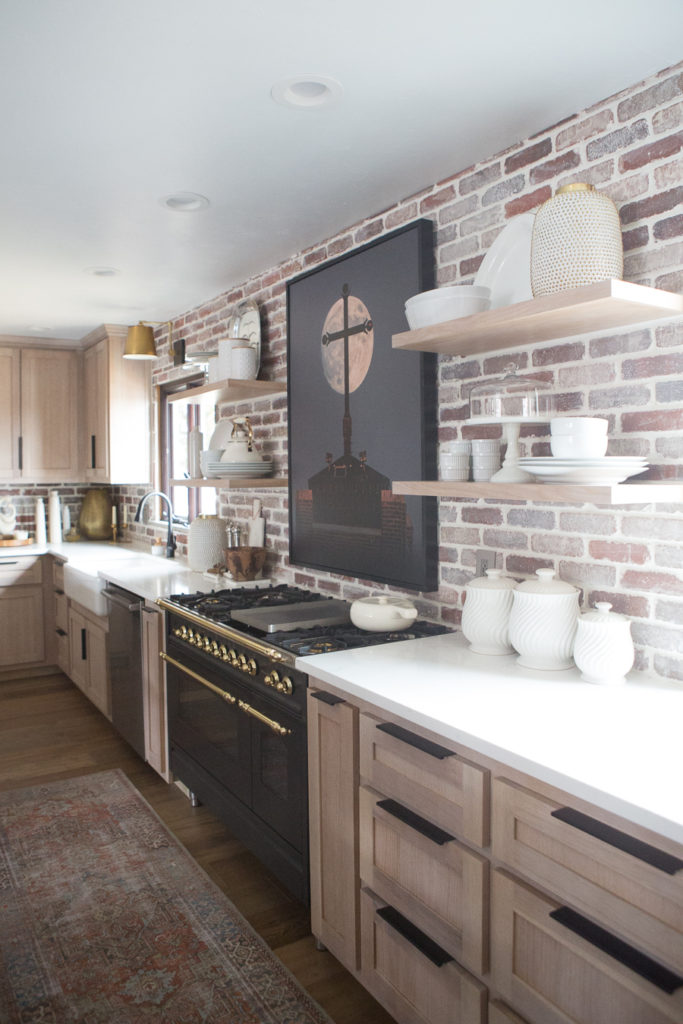
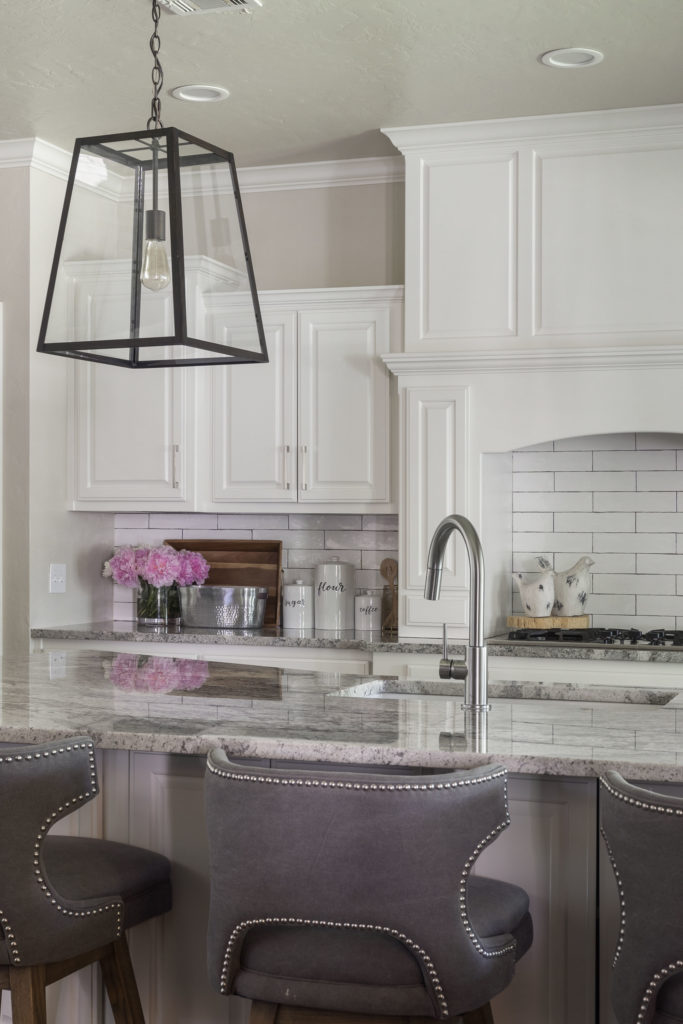
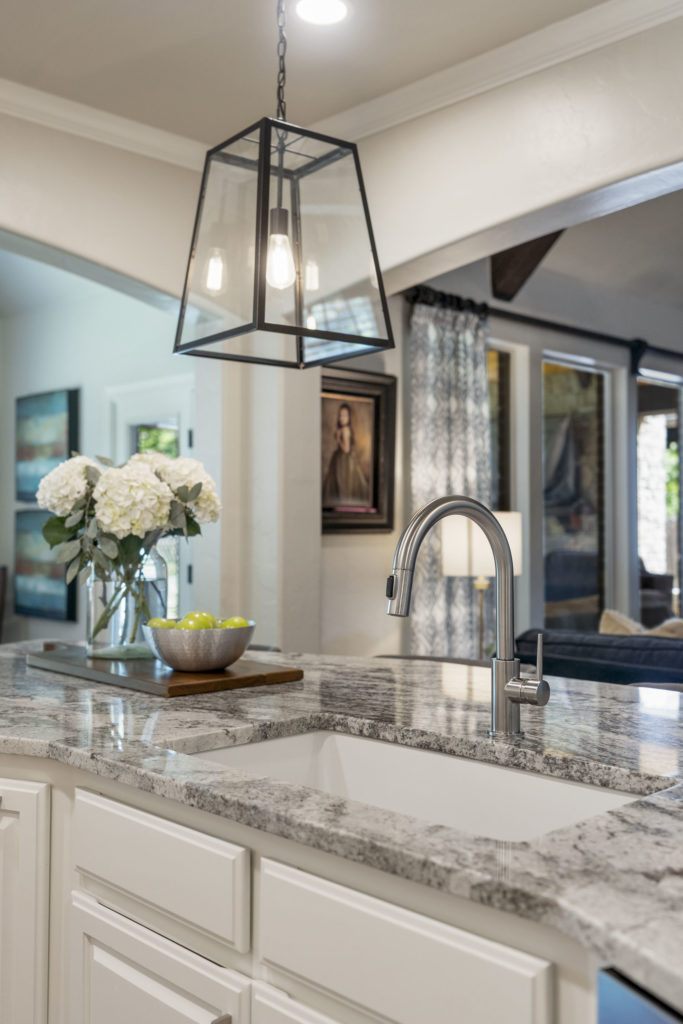
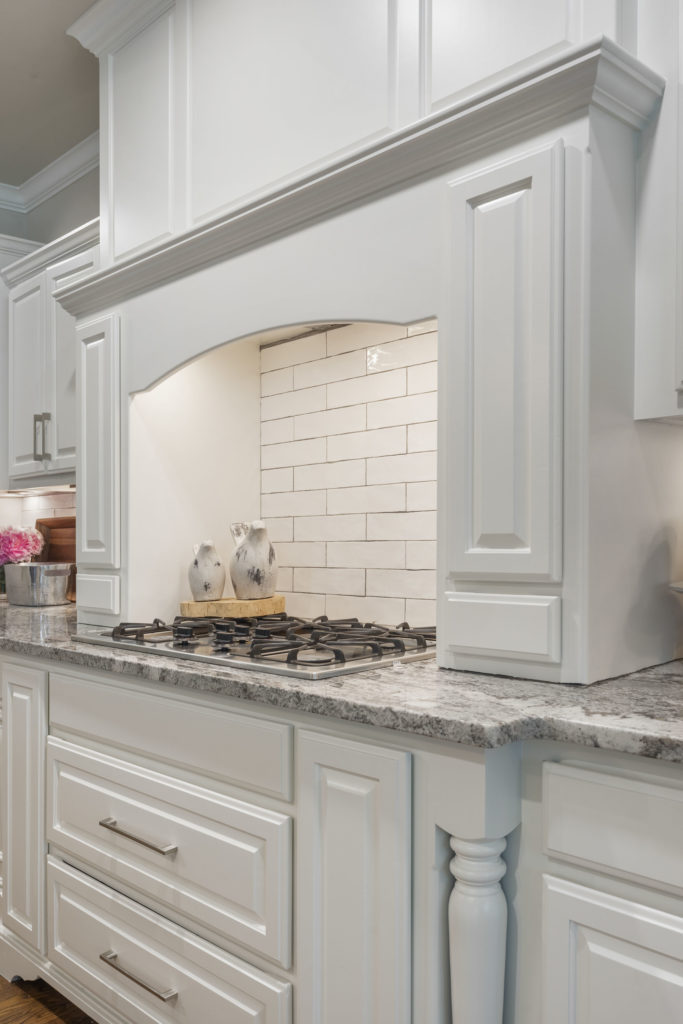
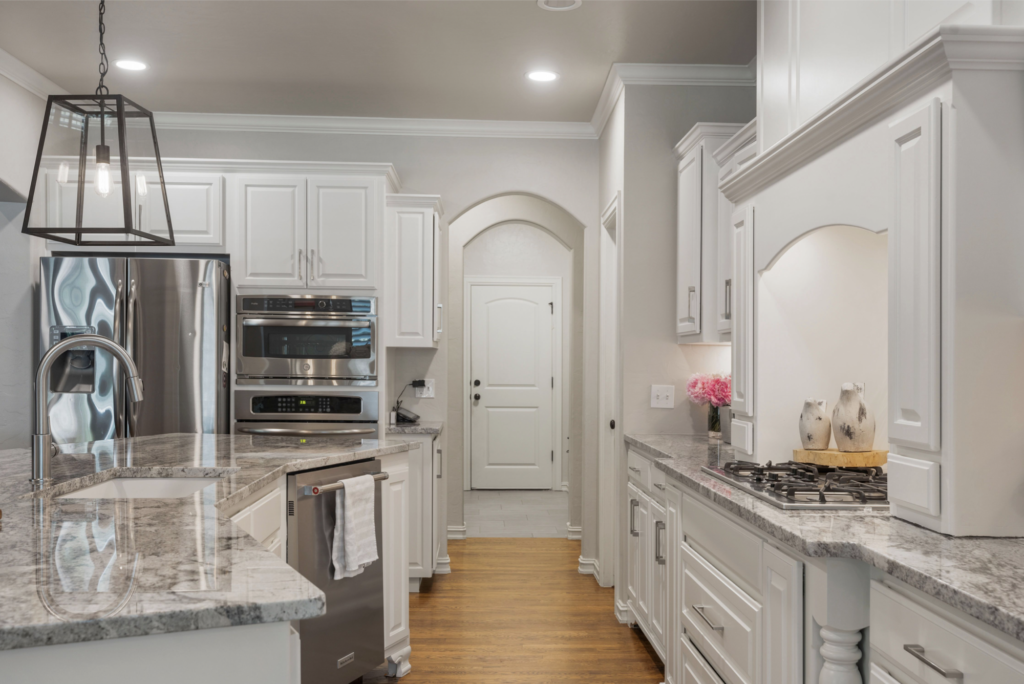
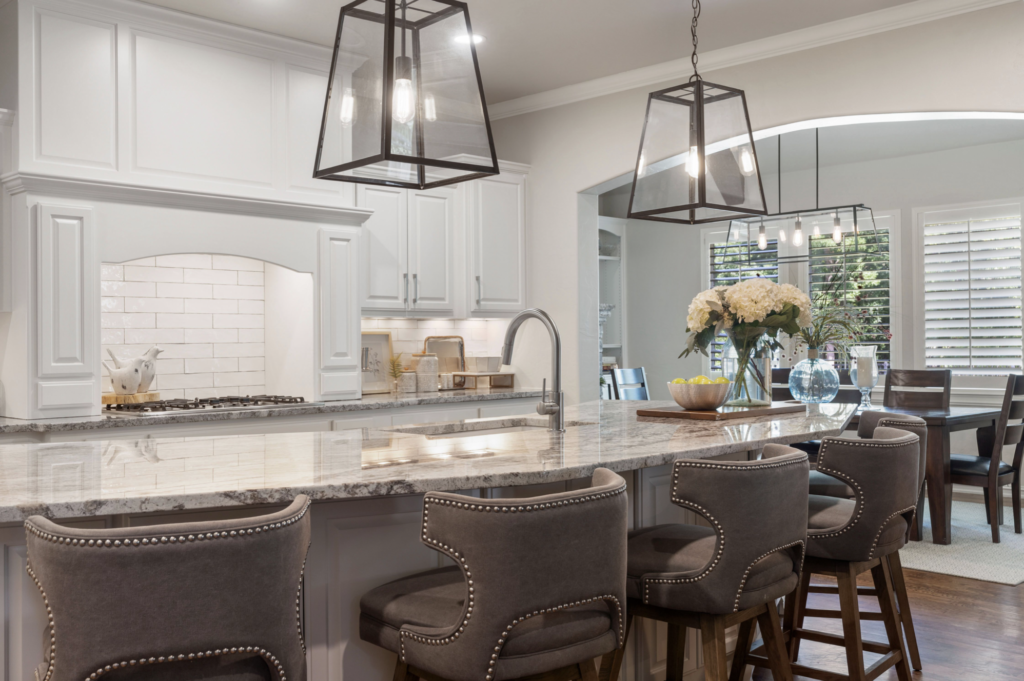
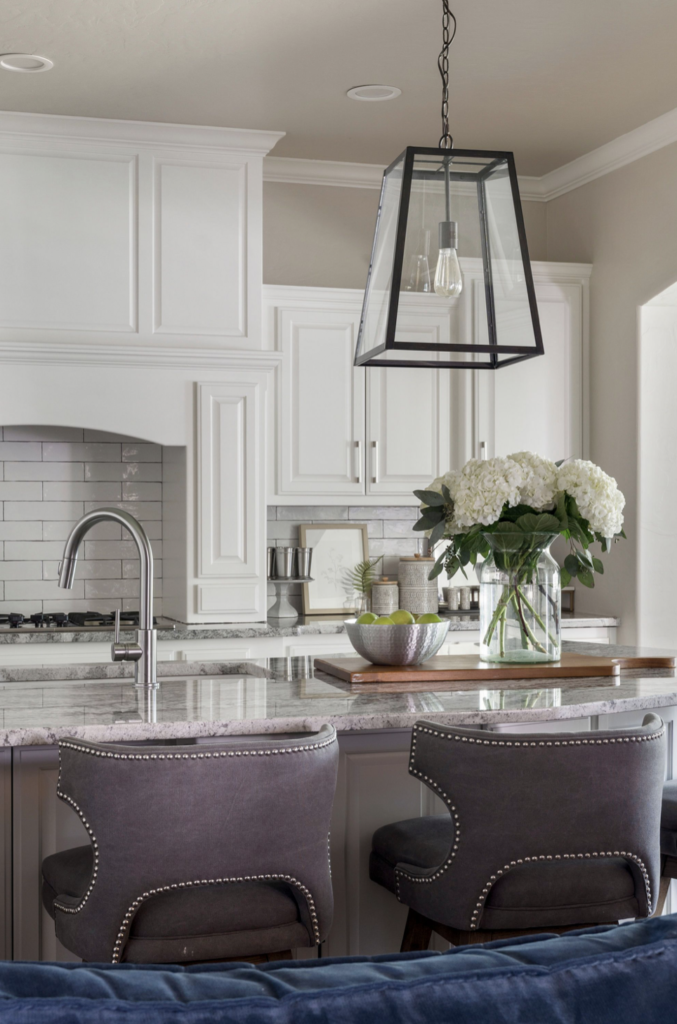
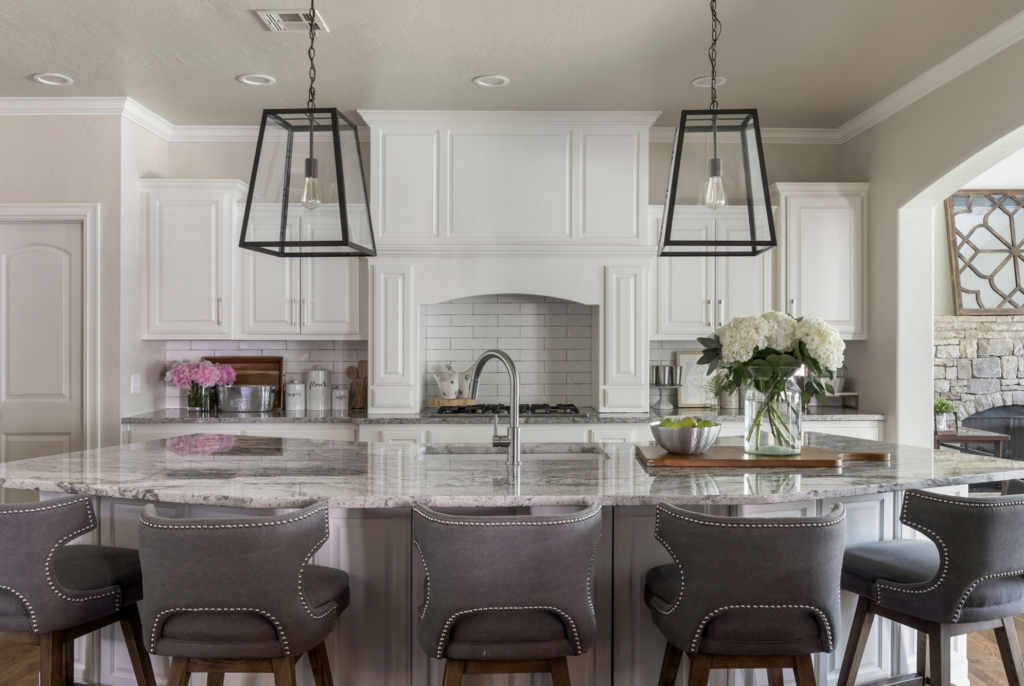
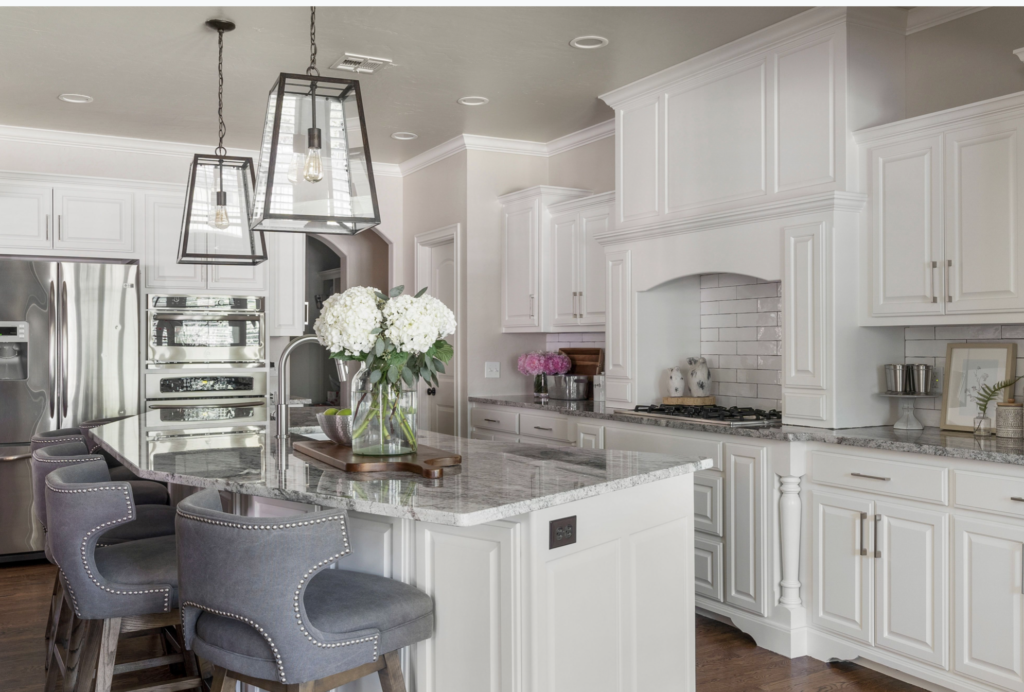
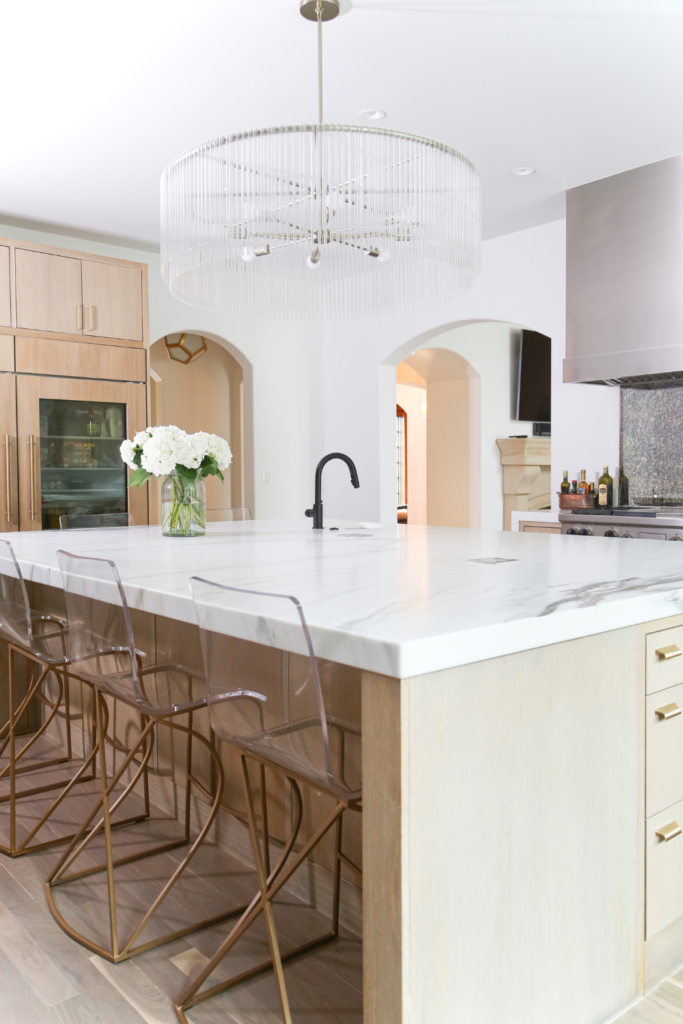
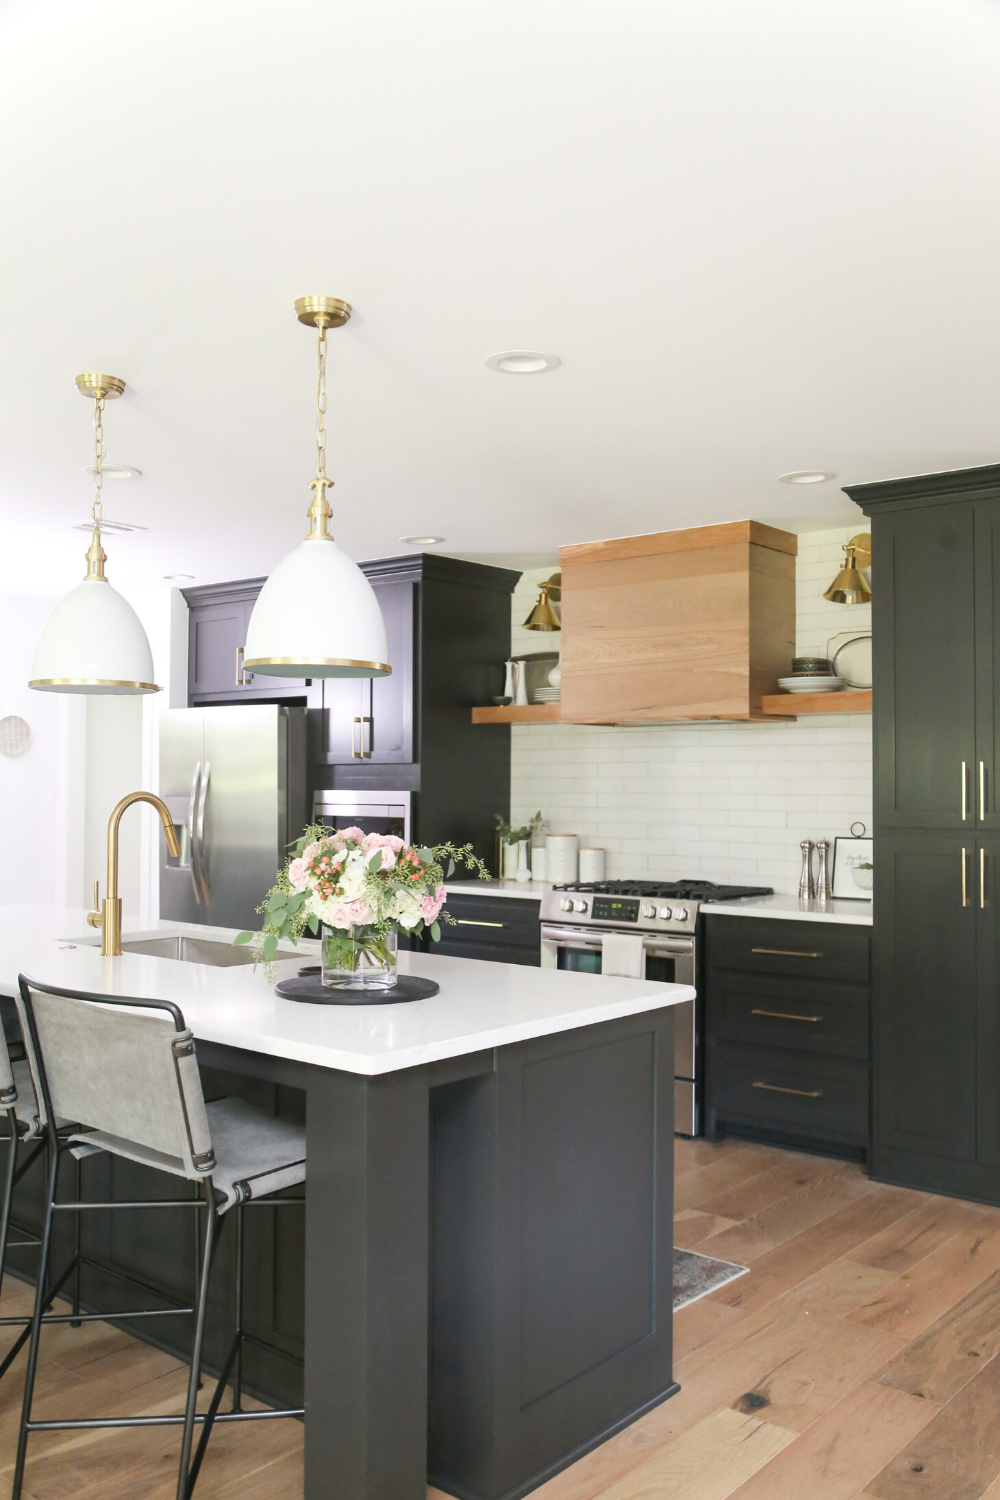
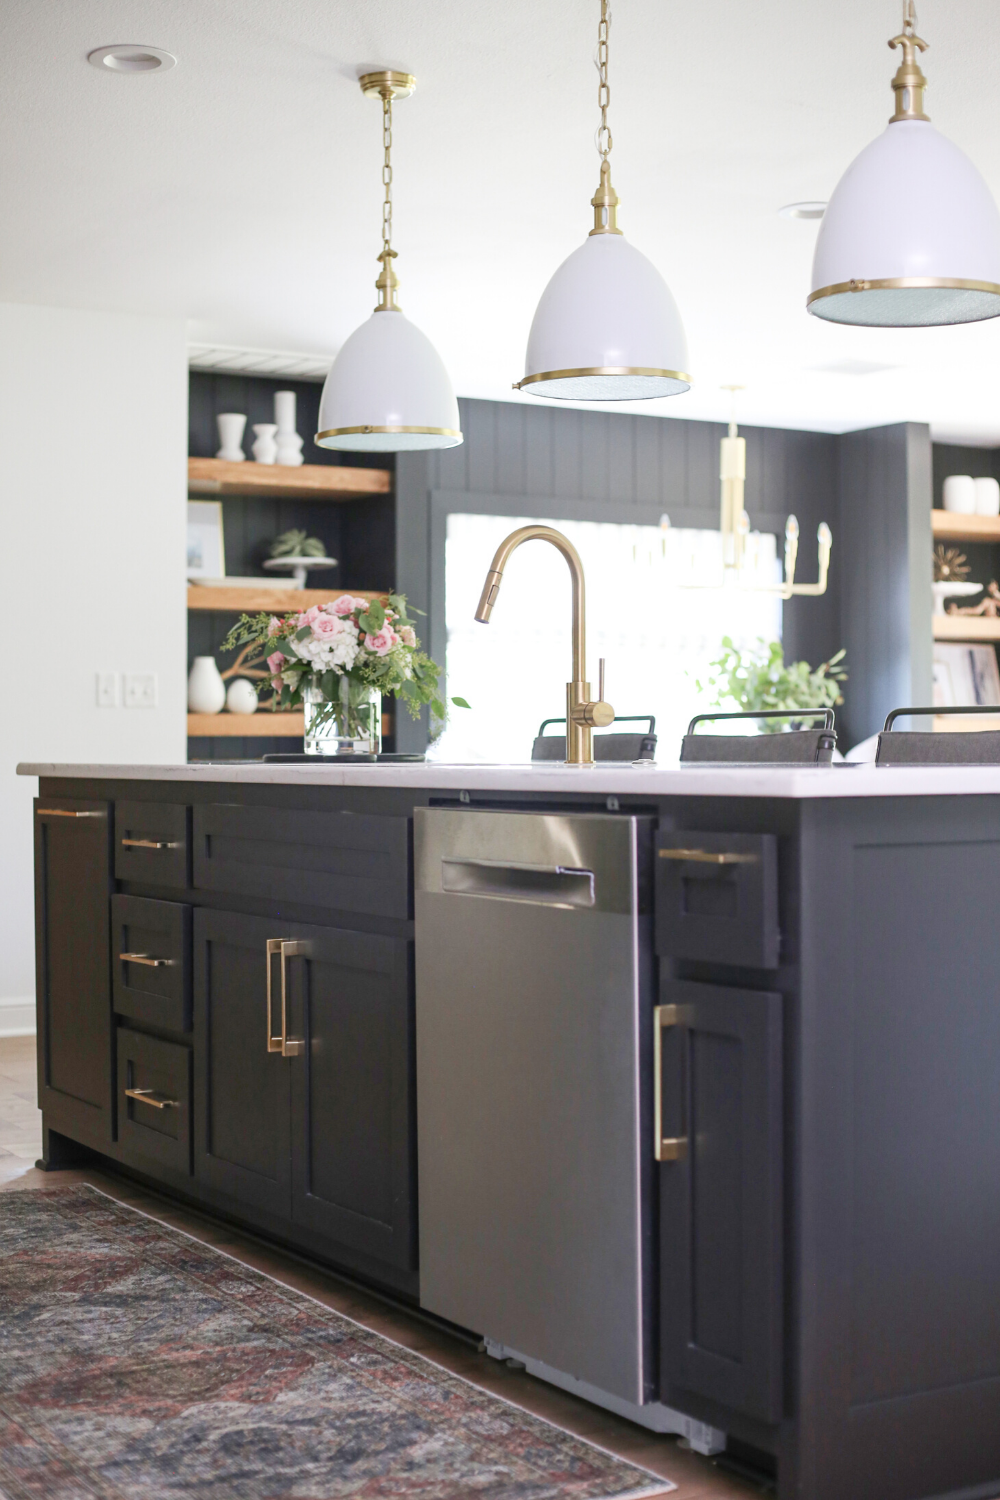
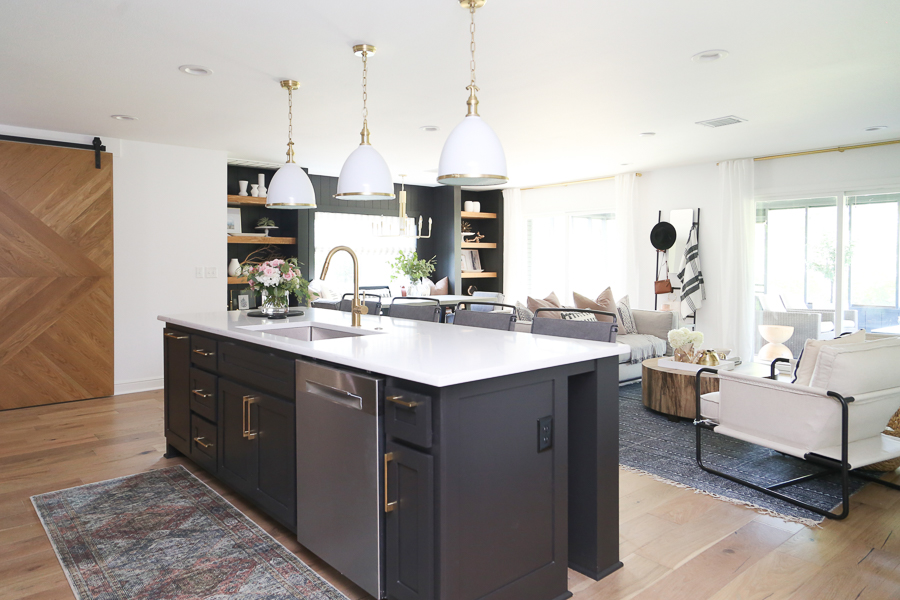
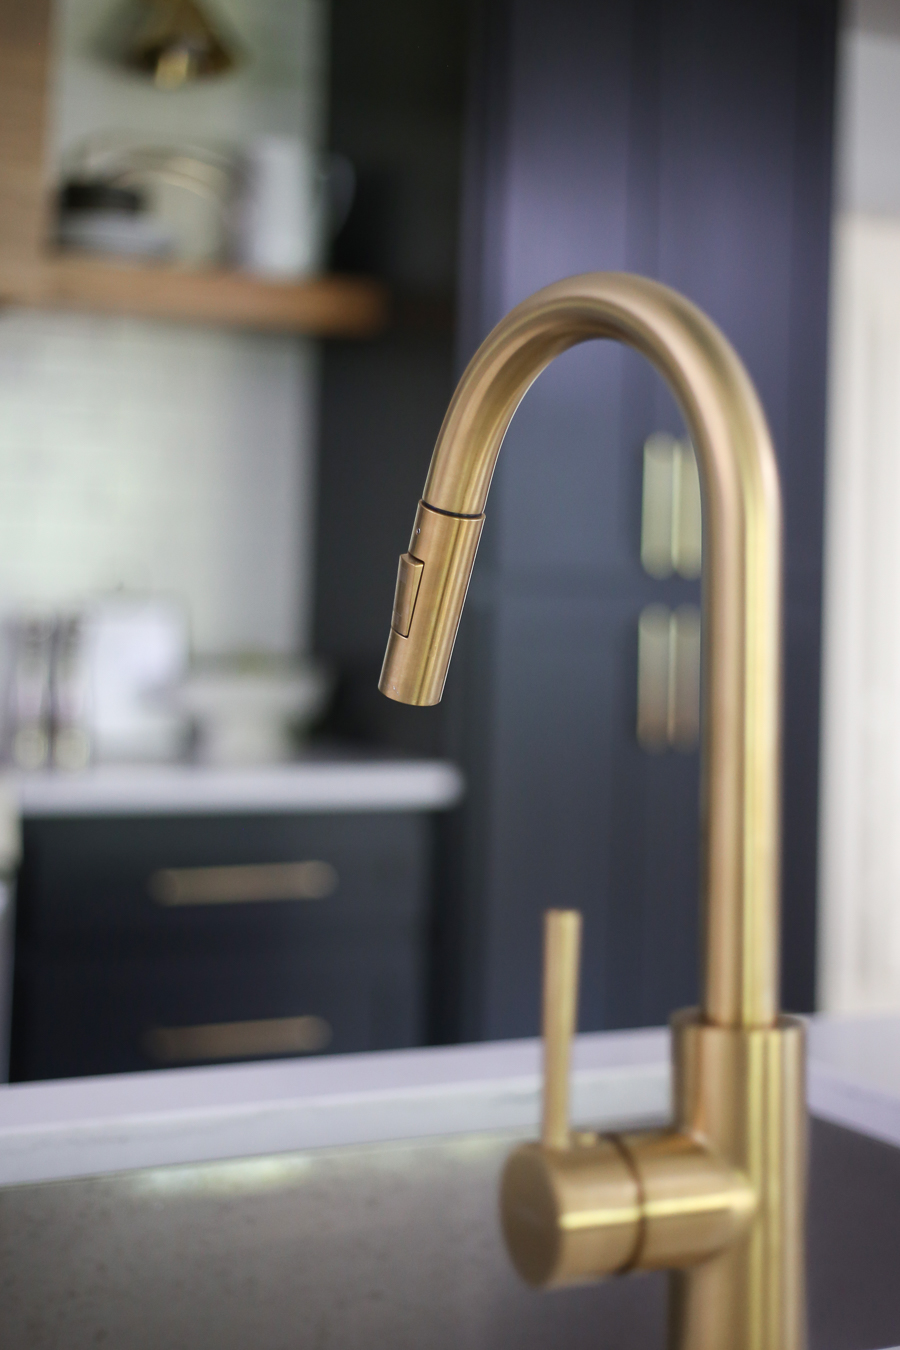
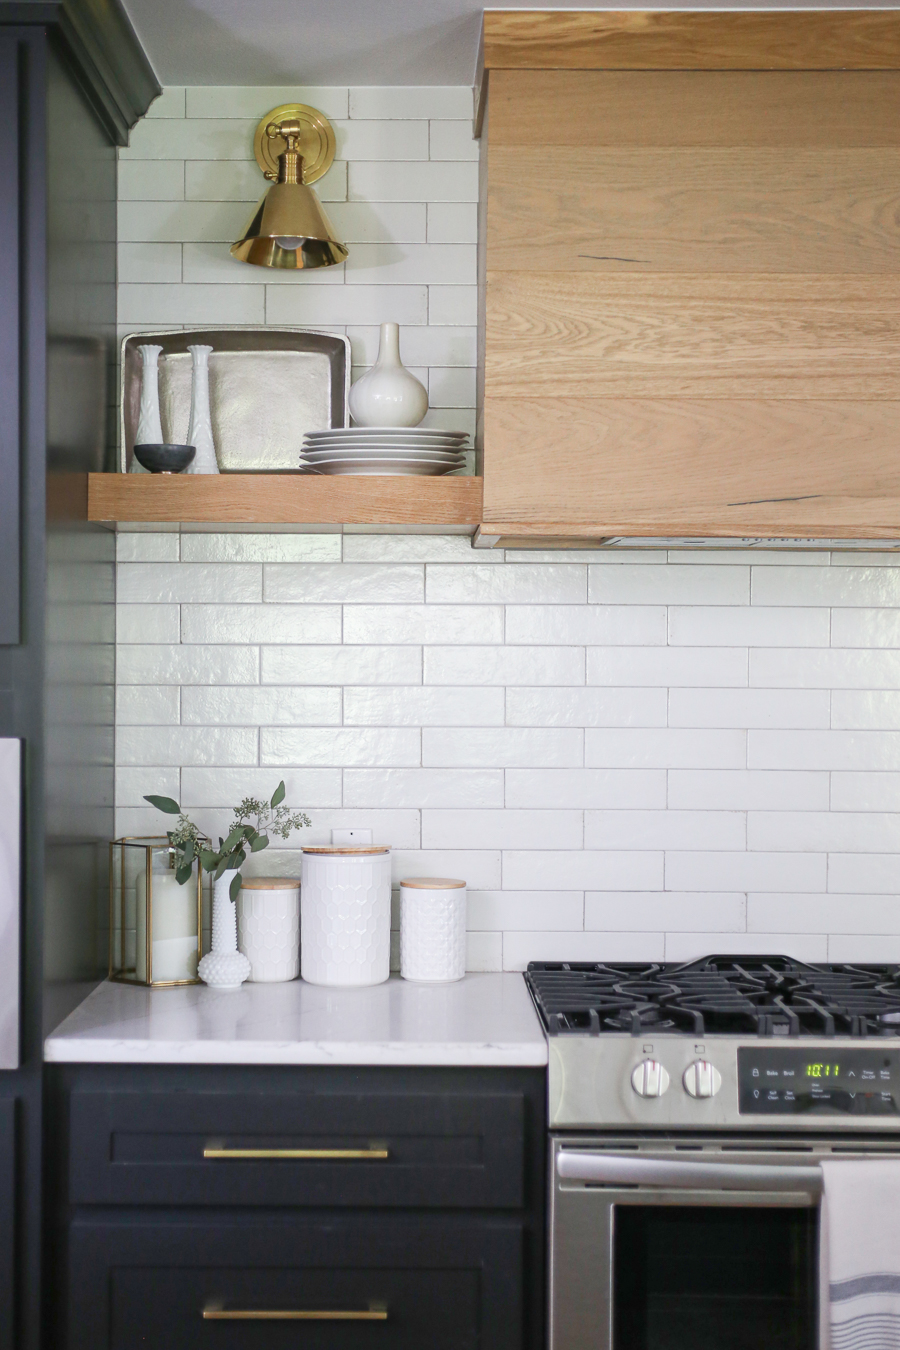
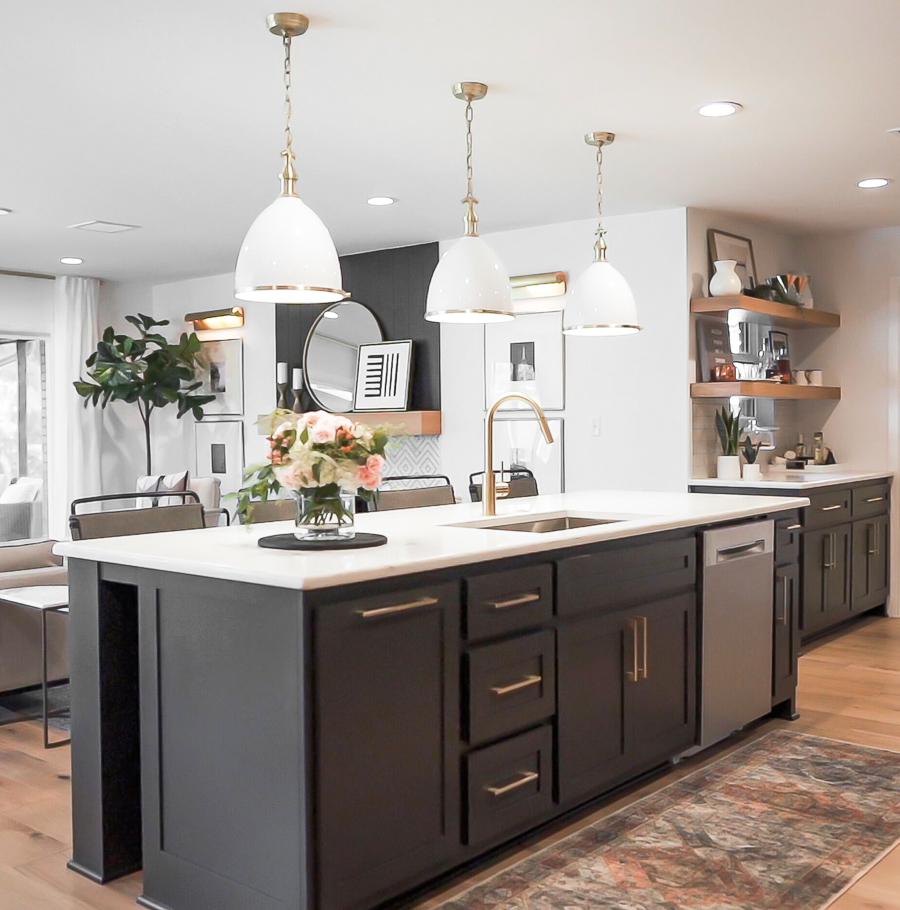
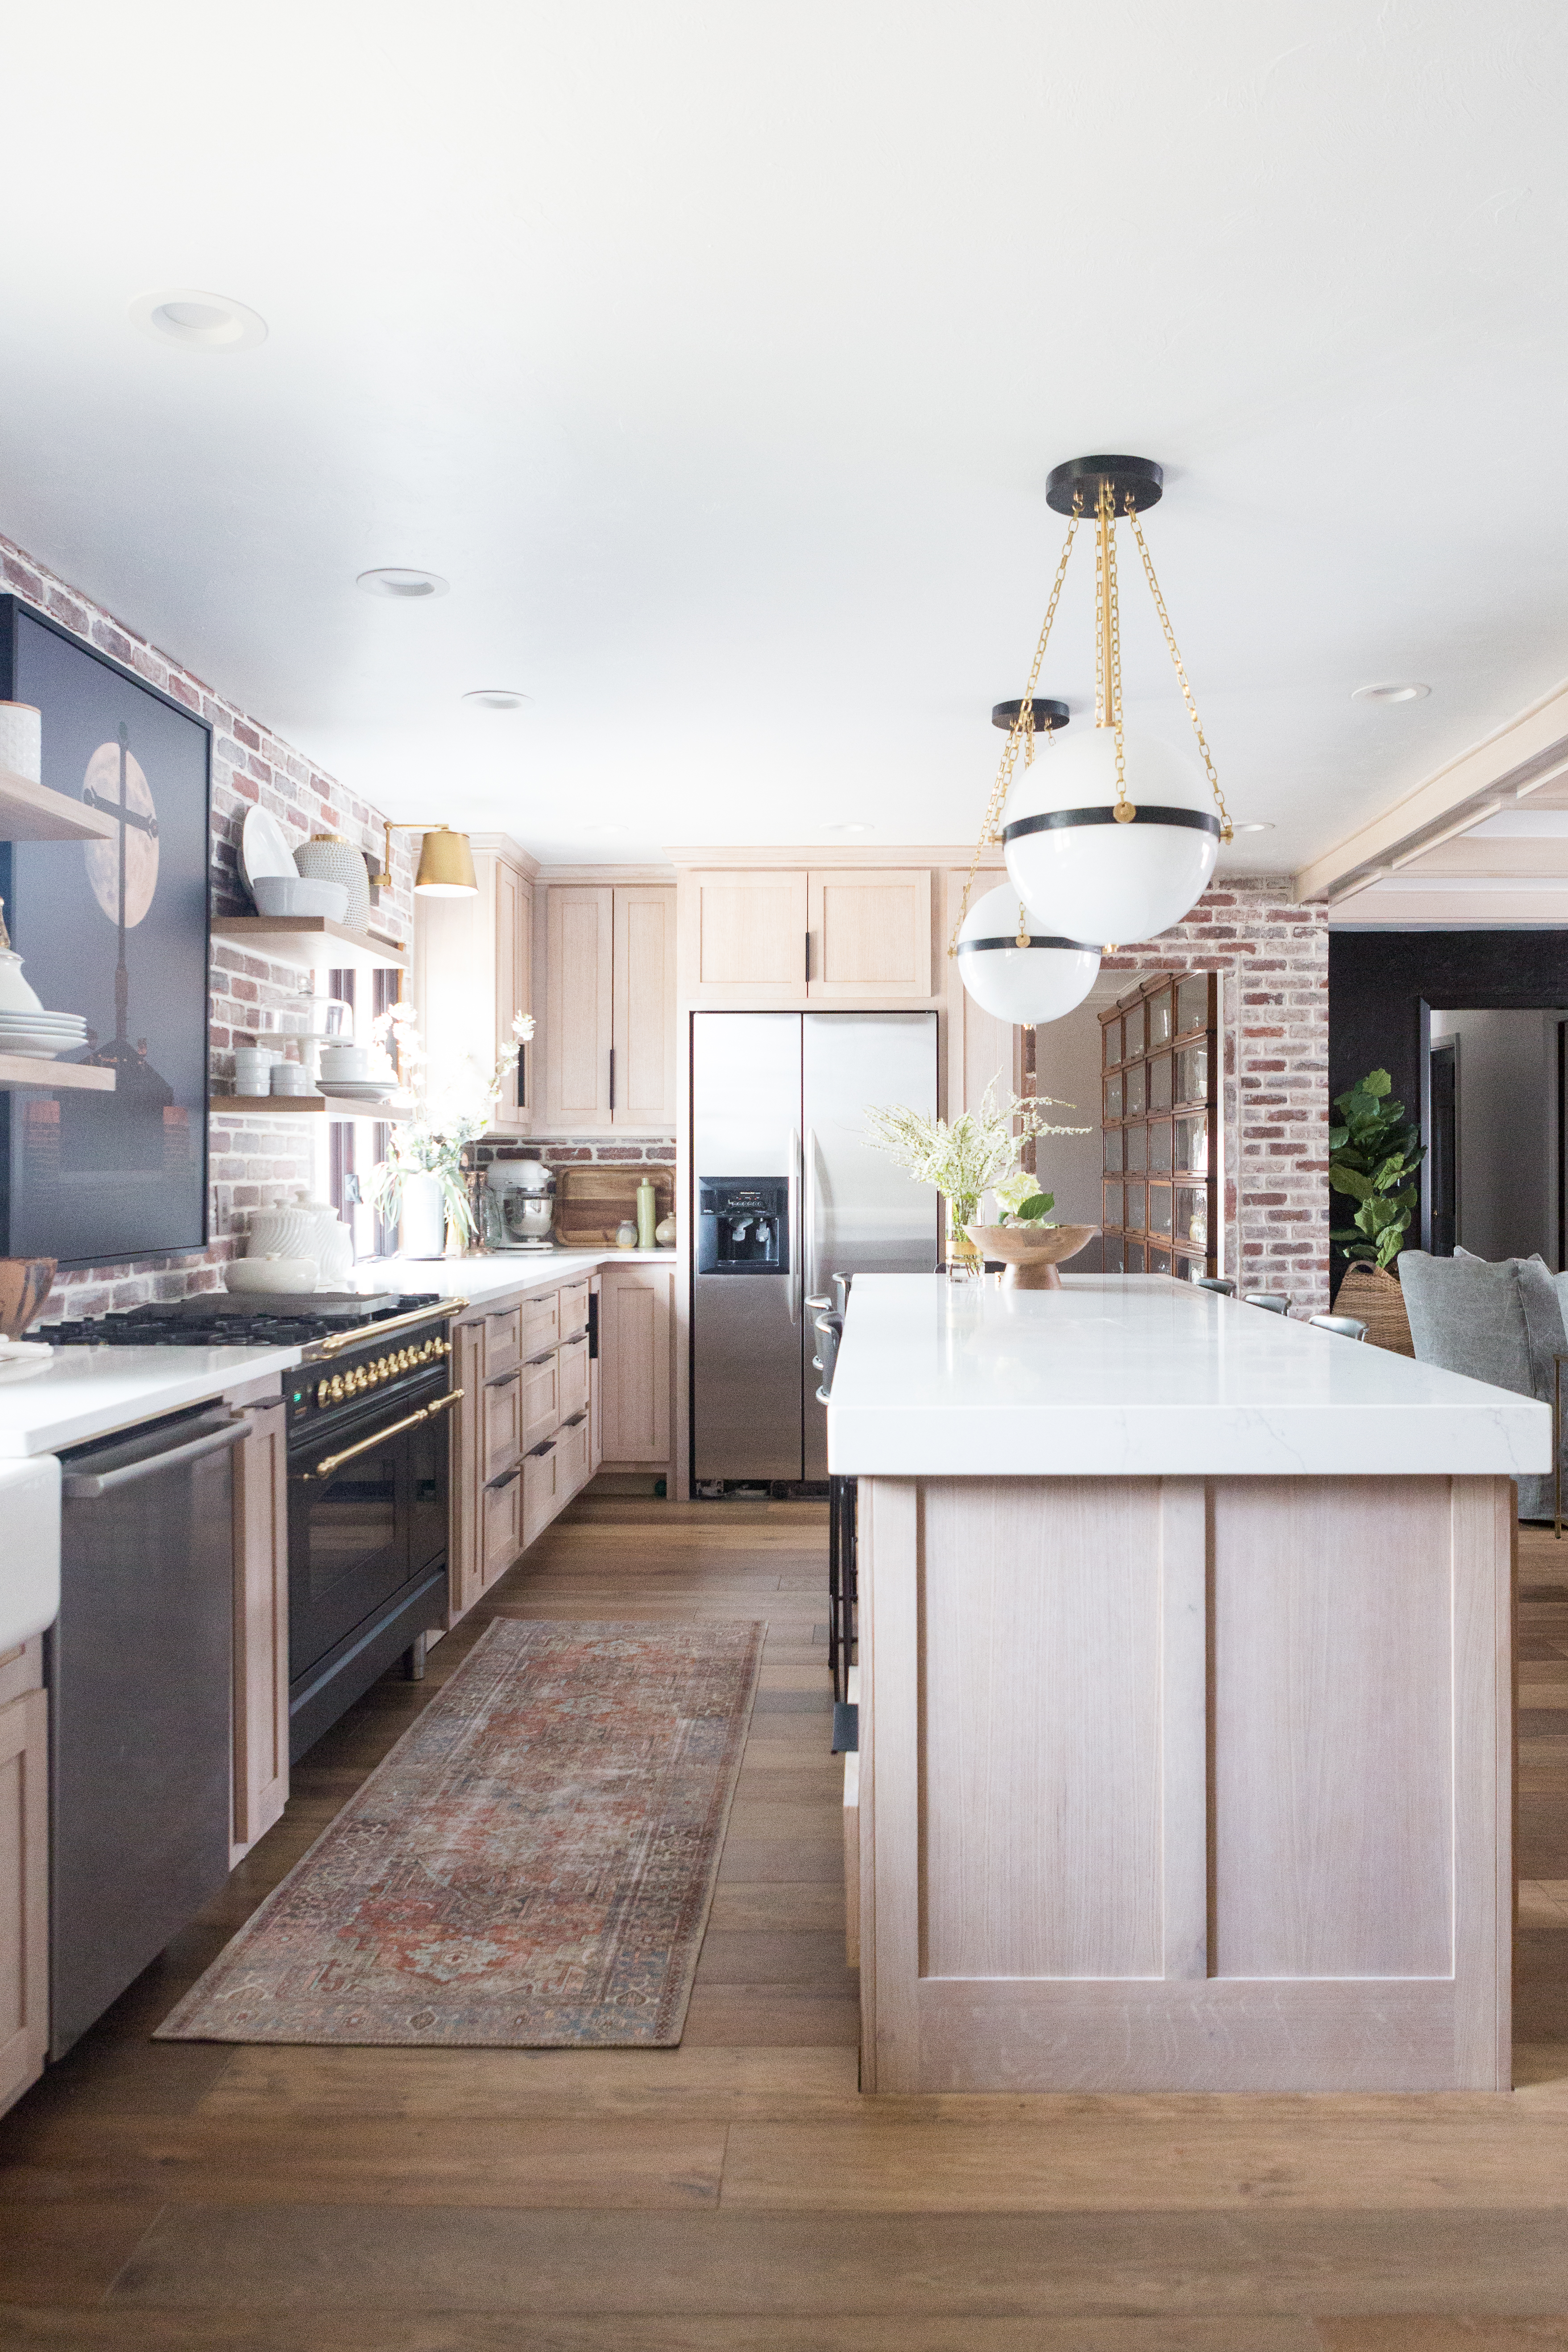
AND DRUMROLL PLEASE….HERE IS THE AFTER!
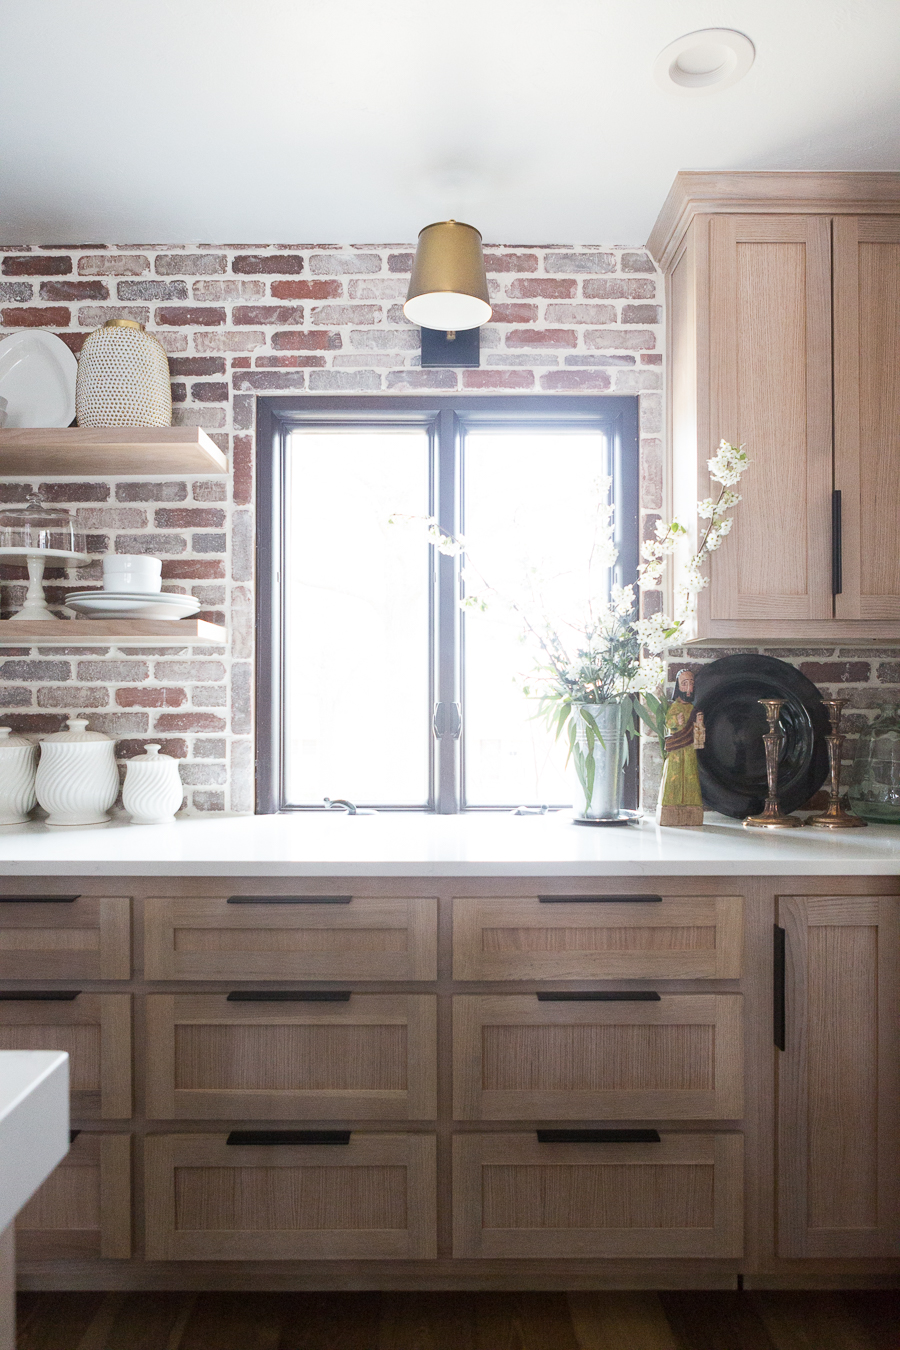
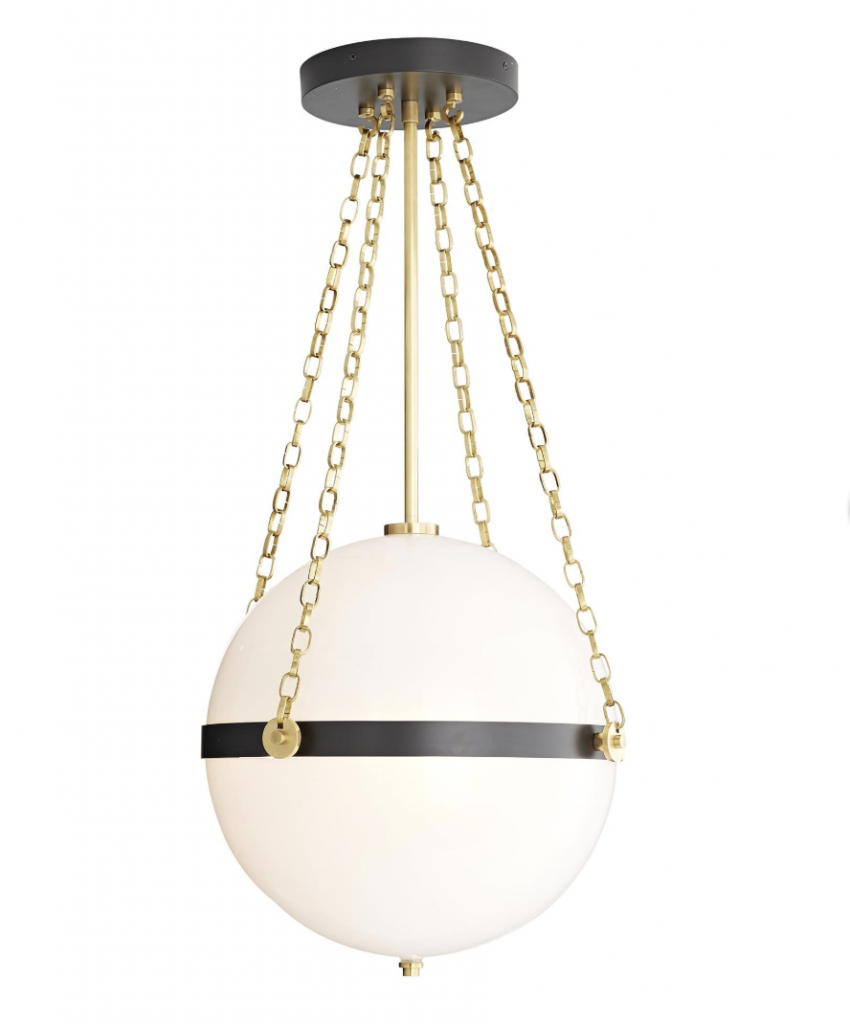
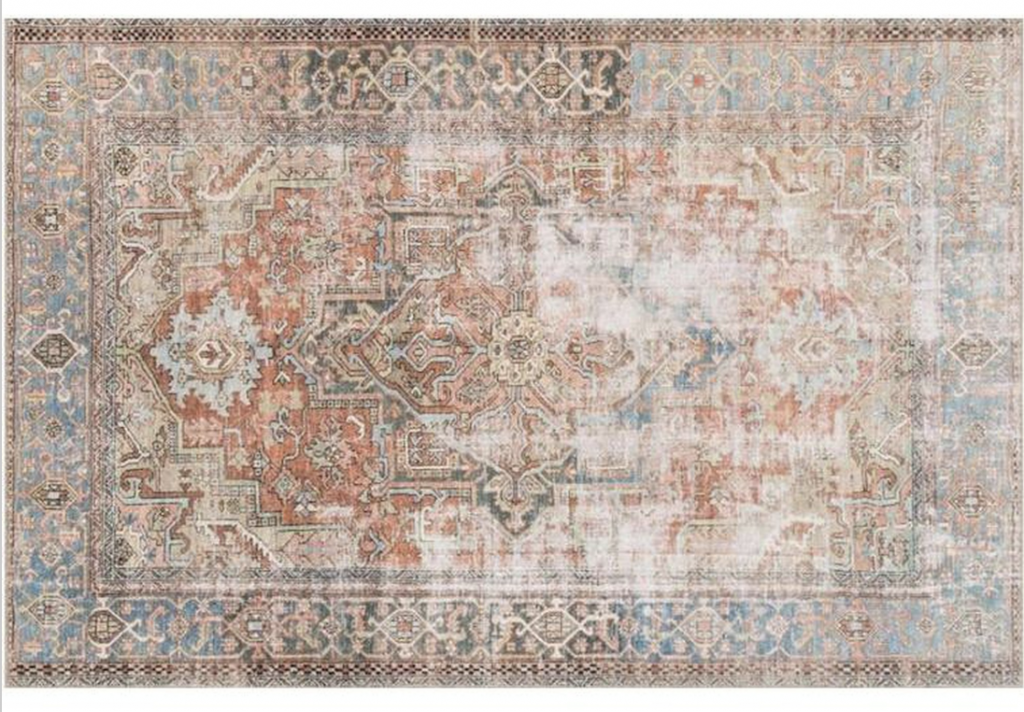
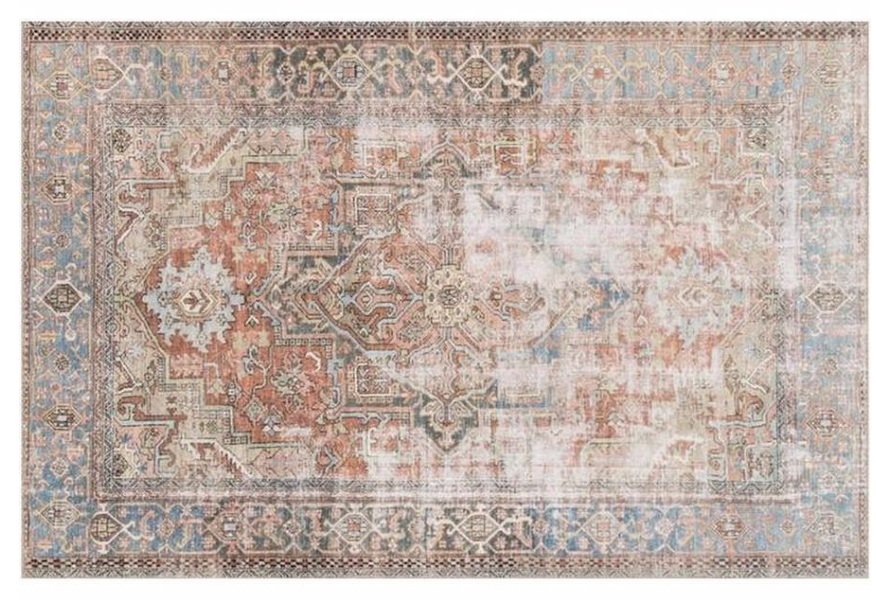
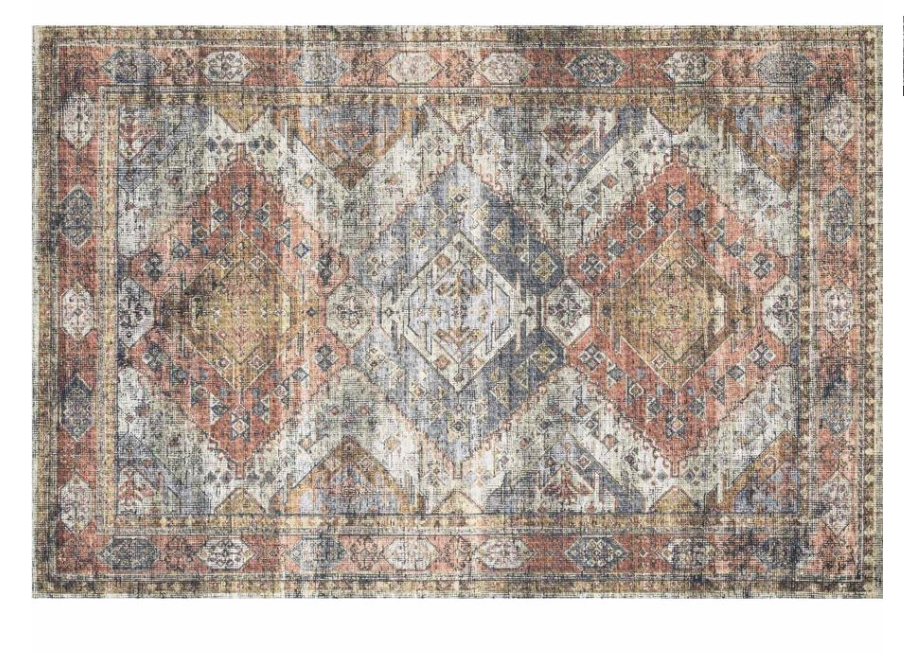
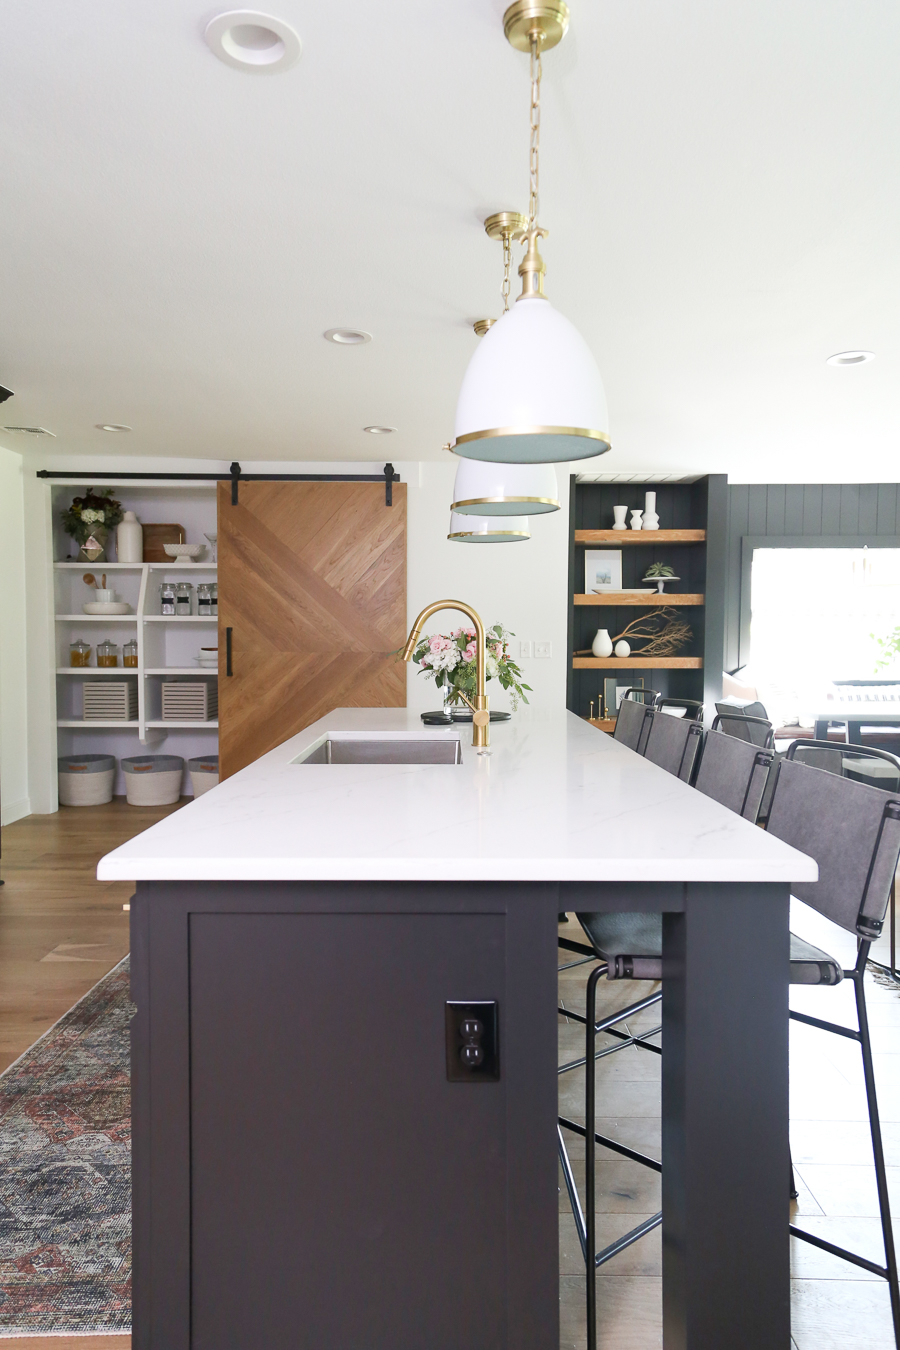
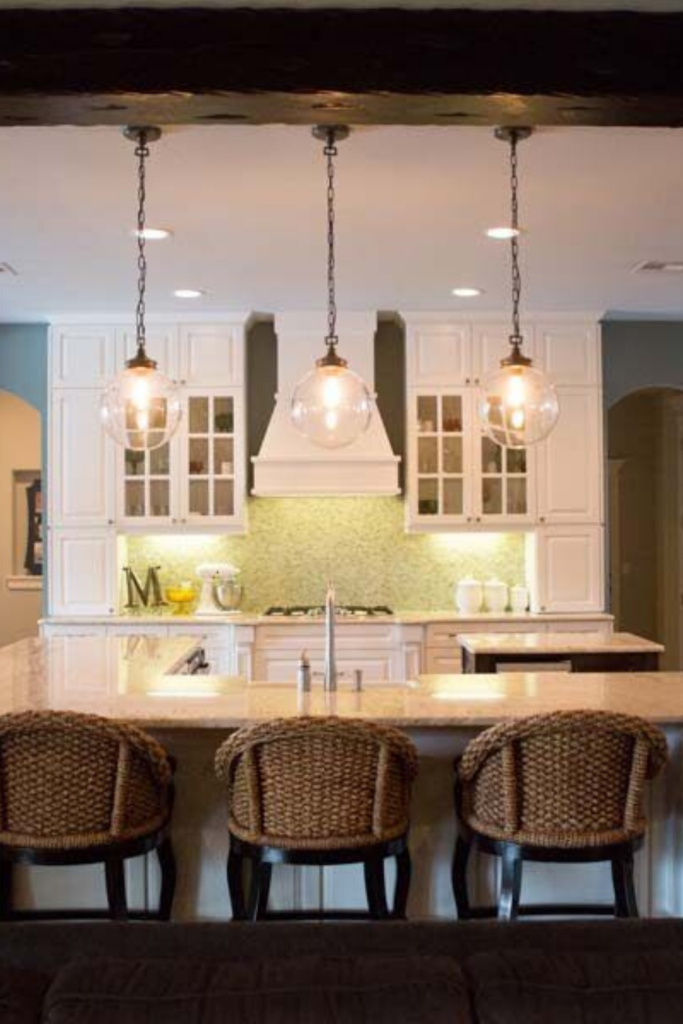
As you can see, we rearranged the kitchen by moving the refrigerator to the far wall instead of having it smack dab in the center wall between the windows. We reworked the size of the island to be a better fit for people to walk around and replaced the countertops with beautiful quartz. We also got a statement-making black and gold Hallman range and put it as the center point of the kitchen with a piece of custom art above the stove. Add the brick backsplash, open shelving, and natural wood cabinets with black hardware….and you have a gorgeous new kitchen that the Kanes (and CC and Mike) LOVE! Oh, and I have to mention those Saturnus light fixtures because truly, the second I saw them I knew they would be just the perfect piece to finish this kitchen off and pull all of the design elements together. Gosh, I love those light fixtures and new they were meant for this kitchen the second I saw them. I also have to mention the Loren rug that is available from CC and Mike the SHOP. We used the gorgeous rug in the kitchen and the living room and it one of my absolute favorite rugs right now. I love the versatility and I love all the different colors you can pull out of the rug. Additionally, the colors in the rug make it a great choice for family rooms, kitchens, and bedrooms because it is dark enough not to show stains but not too dark that it looks heavy in a room. I highly recommend this rug if you are looking for the perfect new statement for your living room, master bedroom, dining room, kitchen runner, or even just hallway runners. You can’t go run with the terracotta Loren rug that we used in this remodel.
Cabinets: The cabinets are rift sawn white oak cabinets. These are truly a work of art and natural wood cabinets are so gorgeous! You have to be very careful when staining these cabinets though or else they will turn out looking orange or pink. The trick is having your painter add some white into the stain mix. It’s imperative to do a few stain samples on the inside of a cabinet and check it after it dries before you stain all the cabinets.
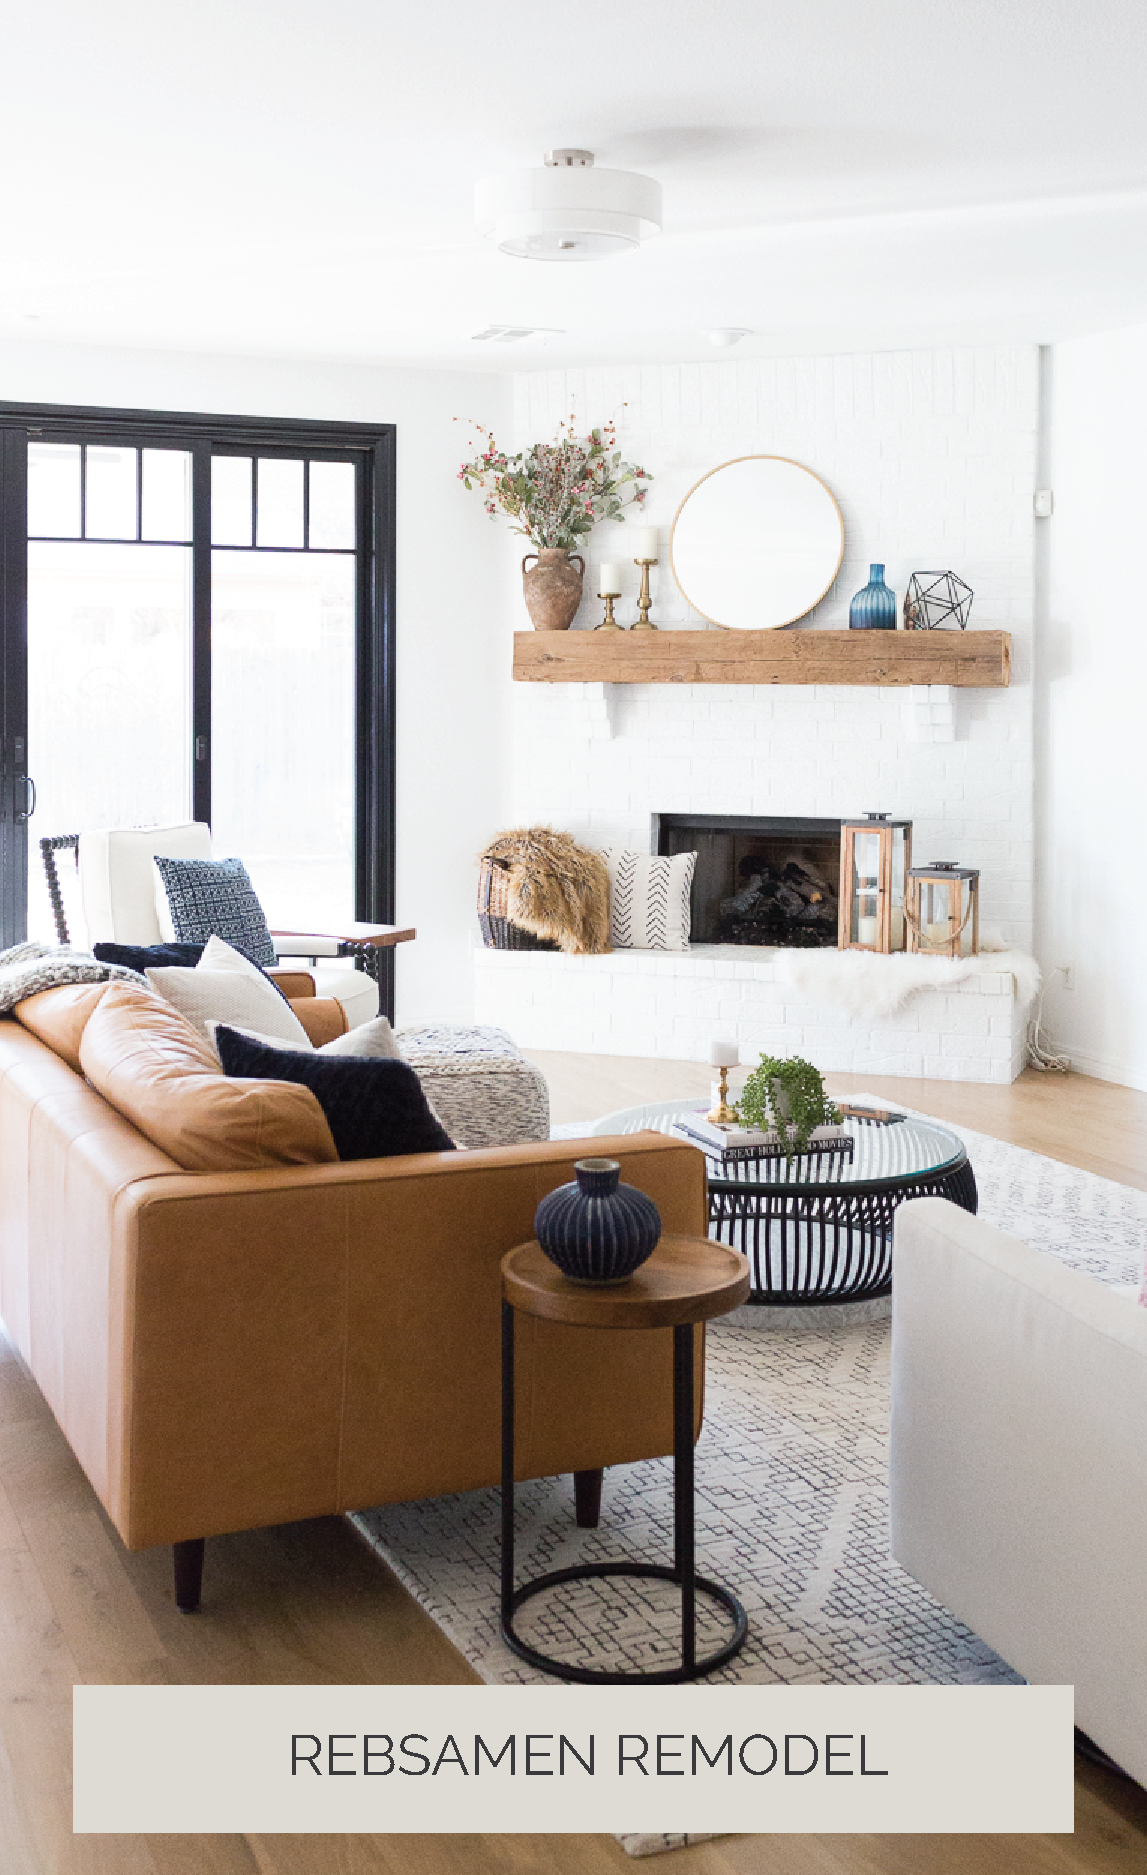
Brick Backsplash: OK so here are the deets on the brick backsplash. We used a product from Home Depot called Old Mill Brick. It is a thin brick single that is perfect for use in interiors. It’s easy to work with and is much thinner than regular brick so it can be used on walls and for backsplash. We also used this product for the vent hood area in the Rebsamen remodel so as you can see, it’s extremely versatile and is a great product to use if you’re wanting to incorporate brick into your interiors. For the Kane remodel, we used a custom mix of Castle Gate Old Mill brick and Dark Castle Gate.
Quartz: Calcatta Lincoln 3 cm quartz
Wood Floors: All the wood floors are from Mill Creek Carpet and Tile. If you are looking to add engineered wood floors to your next home project, we highly recommend using Mill Creek. Their selection is phenomenal and their customer service was top notch. We are also using Mill Creek Carpet and Tile for our Jenks House Flip we are currently doing and we have used them for all our tile selections. Mill Creek has a custom made selections board with all our CC and Mike favorites so you can just go in and ask for the CC and Mike special and they can help you out. Just wait til you see the black and white buffalo check tile and patterned tile that we are using in our flip house. Trust me, we fell in love with it and so will you. But back to the wood floors, for the Kane project, we selected the Villa Belize brand of engineered wood floors and the specific type we used was GELA.
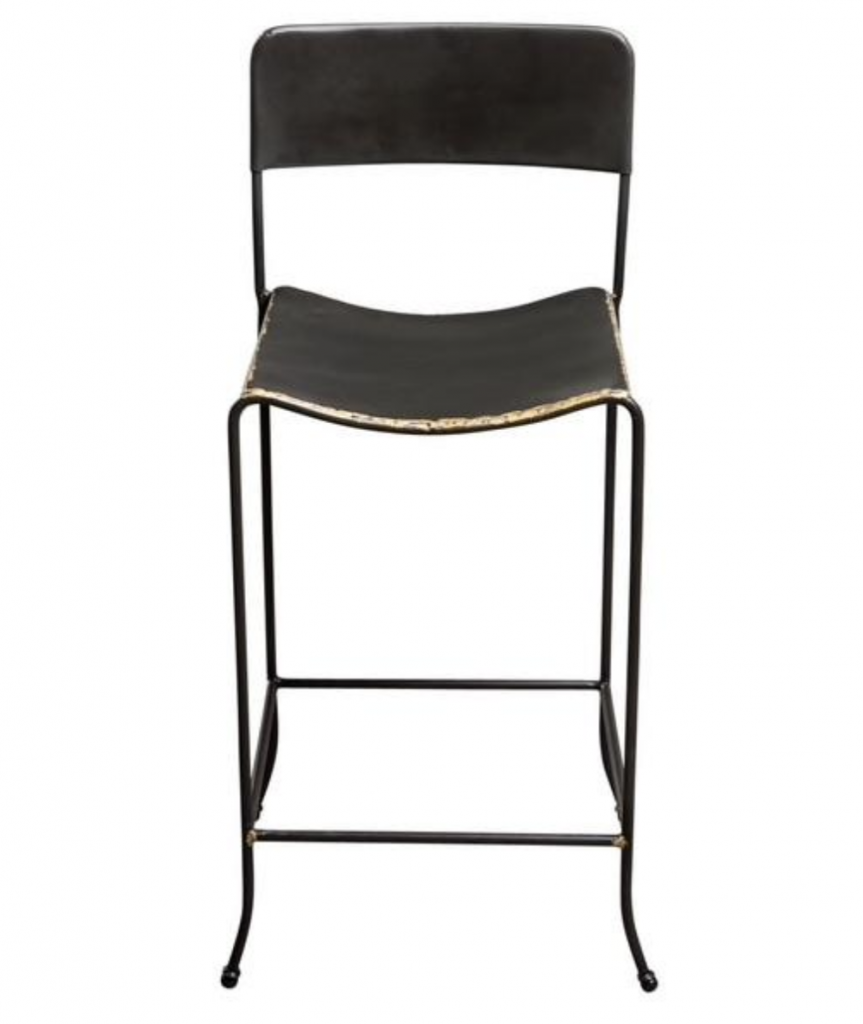
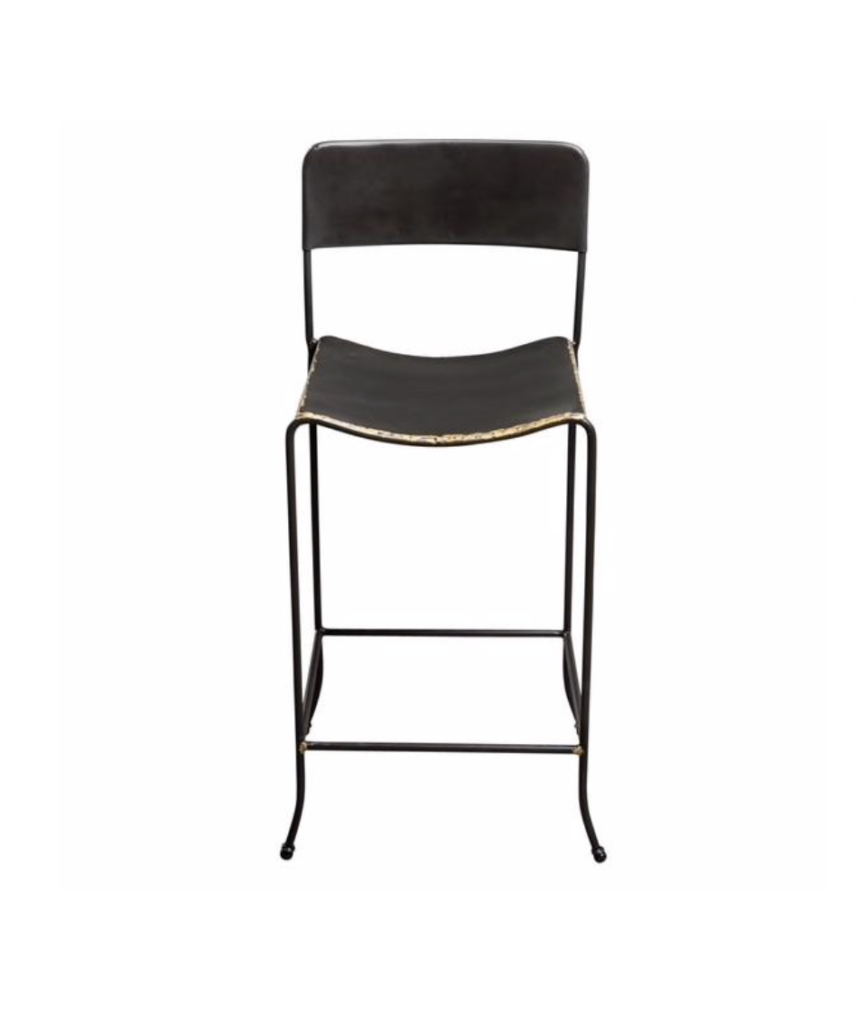
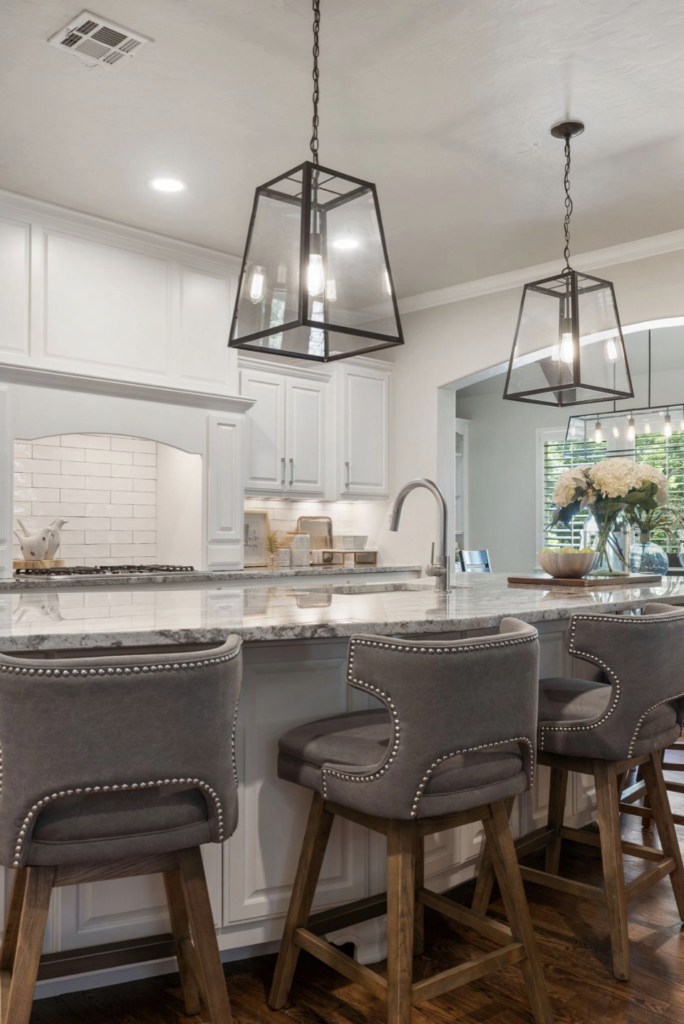
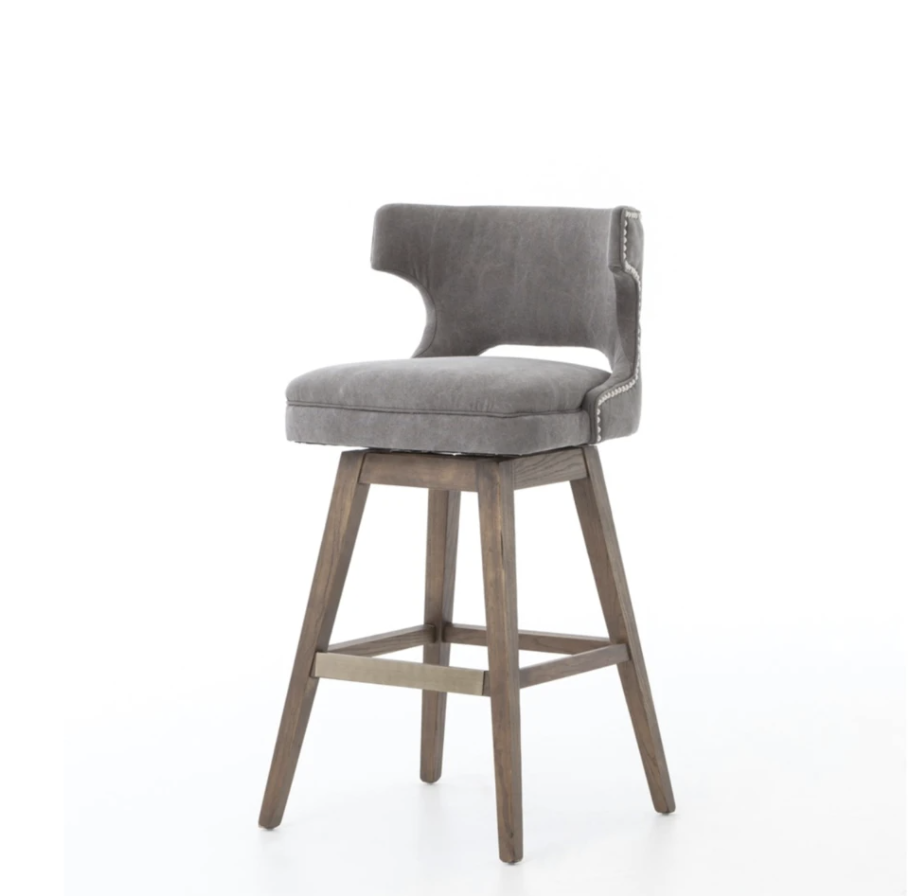
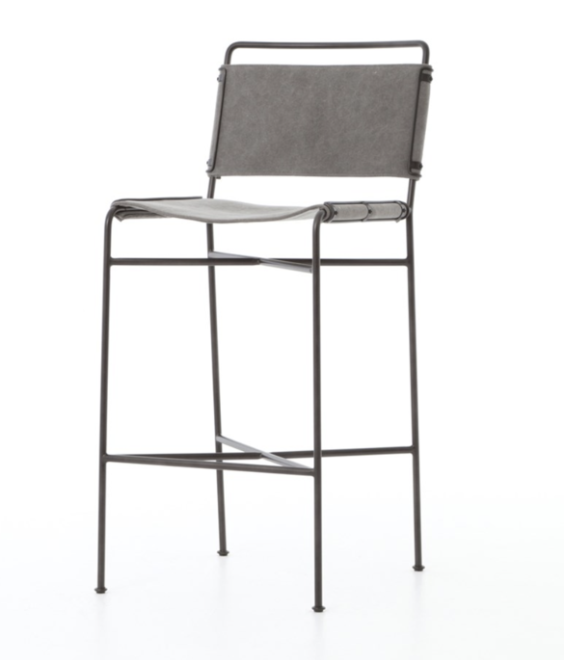
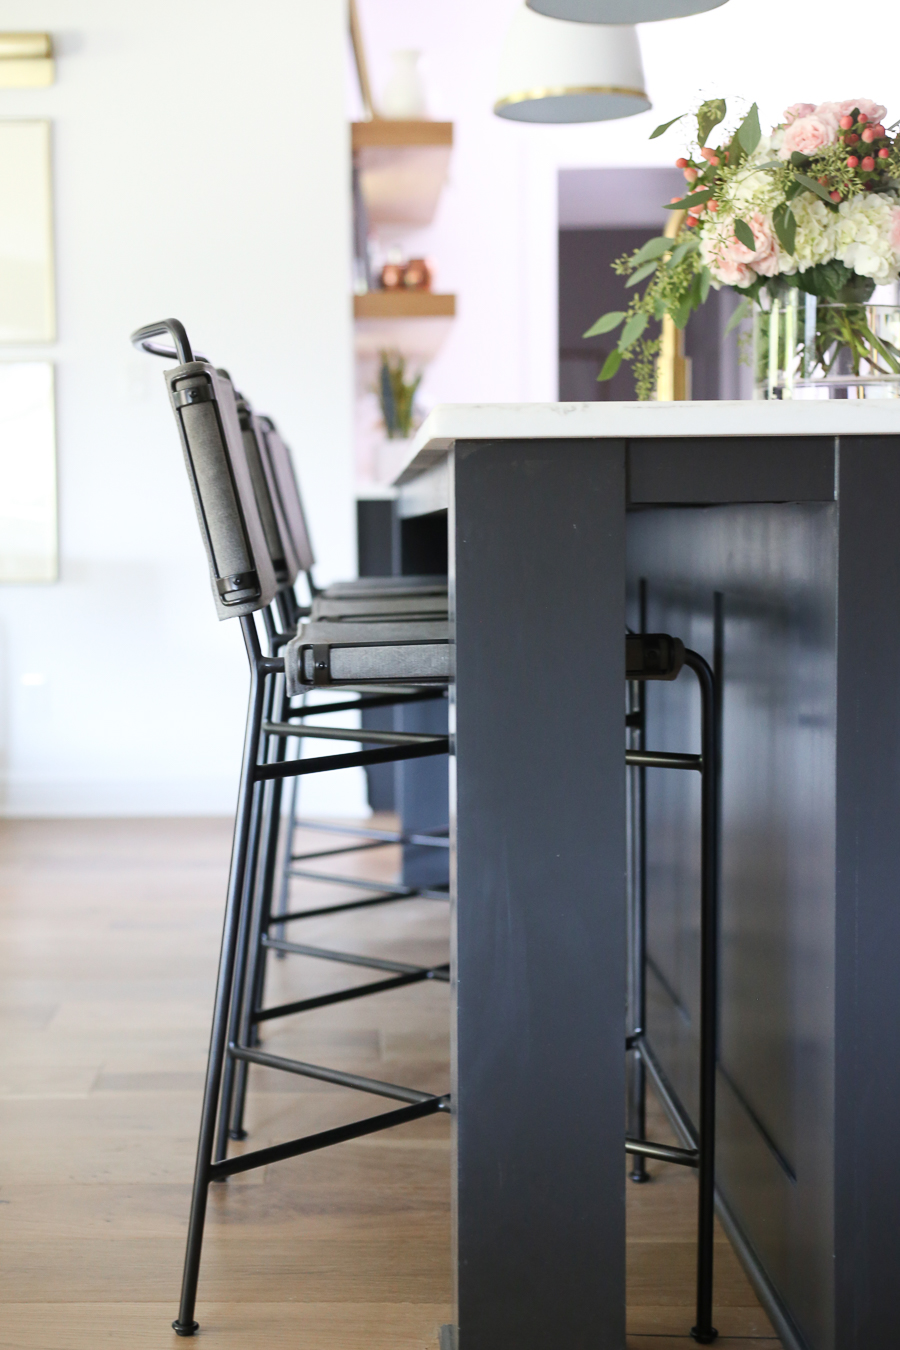
These bar stools are a must mention as well. They are available in CC and Mike the SHOP and the price point is incredible. They also are extremely comfortable, durable, and mess-free since they can just be easily wiped down! I highly recommend these bar stools, especially paired with natural wood islands and white islands.
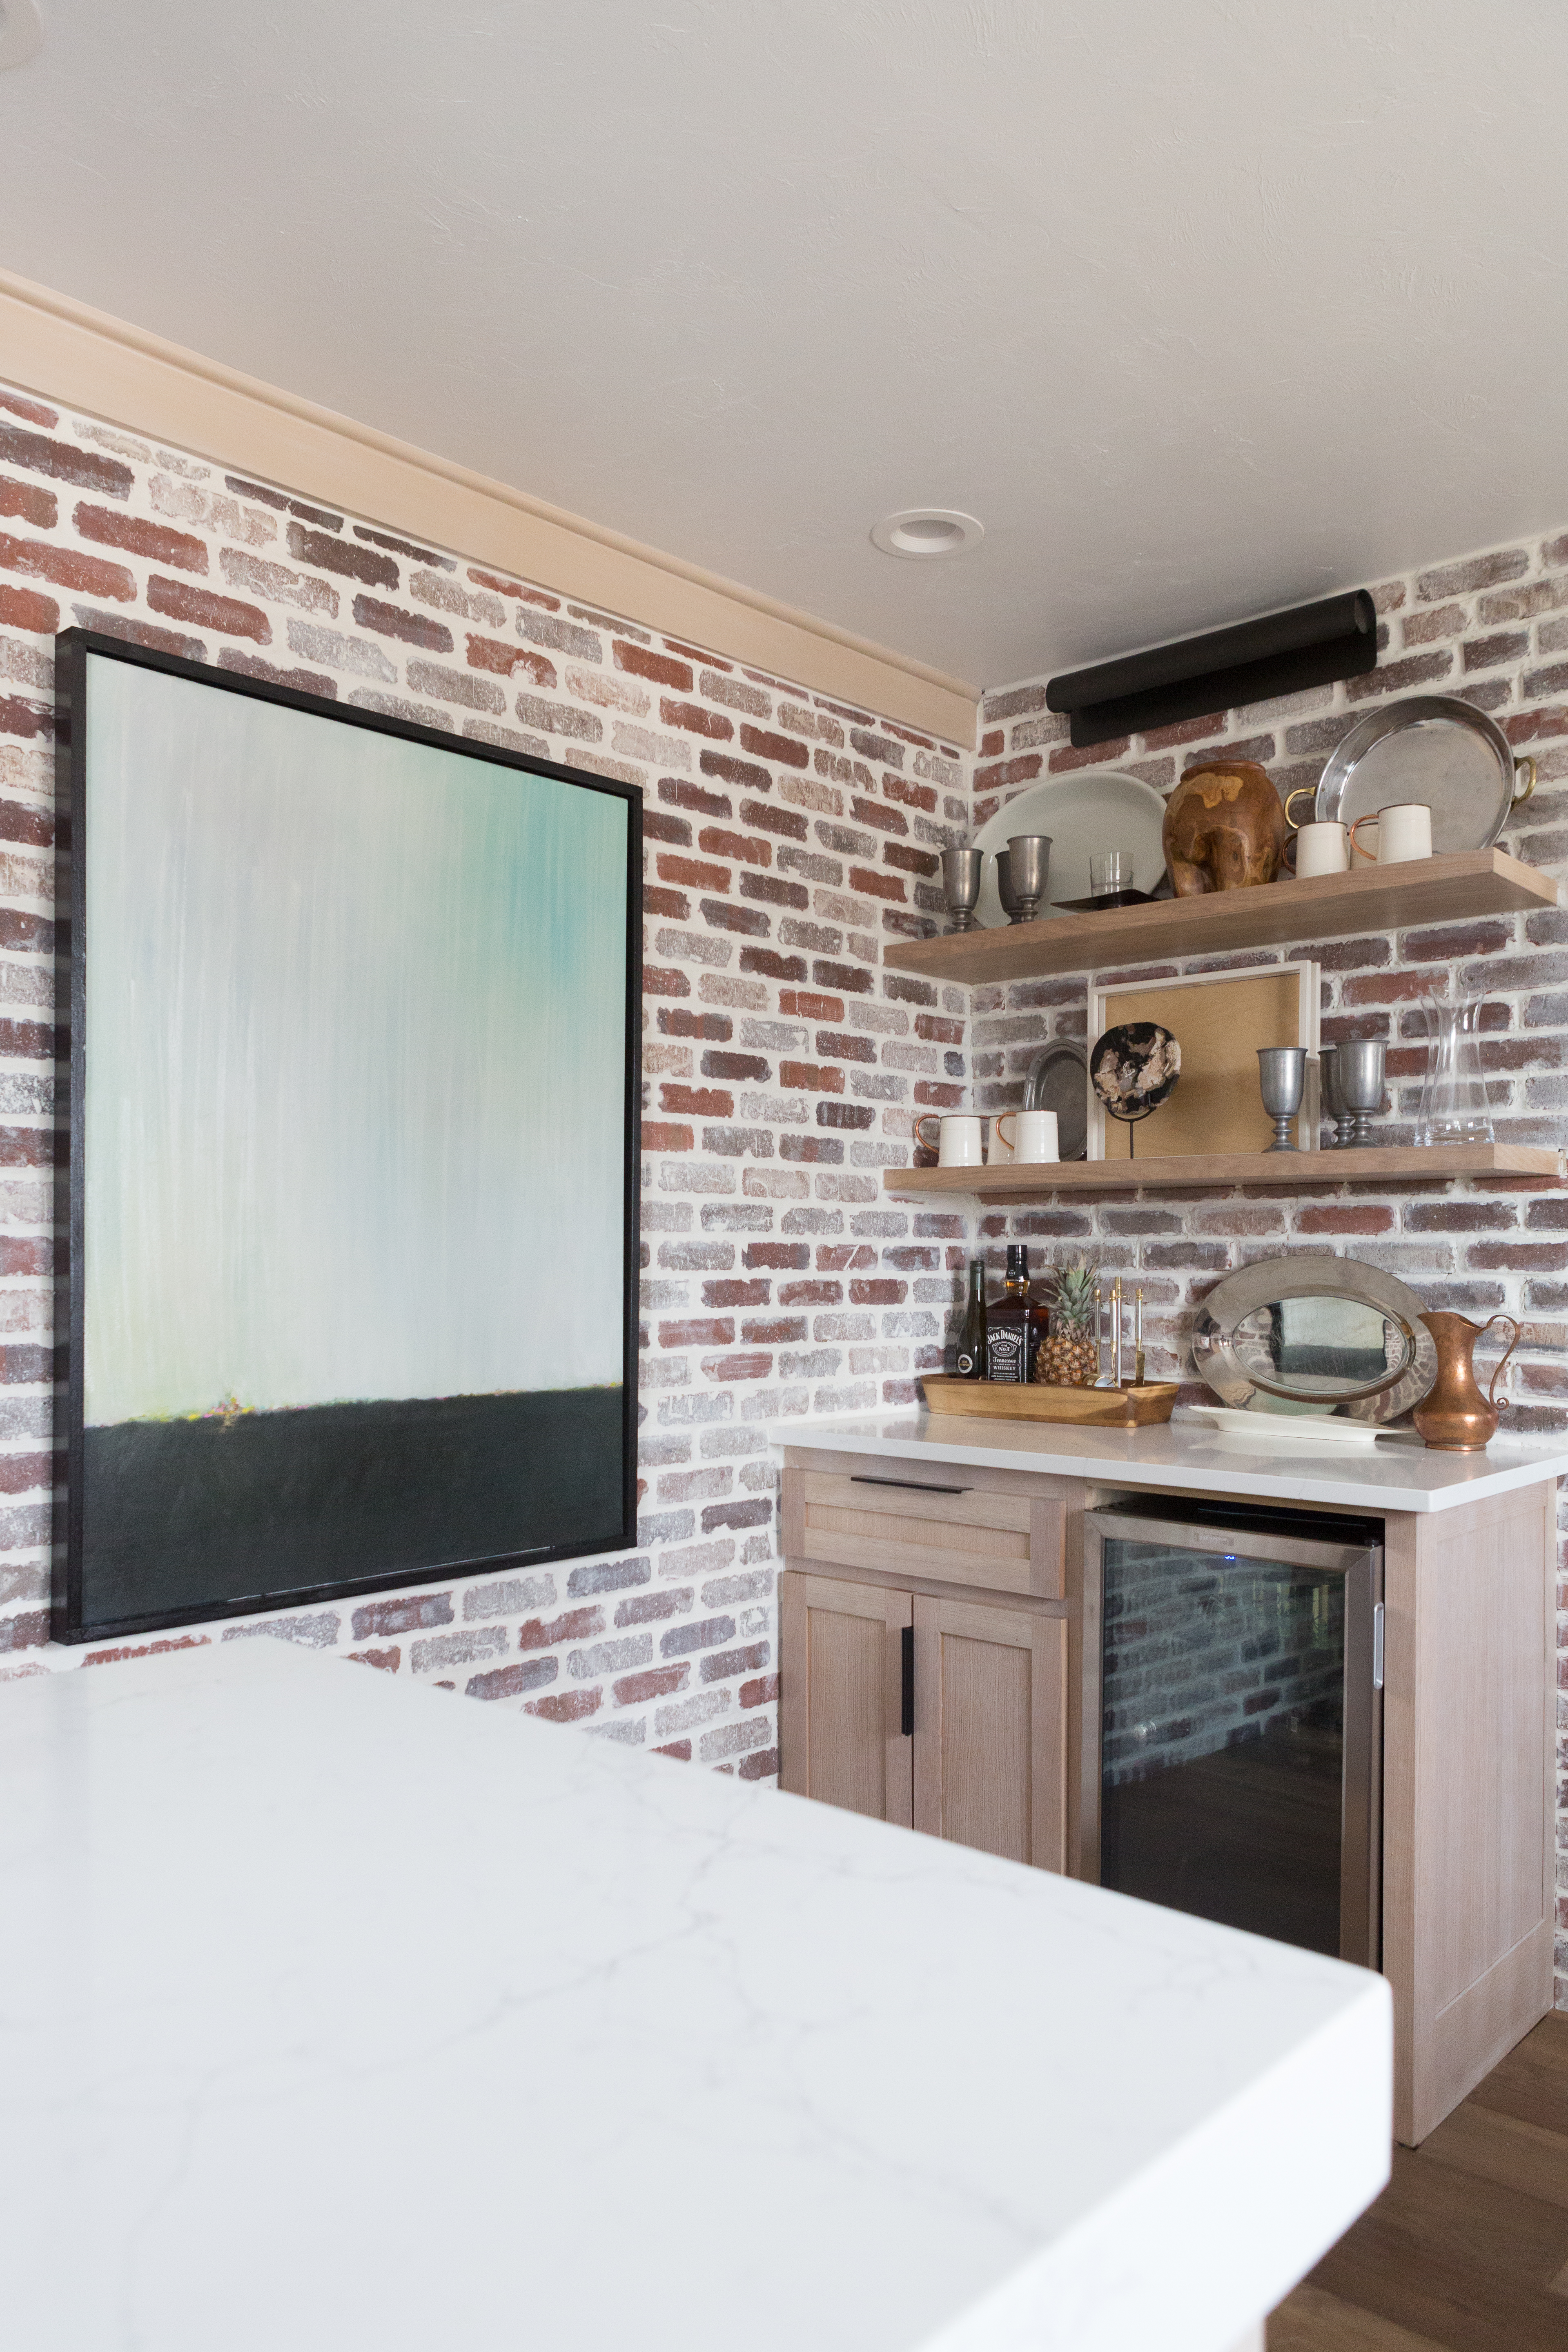
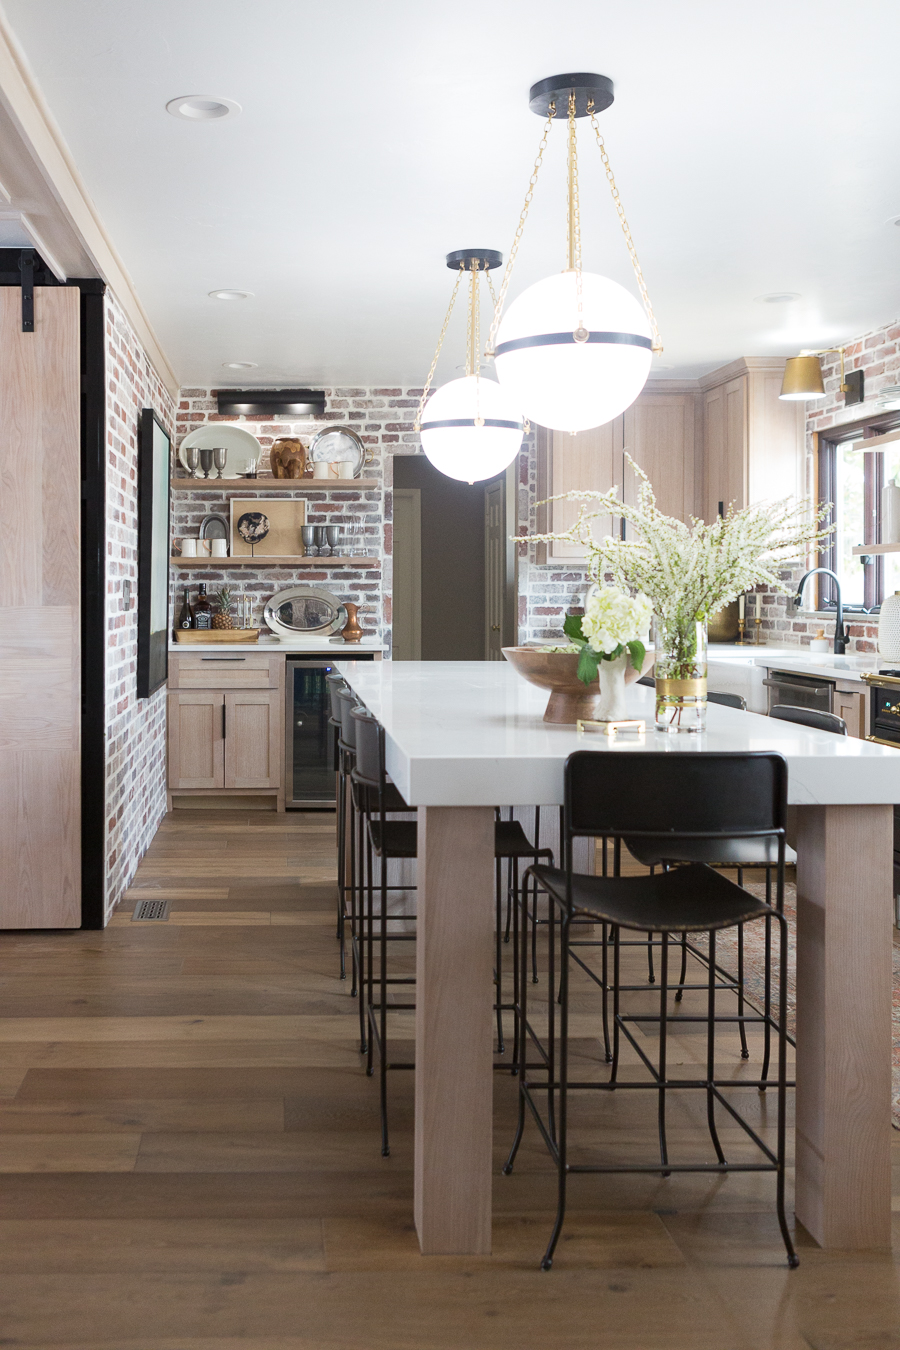
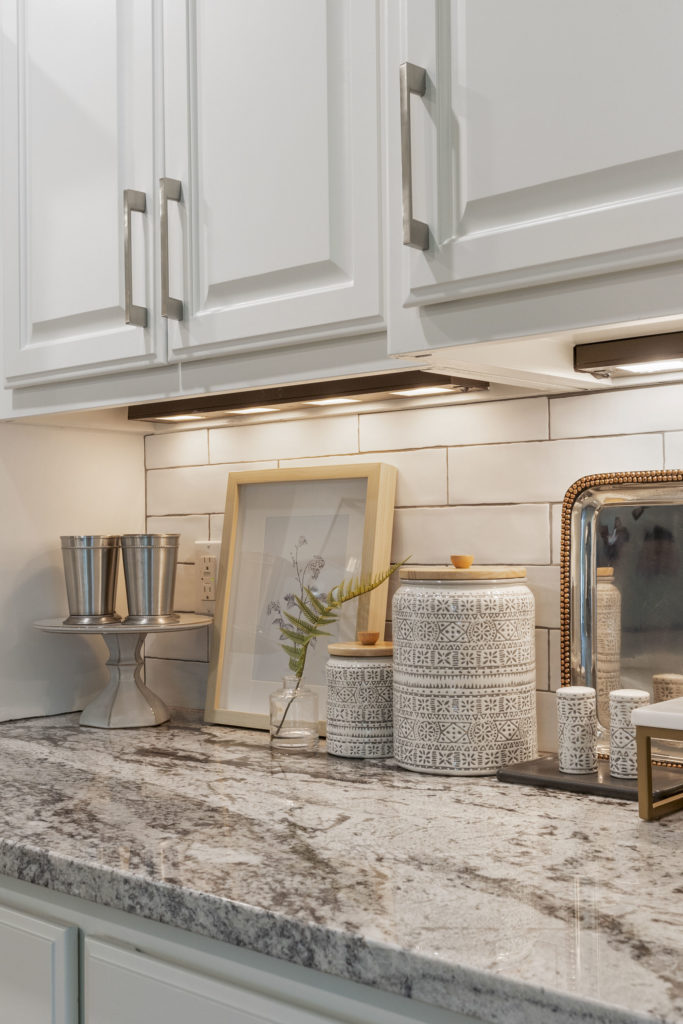
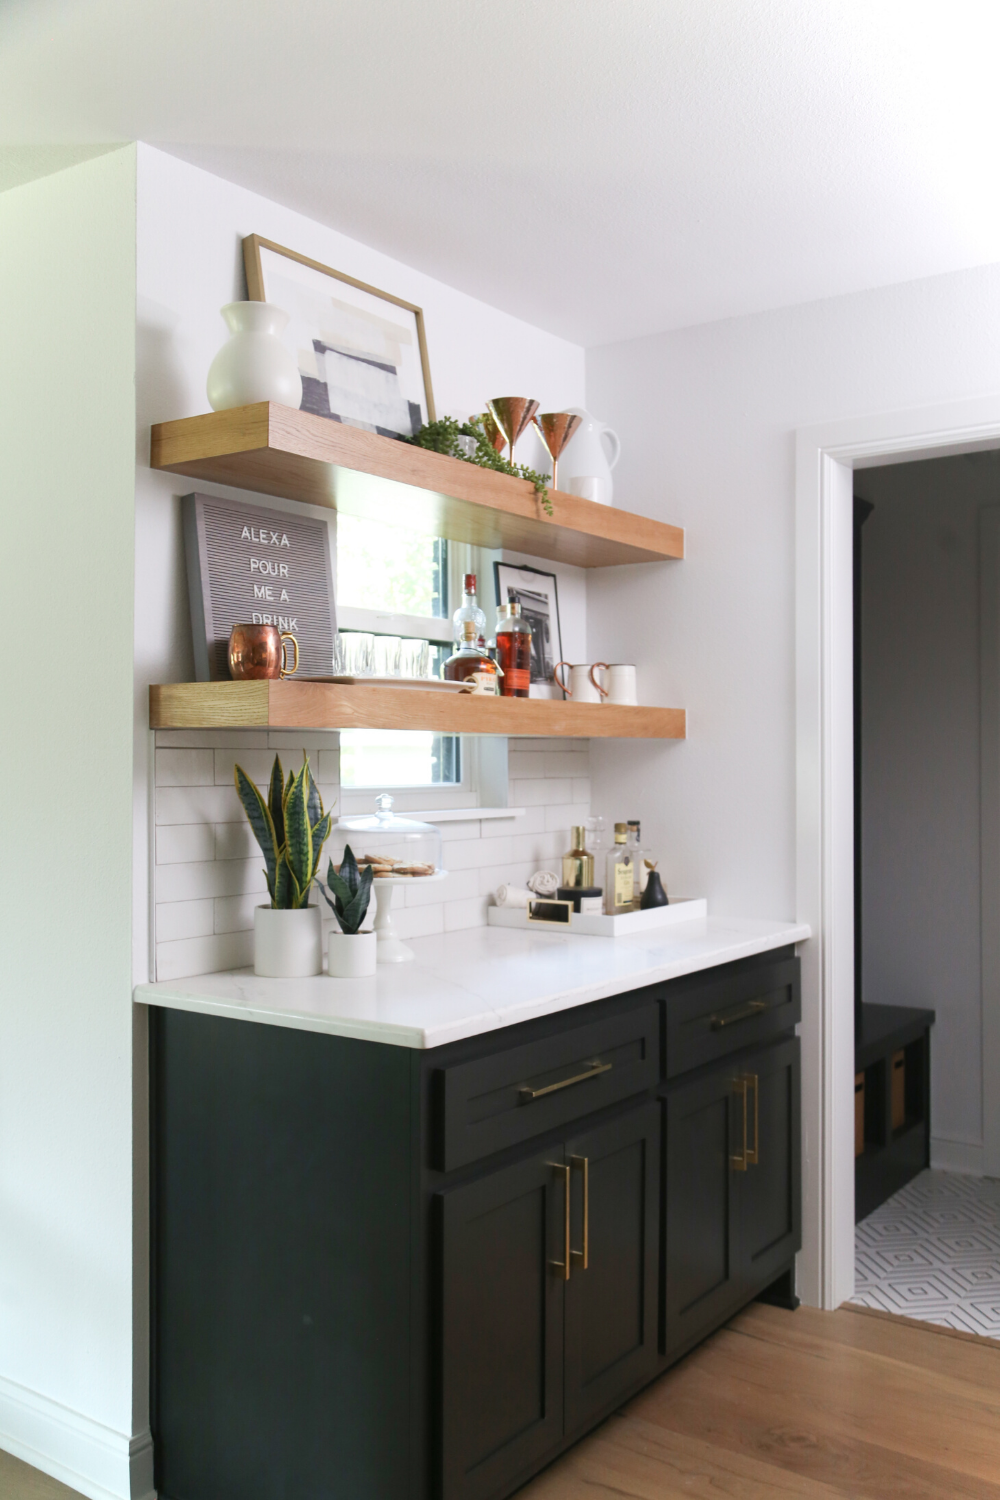
This area of the kitchen remodel was very important because one of our goals was to add a little bar and drink area. As mentioned previously, when the Kanes entertained the kitchen would become congested at times and this little area now allows guests to just come in and grab a drink without walking through the main kitchen area. The beautiful custom art you see is called OSAGE RAIN and it was commissioned for this space by Cyndi by Tulsa artist Brent Brander.
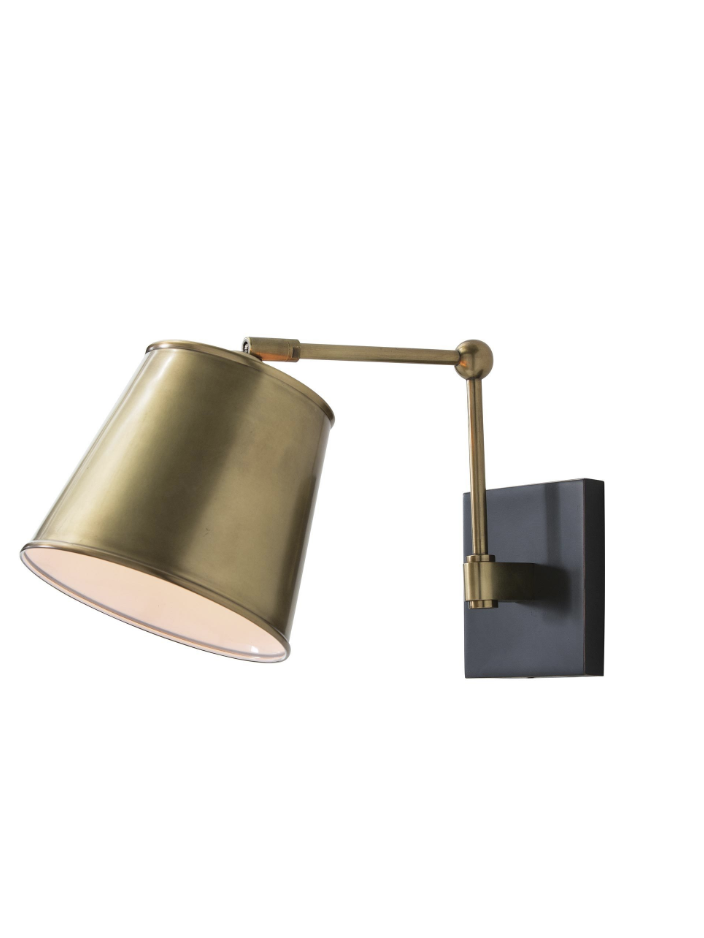
Let’s talk about the lighting you are going to see as well because it is a must-mention. I love the use of the library sconce in the bar area (pictured below). This sconce is from Hudson Valley Lighting and it is available in CC and Mike the Shop.
You can also shop some of our favorite bar items here:
Click on the pictures below to shop these items from CC and Mike THE SHOP that was integral to the design of the Kane Remodel
NEXT UP WE HAVE THE LIVING ROOM DESIGN AND REMODEL!
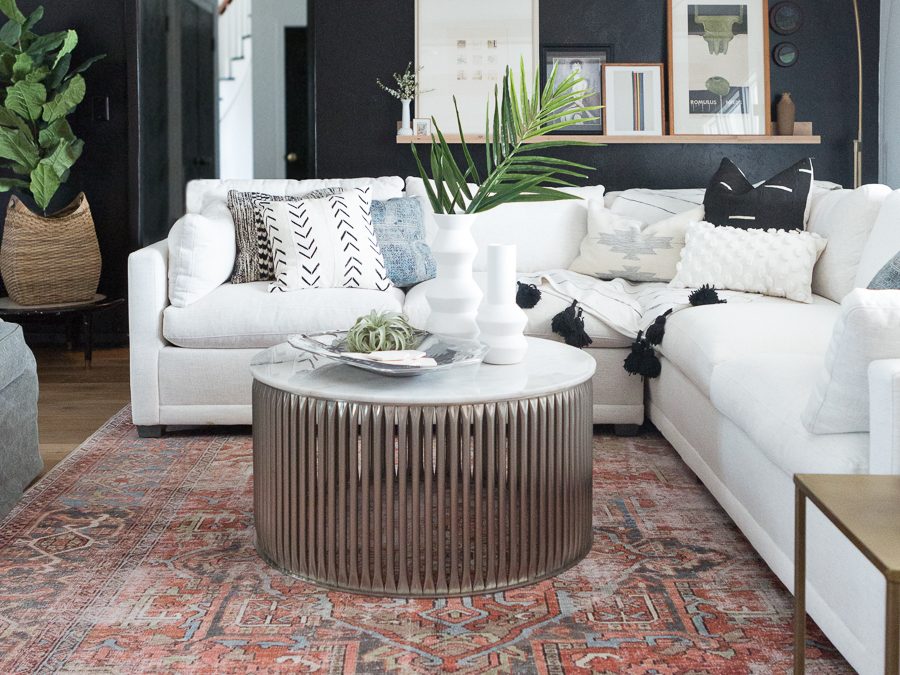
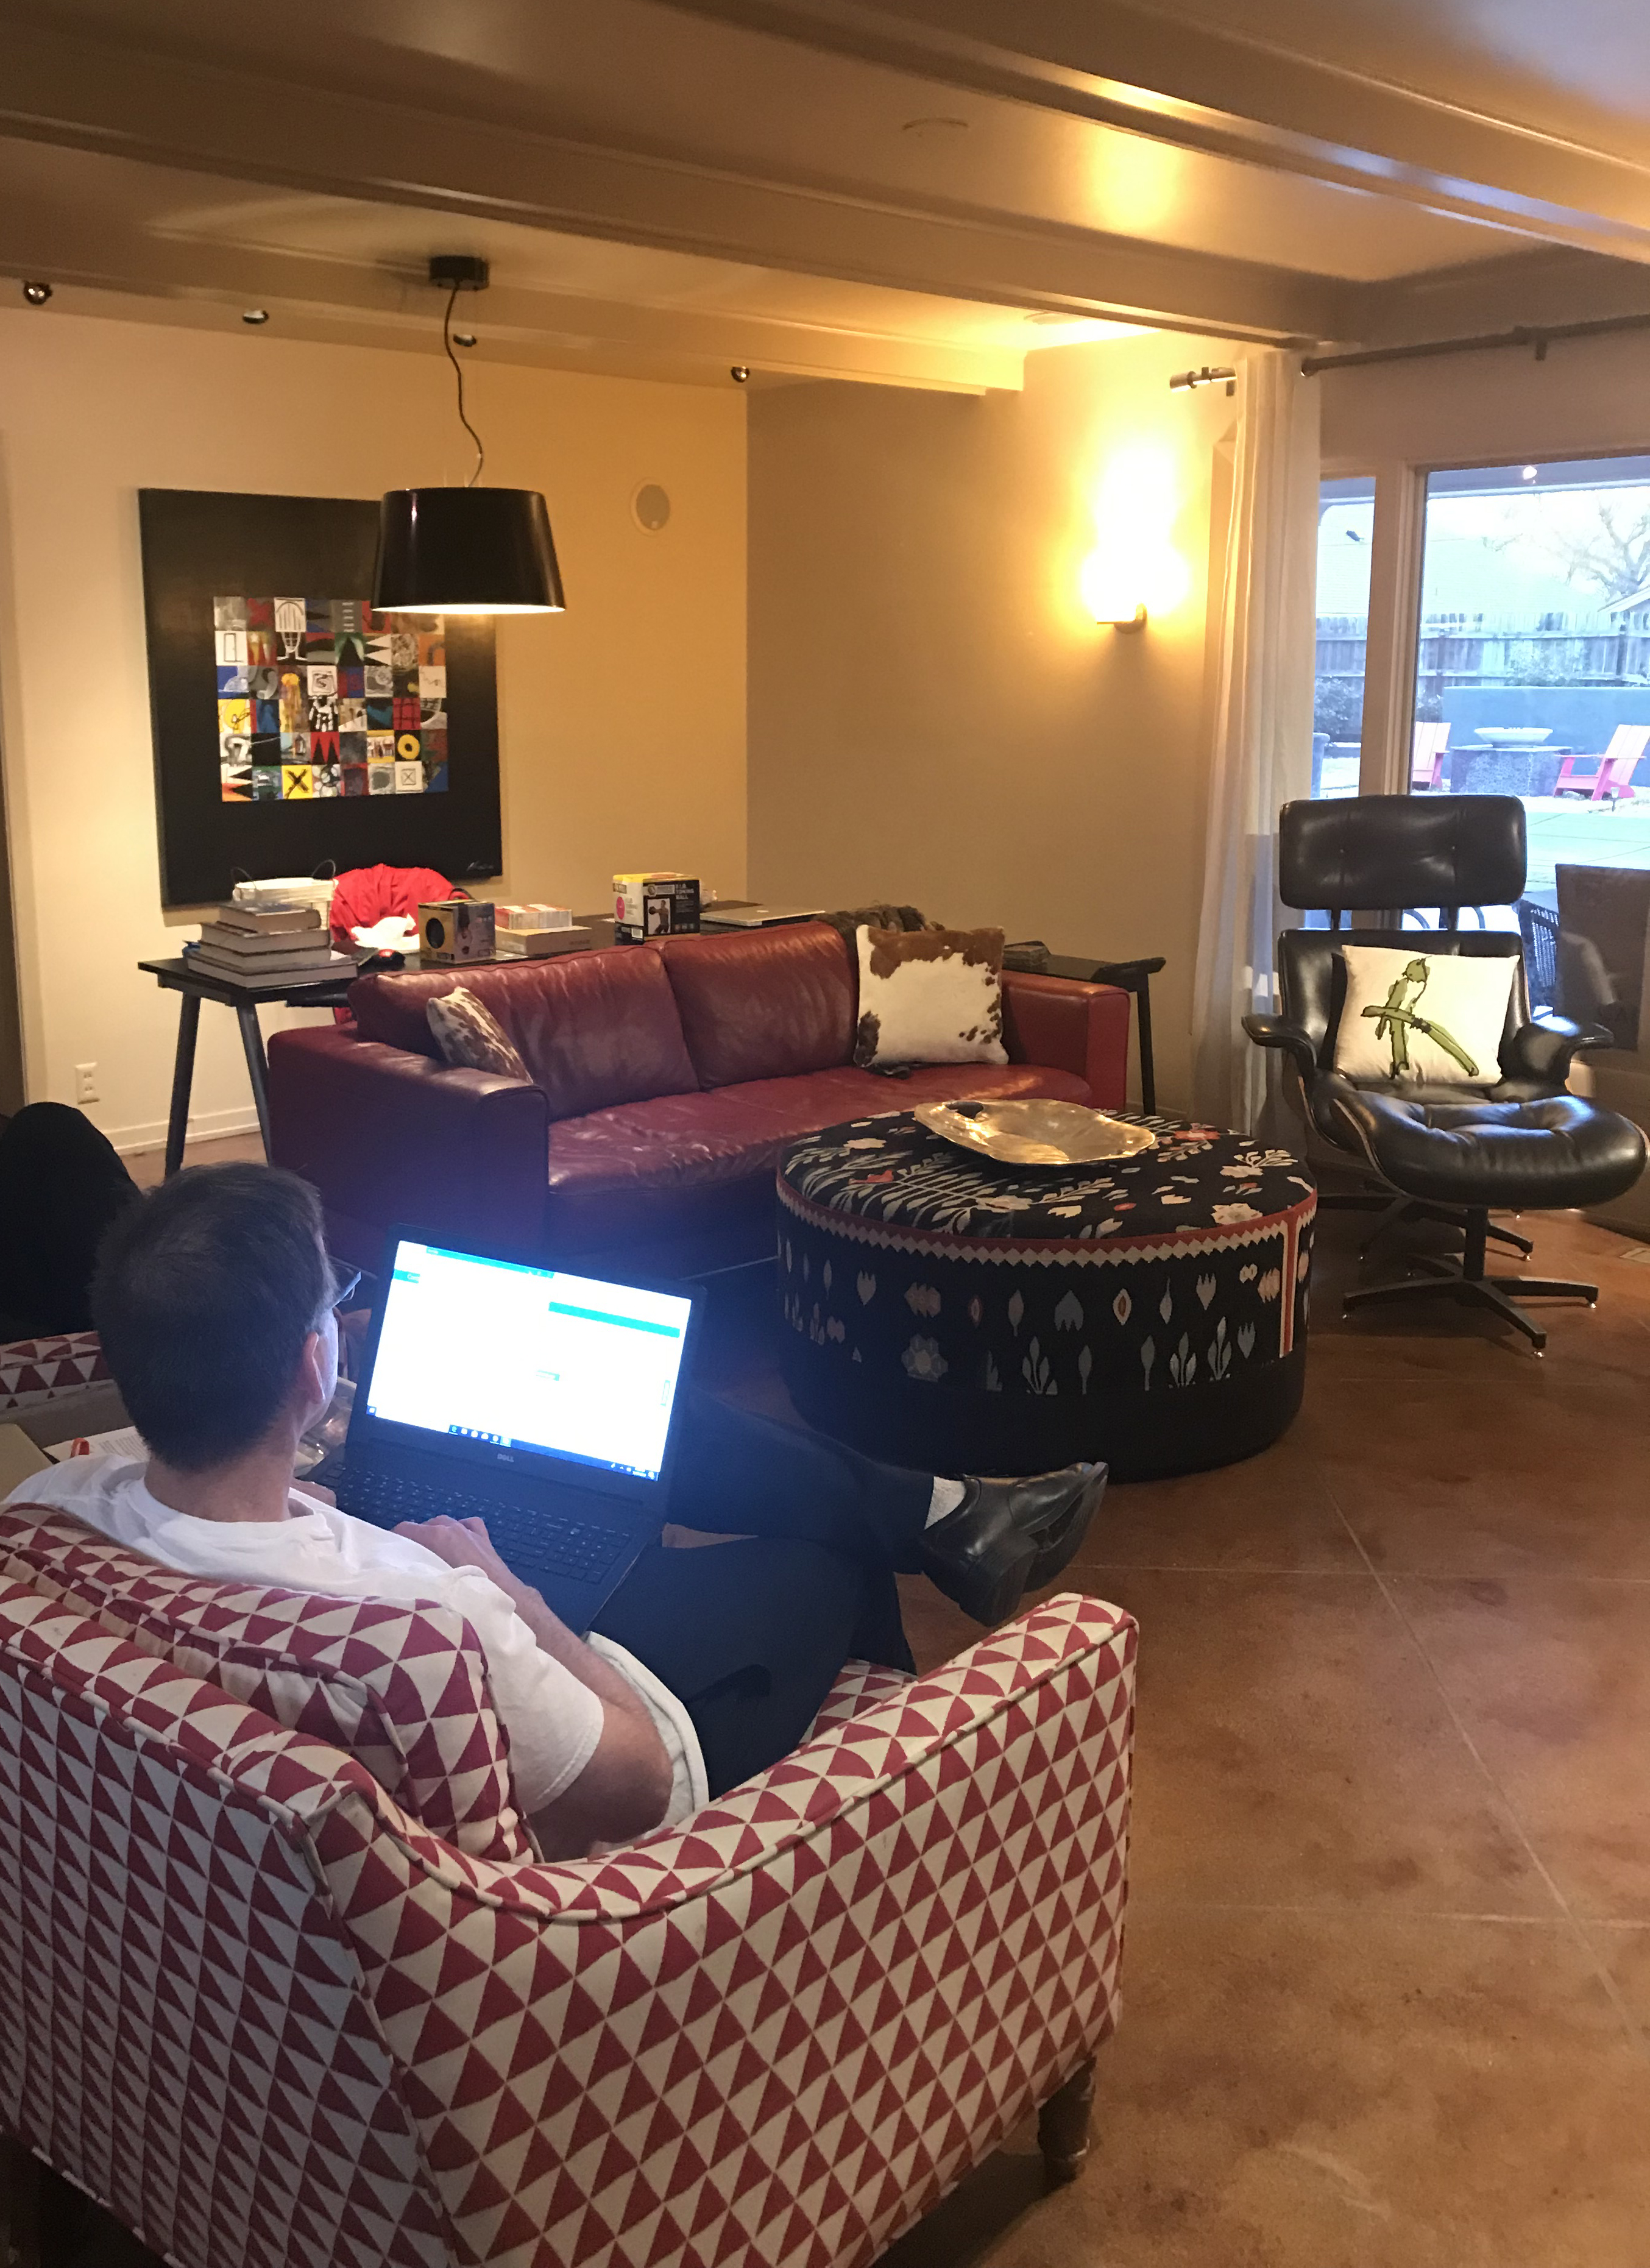
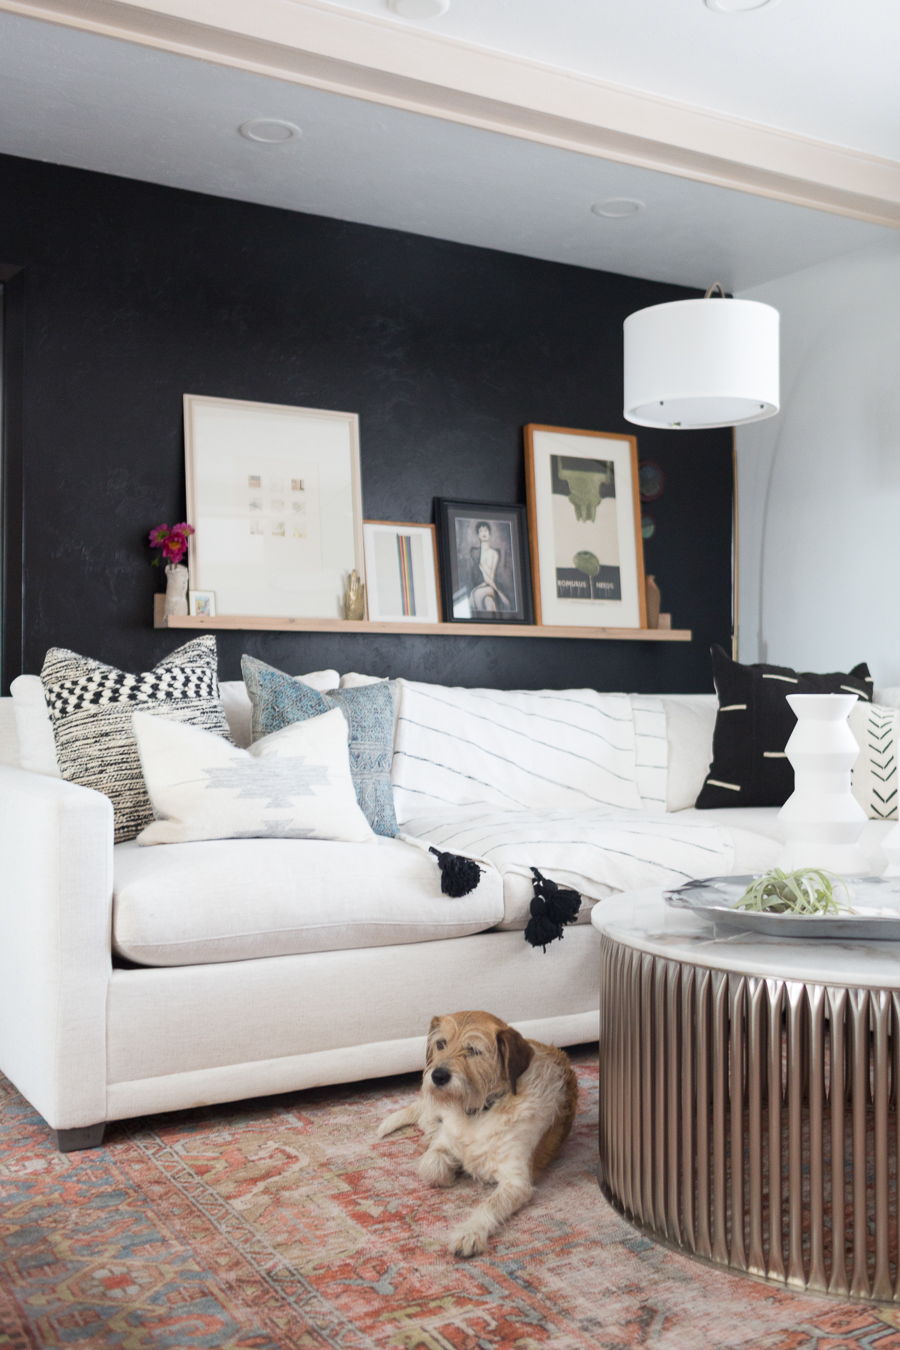
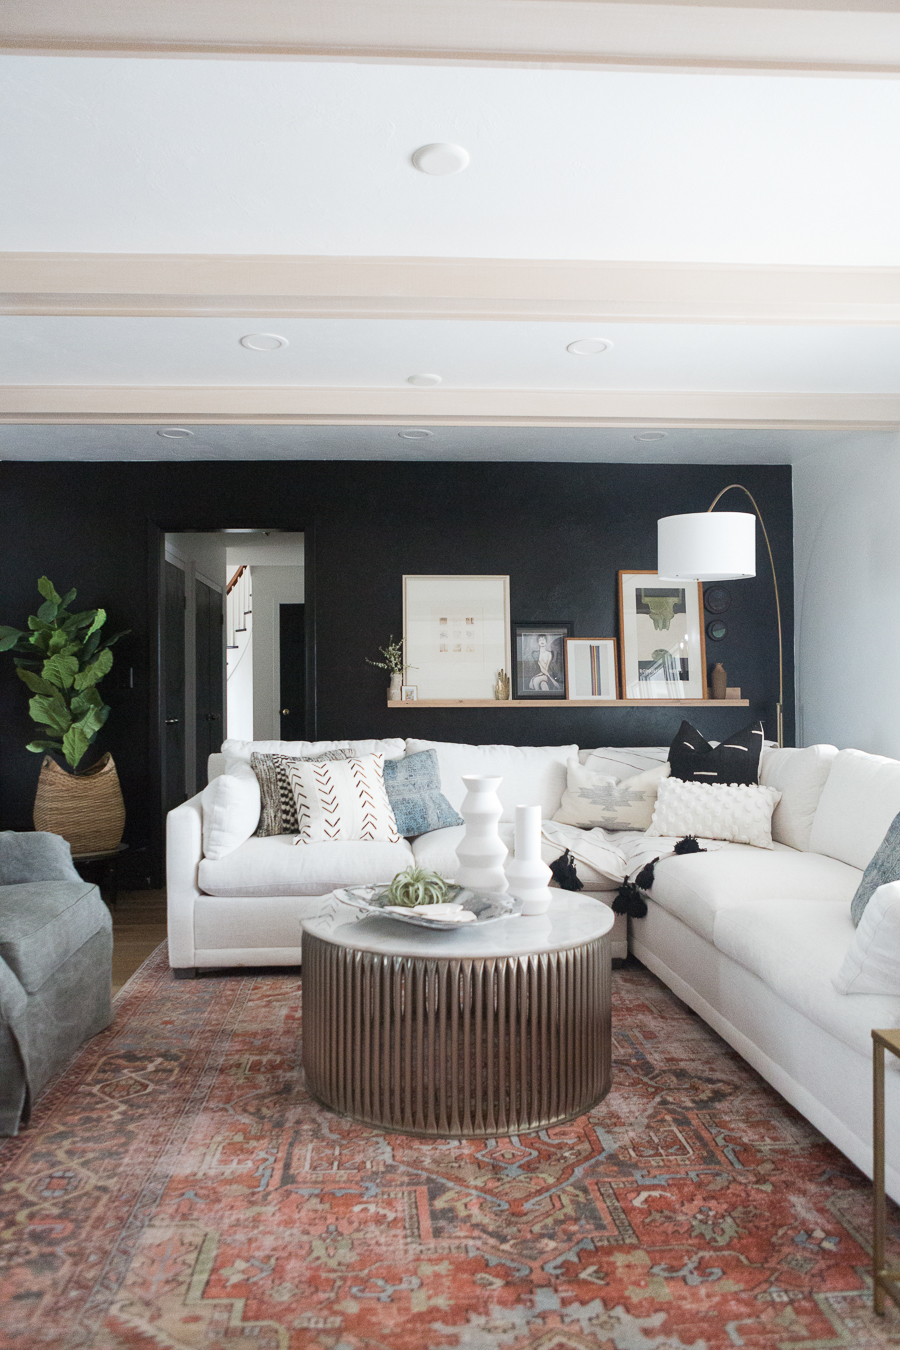
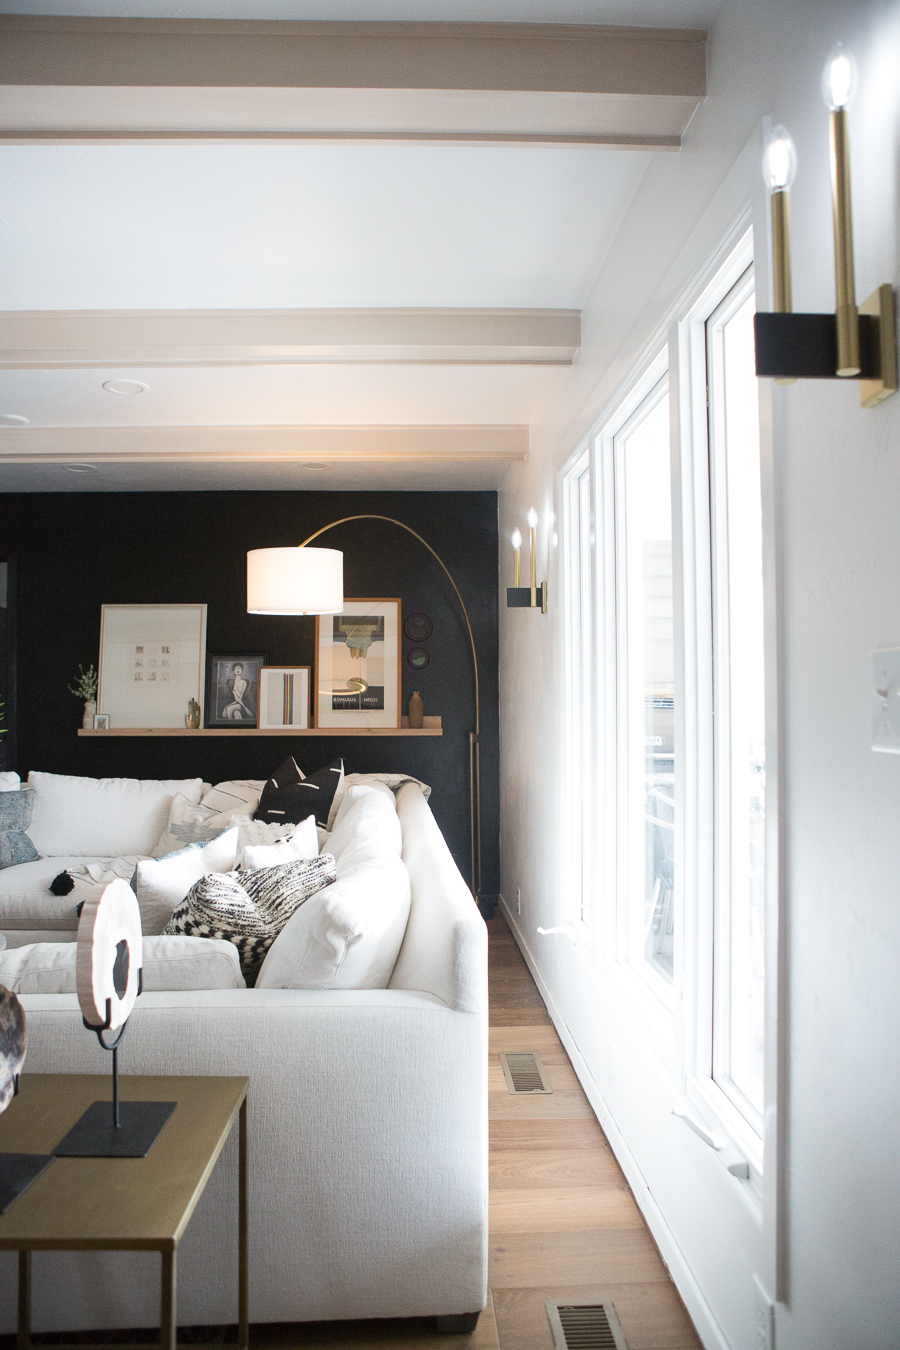
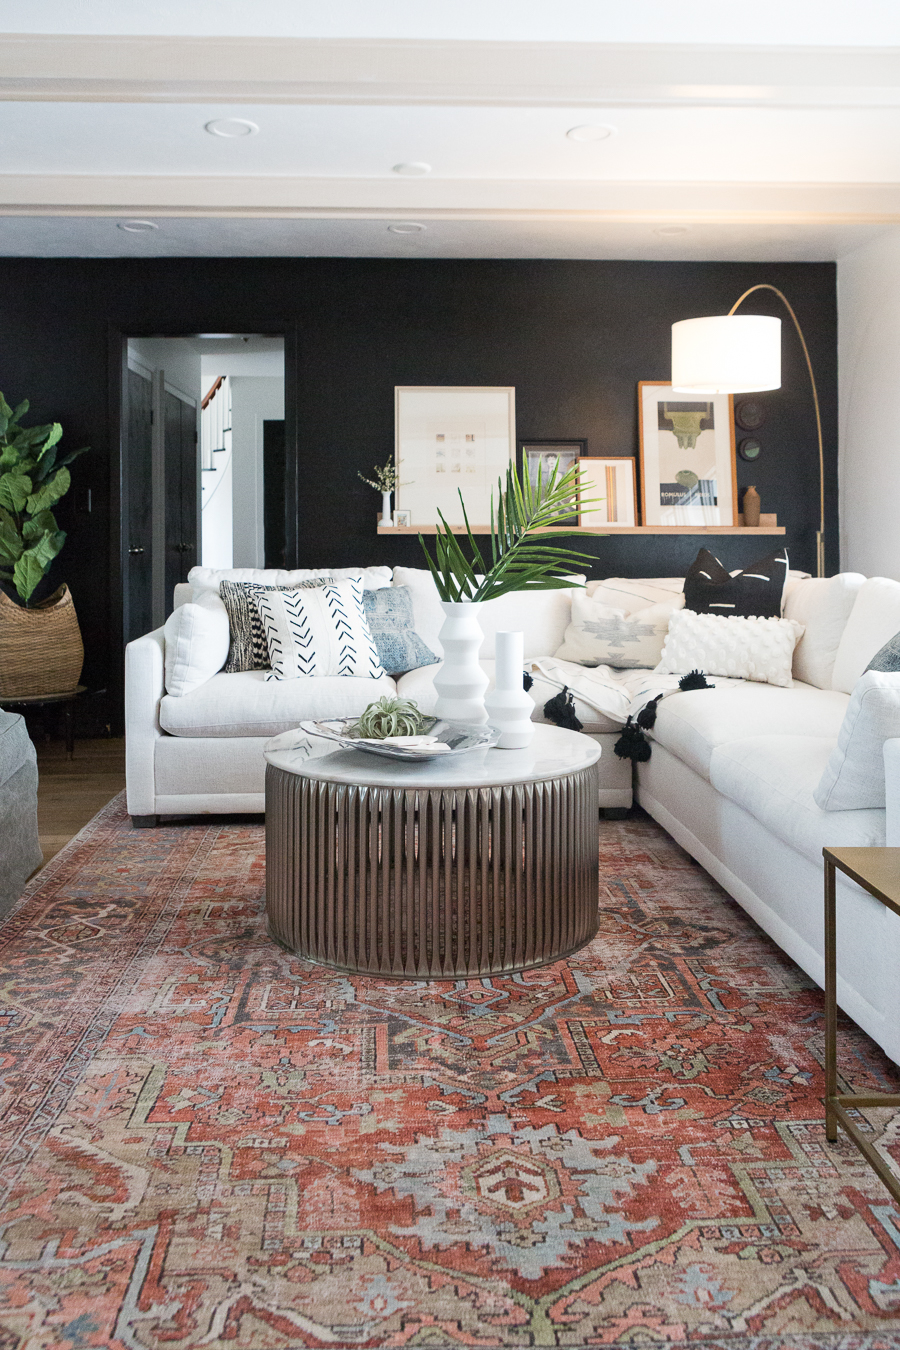
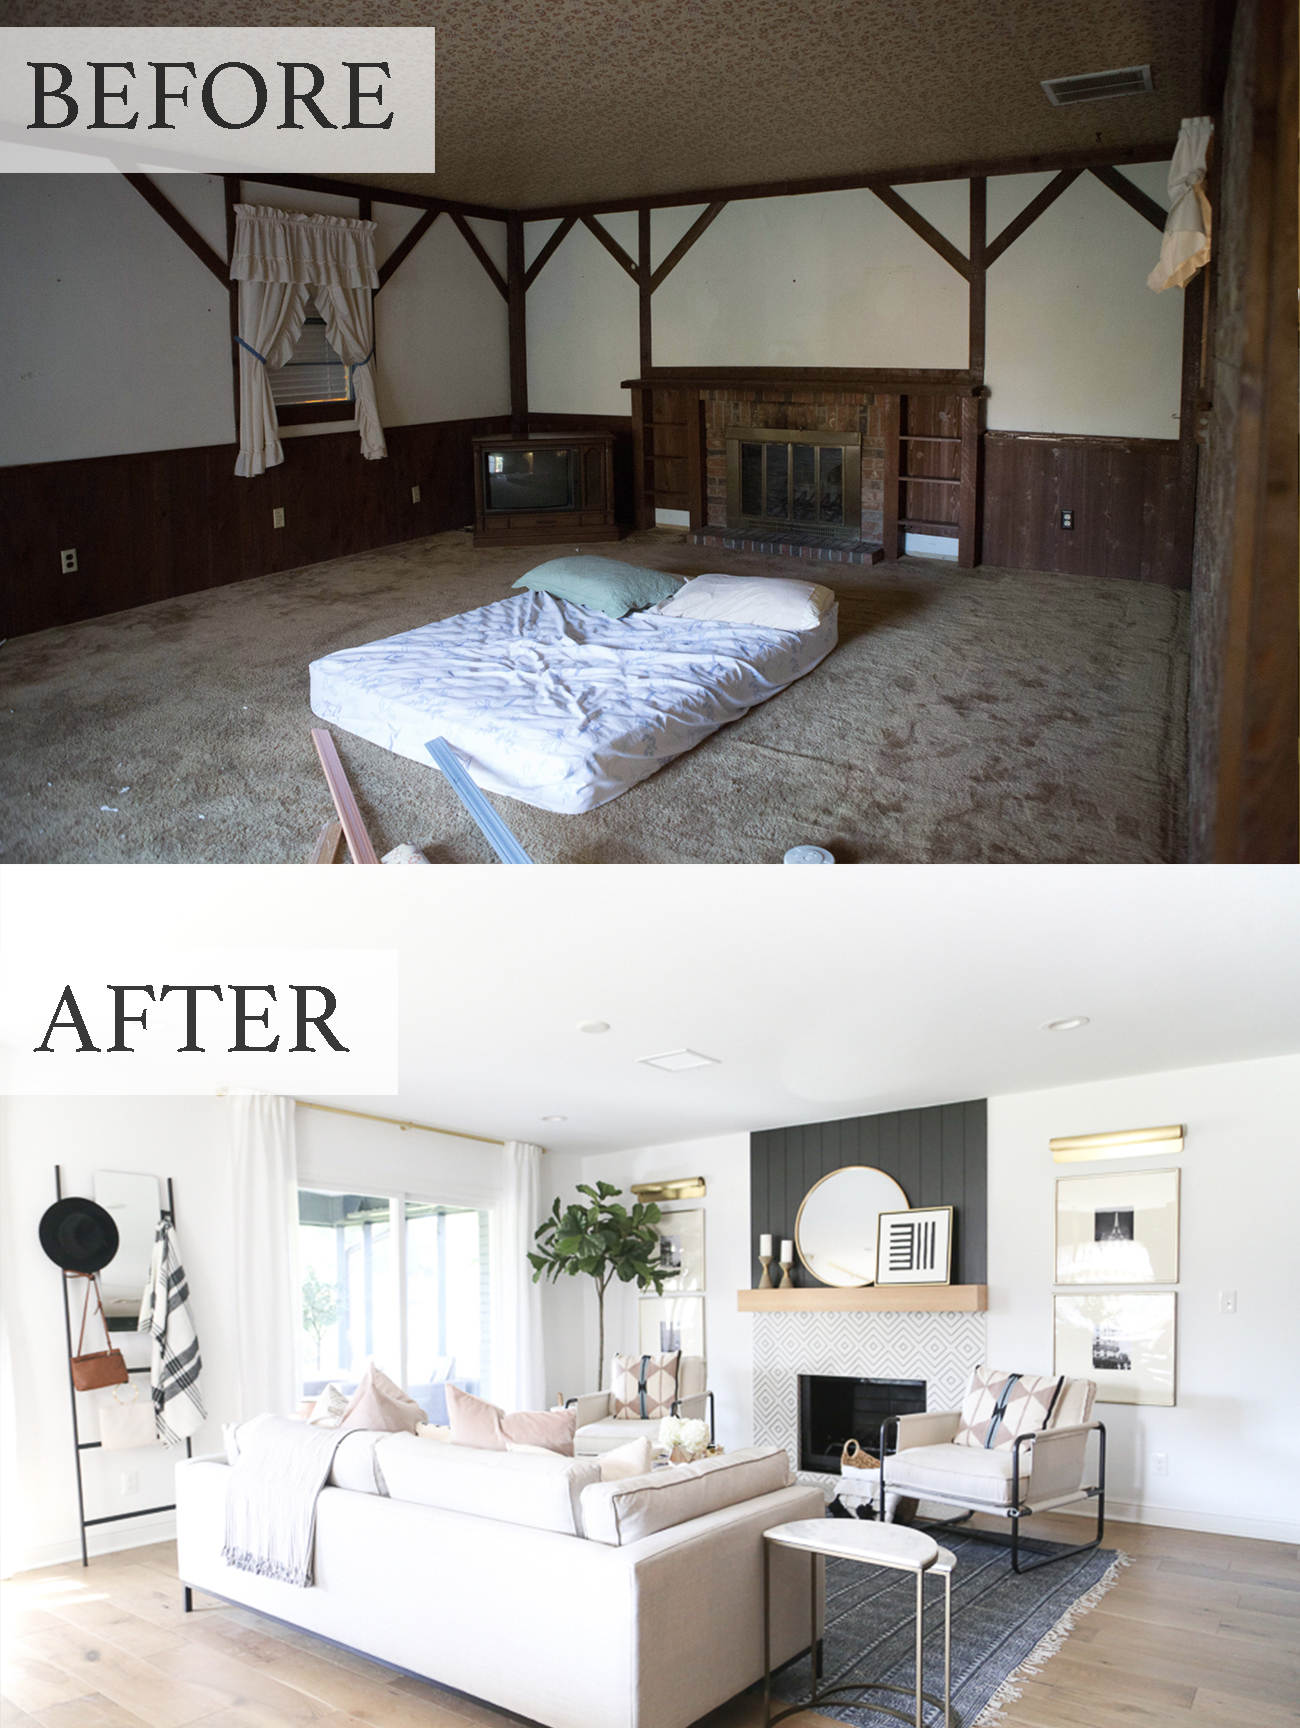
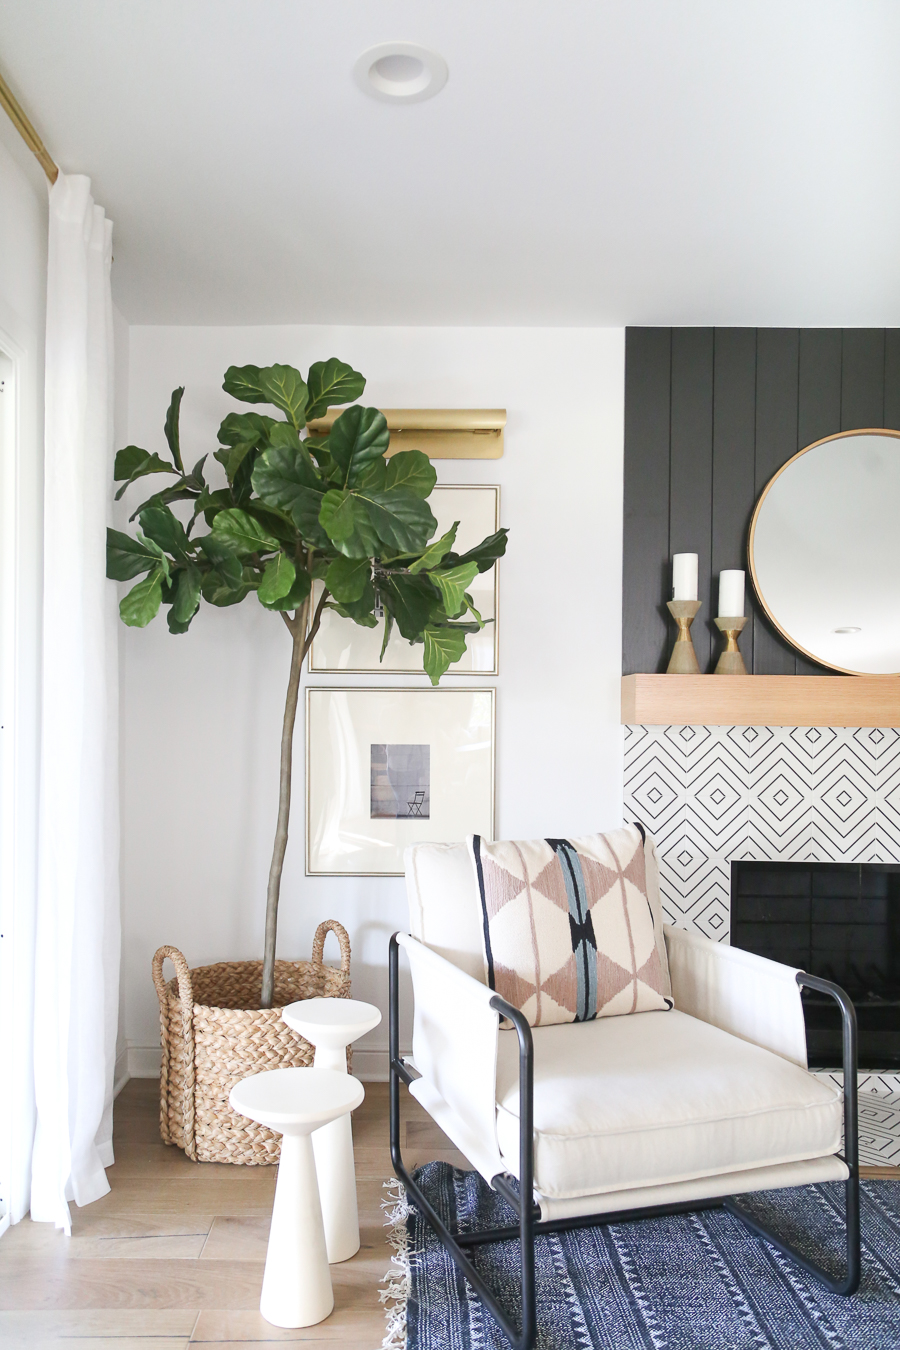
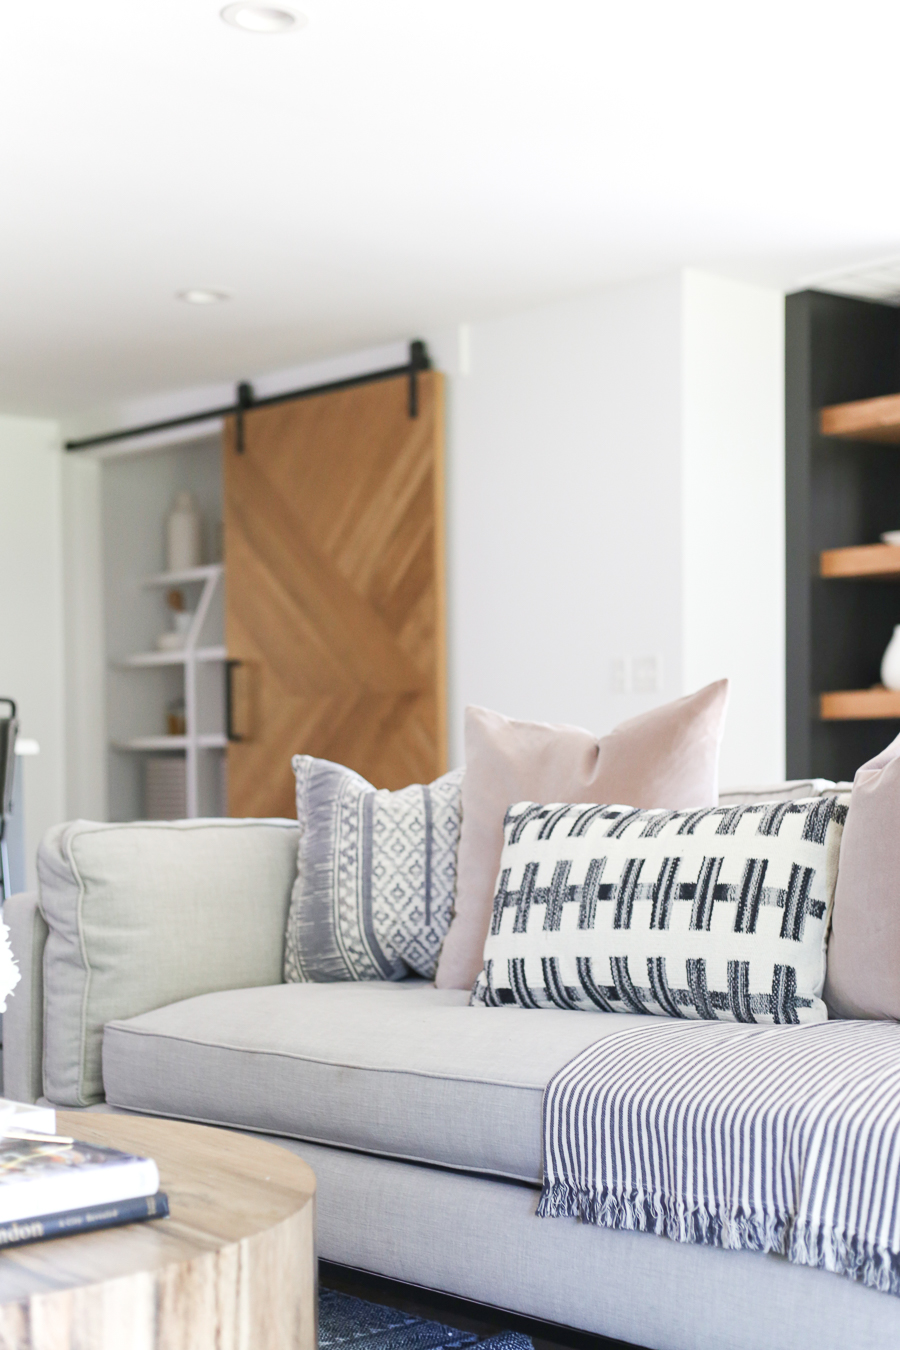
Our goals for the living room were three things: MORE LIGHT (this was a special request from Cyndi’s husband), MORE COMFORT (their previous red leather couch was not a fan favorite in the Kane household because of lack of comfort), and just an overall fresh new look and design! I encouraged Cyndi to consider a black statement wall to showcase her art and she went for the idea! I’m so glad she did becaue we both love it. Pro tip: It usually works out pretty nicely when a client trusts the designer even if it’s a bit out of their comfort zone. I know it’s hard. Trust me, I do! Cyndi has told me she was unsure about the idea of the black statement wall, but she trusted me and said let’s go for it! You will see for yourself how it turned out (spoiler alert: it’s incredible) and we love how it just totally showcases all of Cyndi’s beloved art collection!
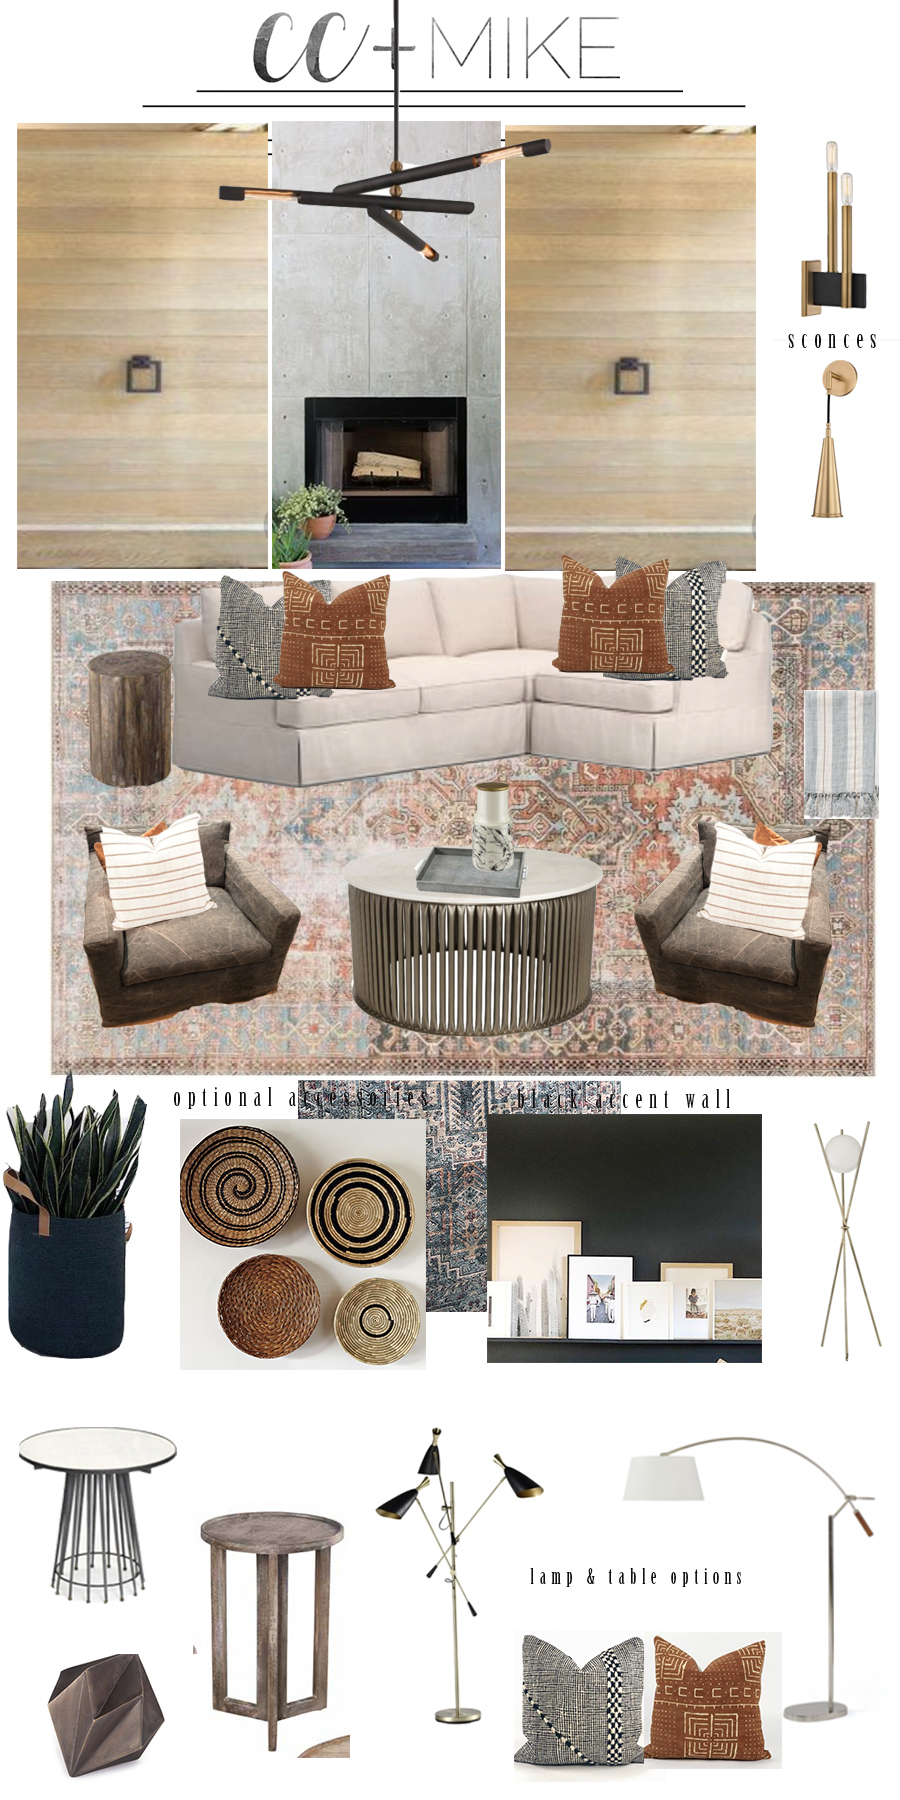
HERE IS THE DESIGN BOARD I CREATED FOR THE KANE LIVING ROOM:
So now that you’ve seen what our road map was for the design of the living room, let’s take a look at the…
BEFORE PICTURES OF THE KANE LIVING ROOM
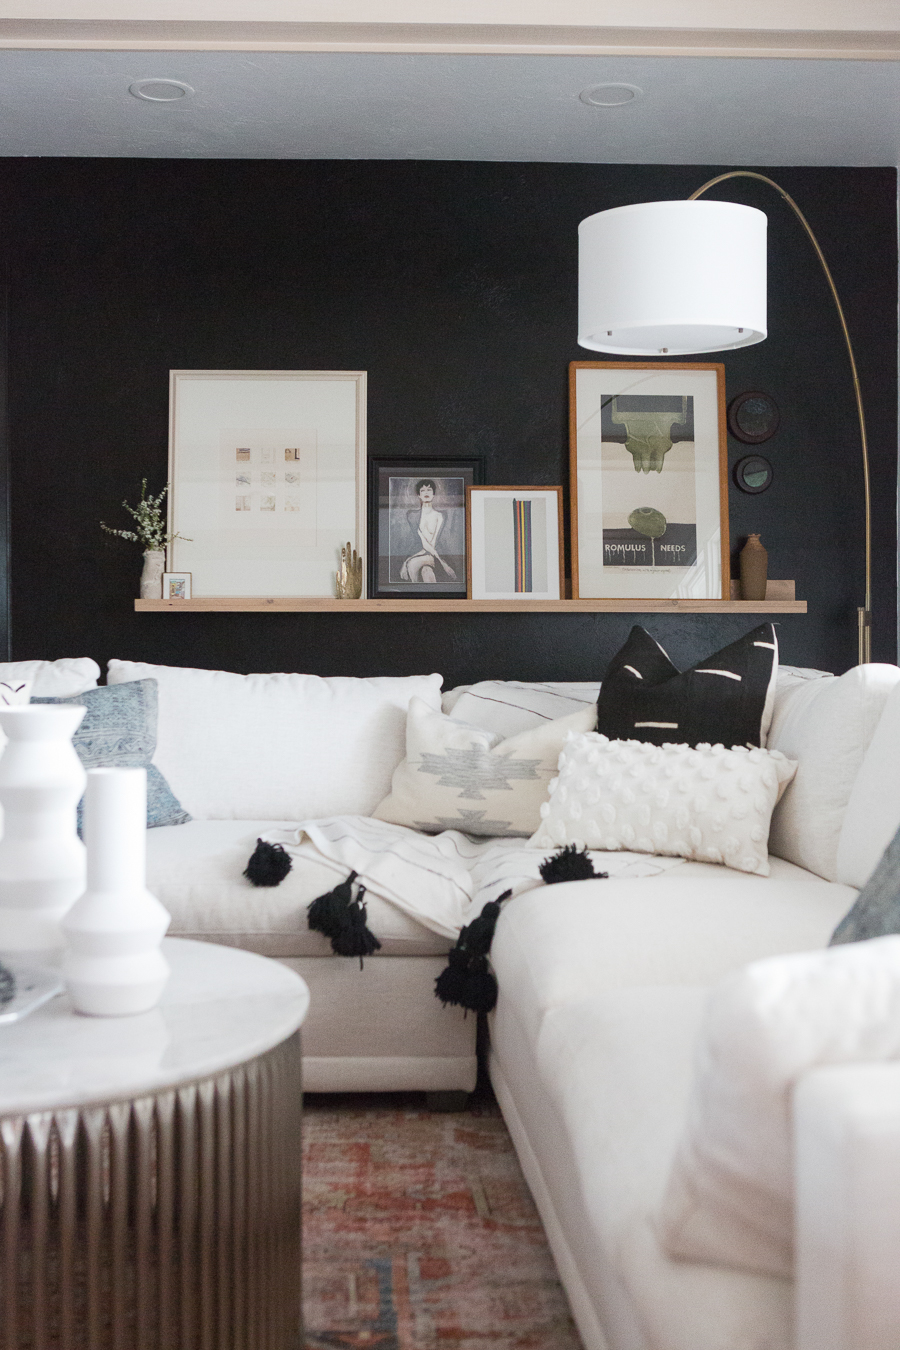
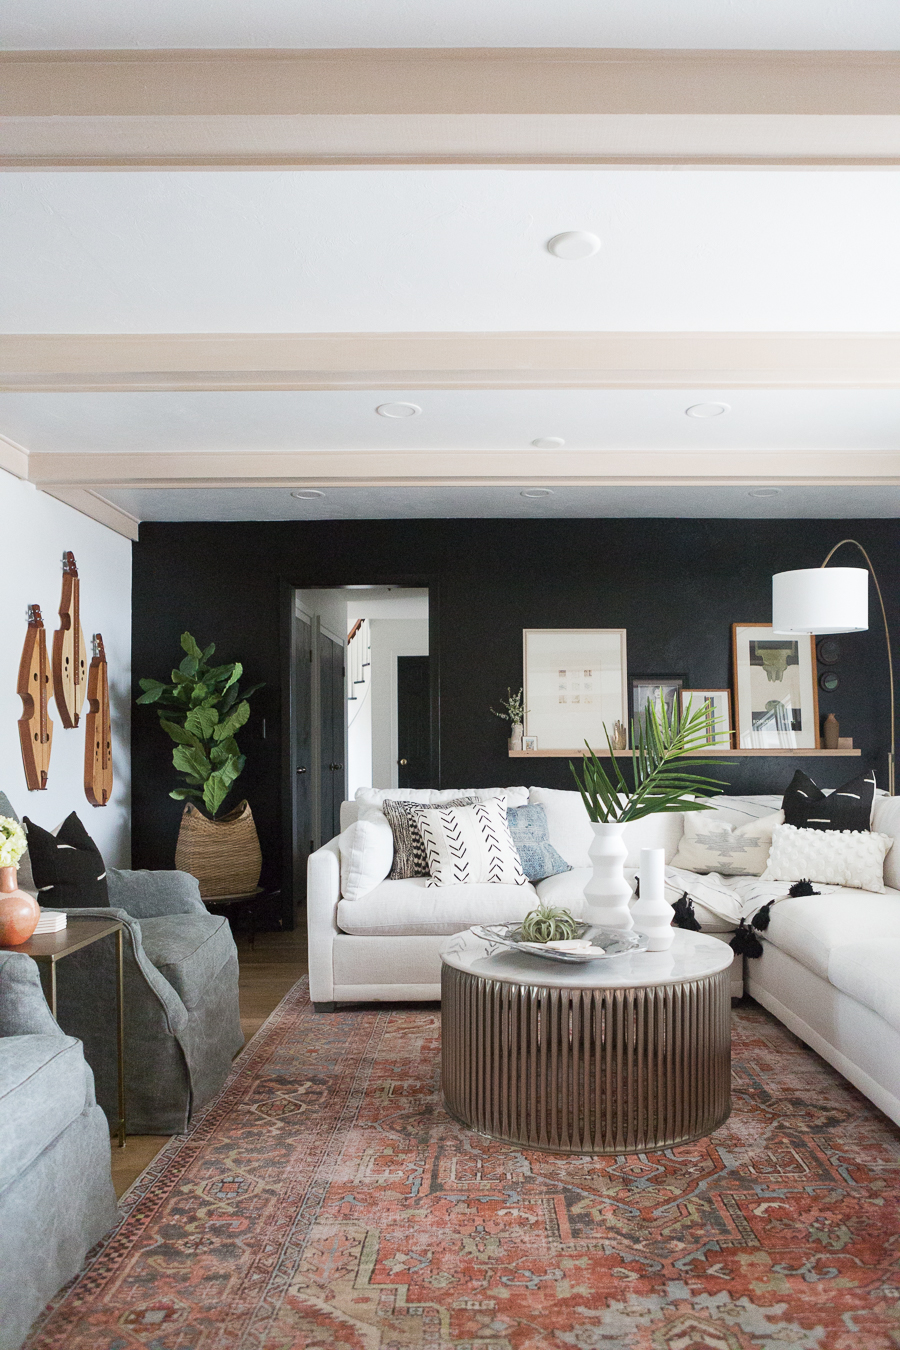
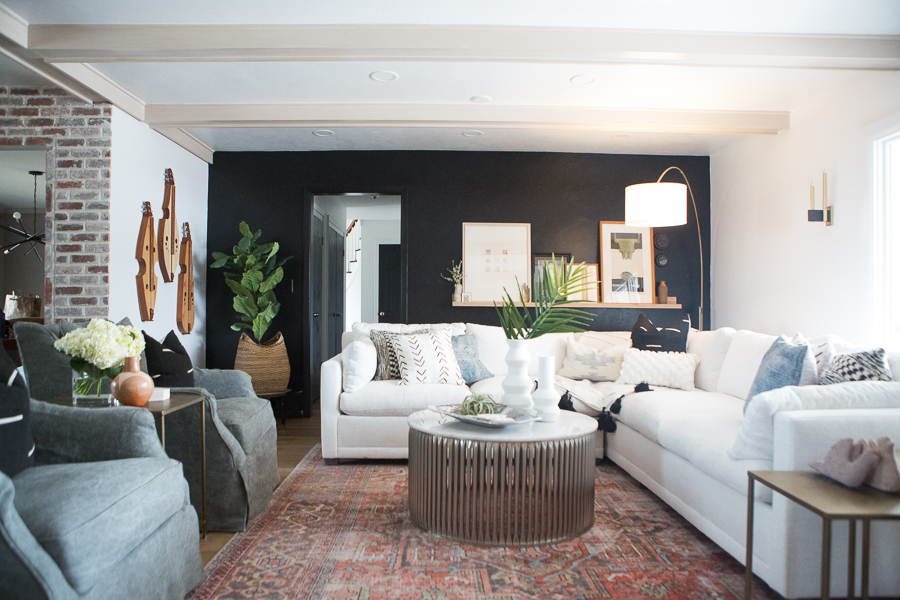
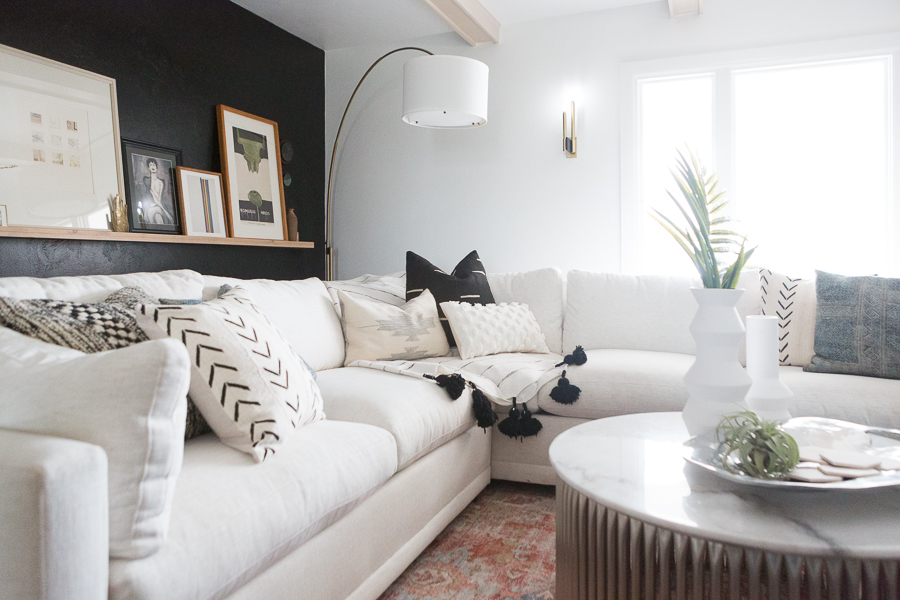
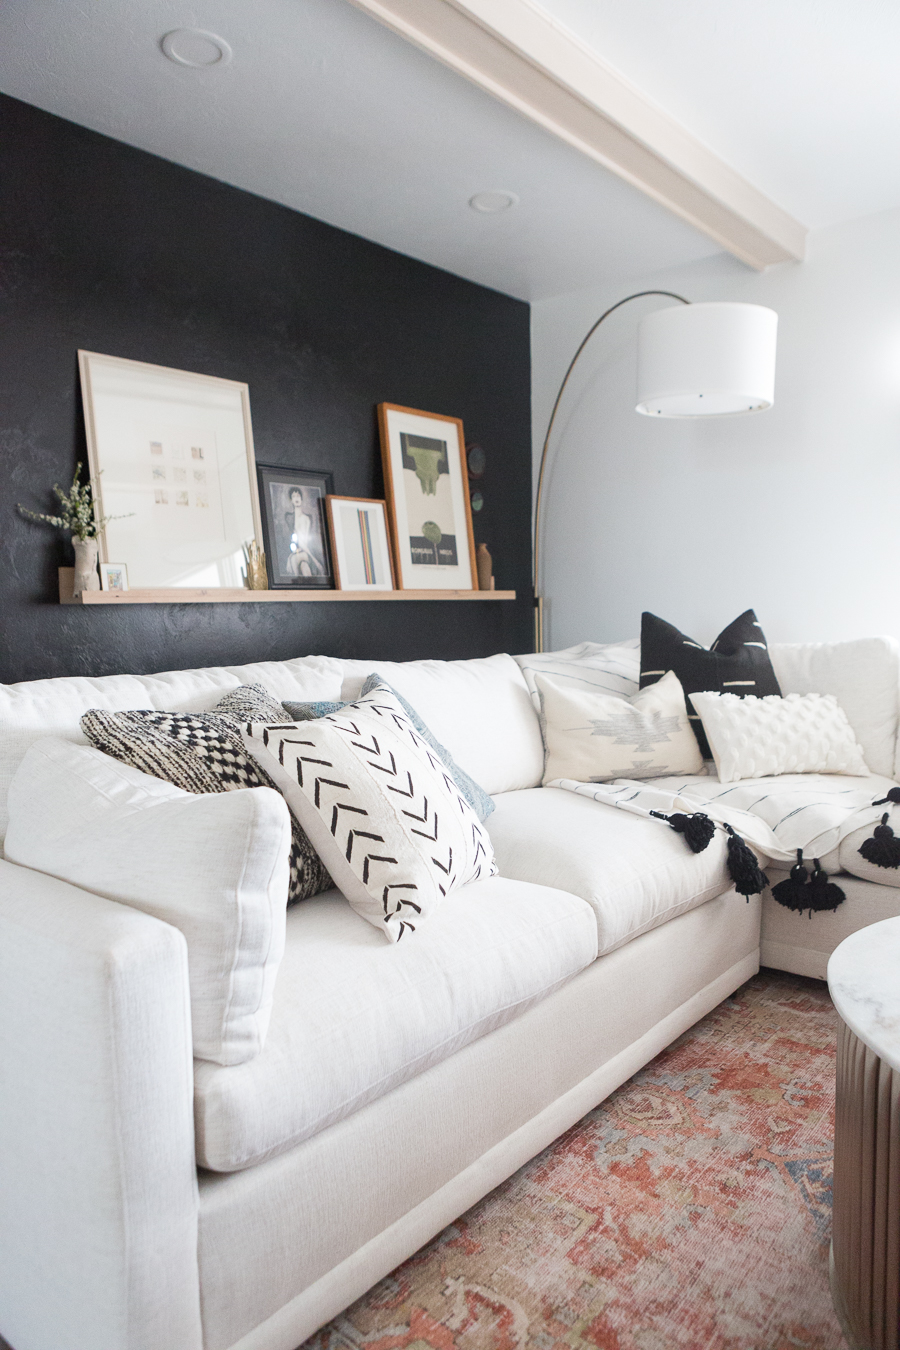
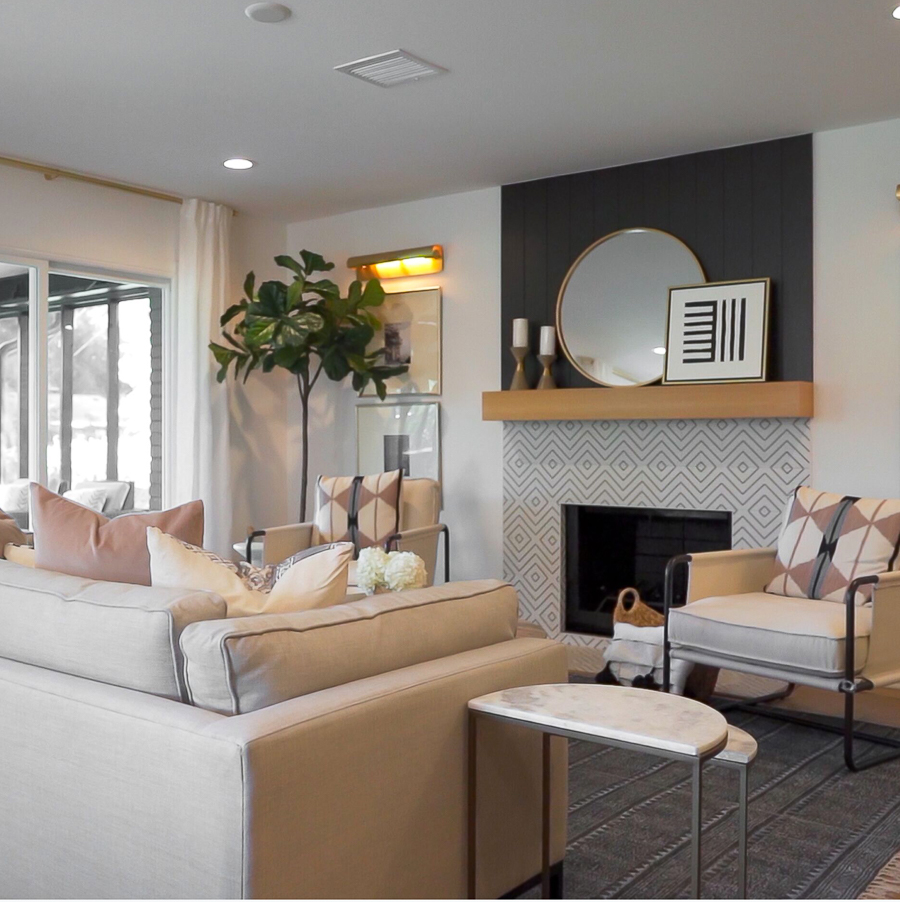
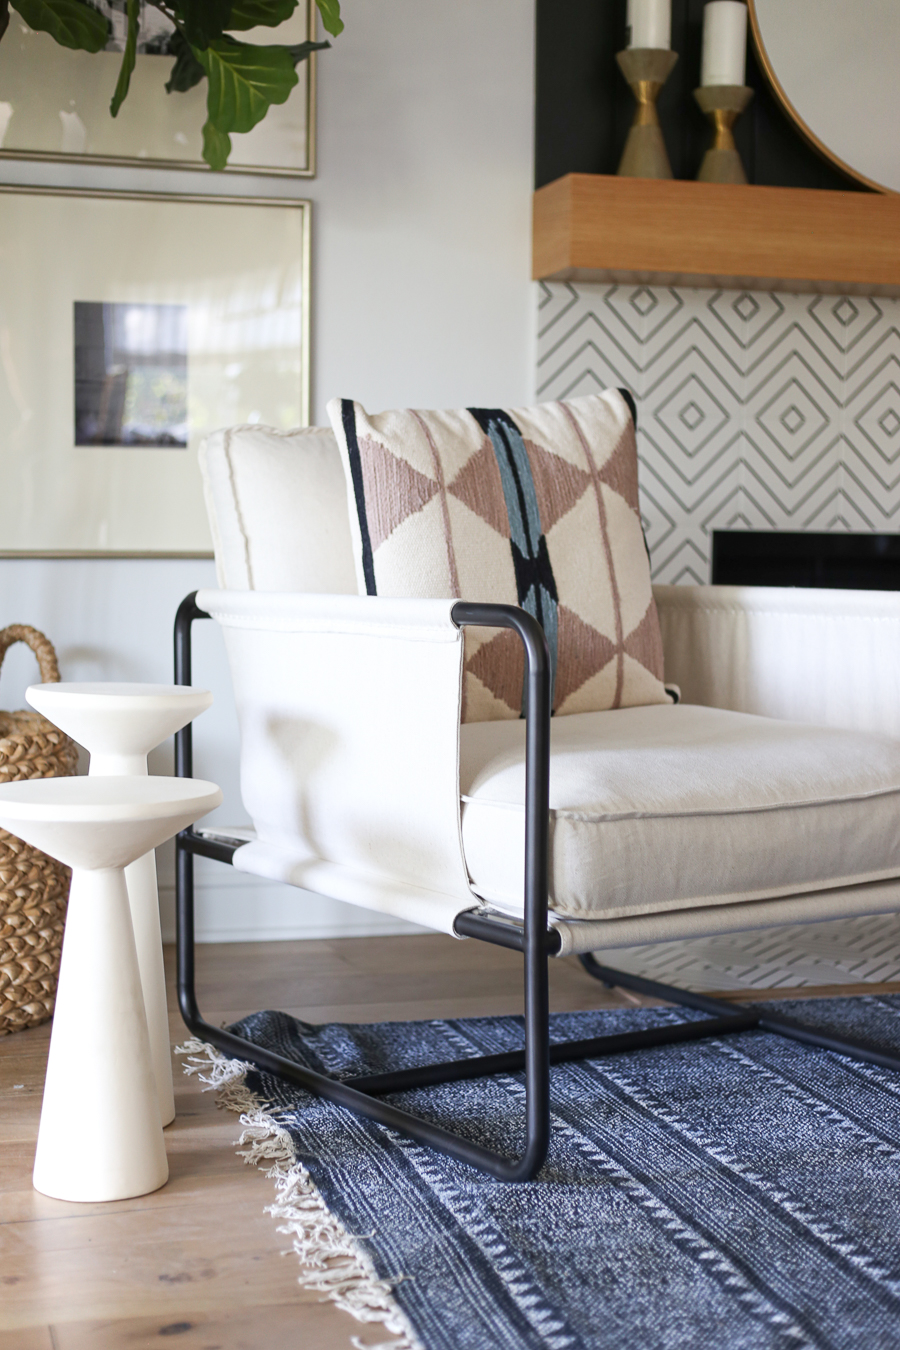
DRUMROLL PLEASE….HERE ARE THE AFTER PICTURES OF THE KANE LIVING ROOM REMODEL
PAINT – Black Beauty (Benjamin Moore) and Decorator’s White
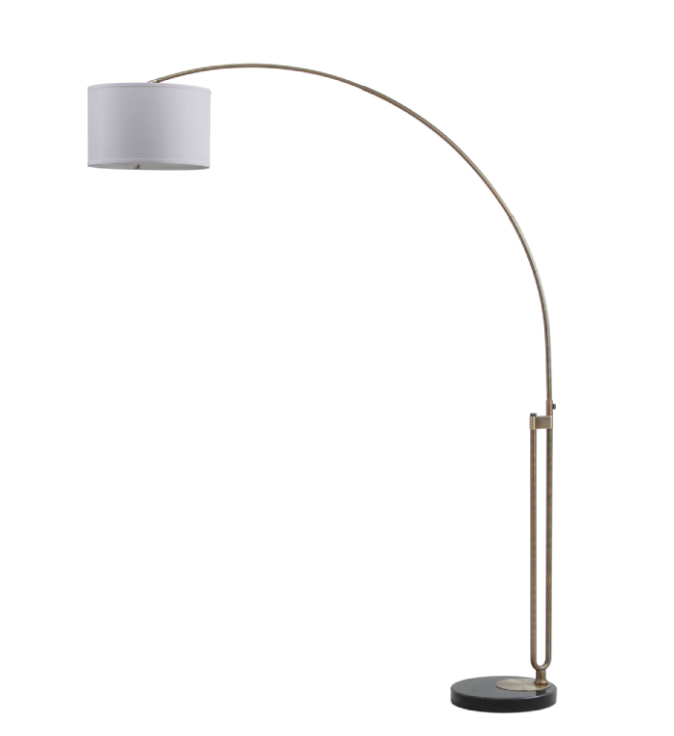
If you like the statement that the Arc Floor Lamp makes, you might want to check out these floor lamps from CC and Mike THE SHOP as well.
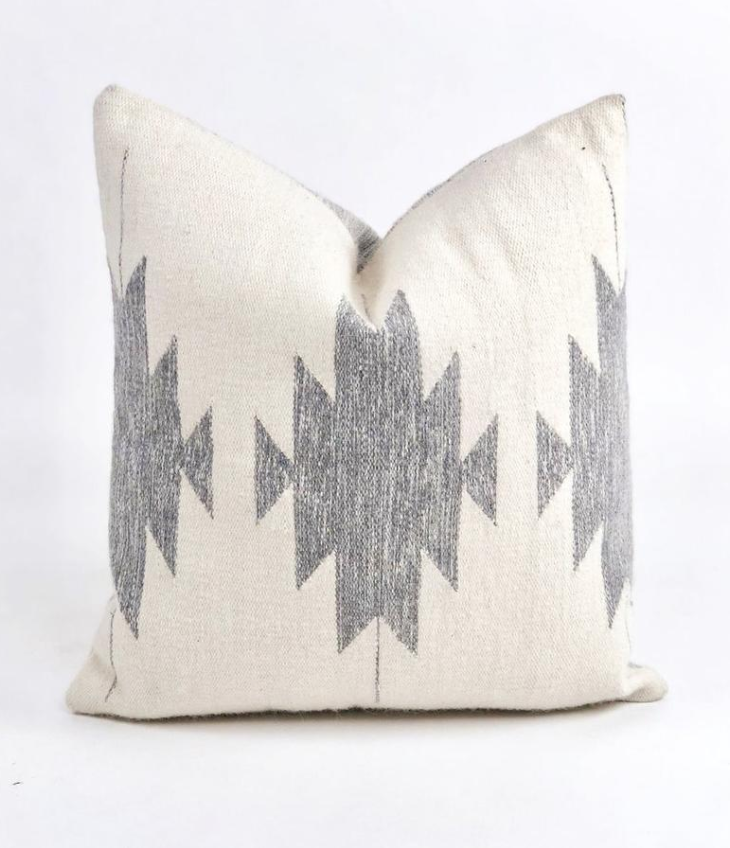
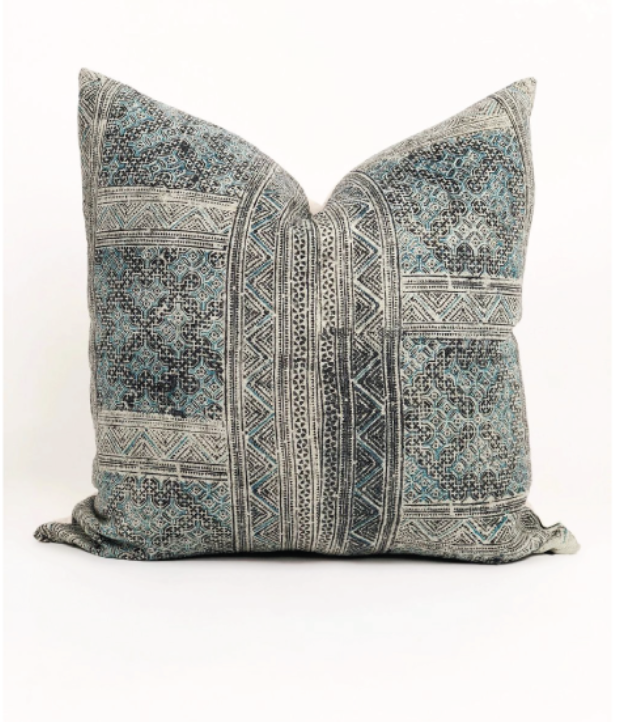
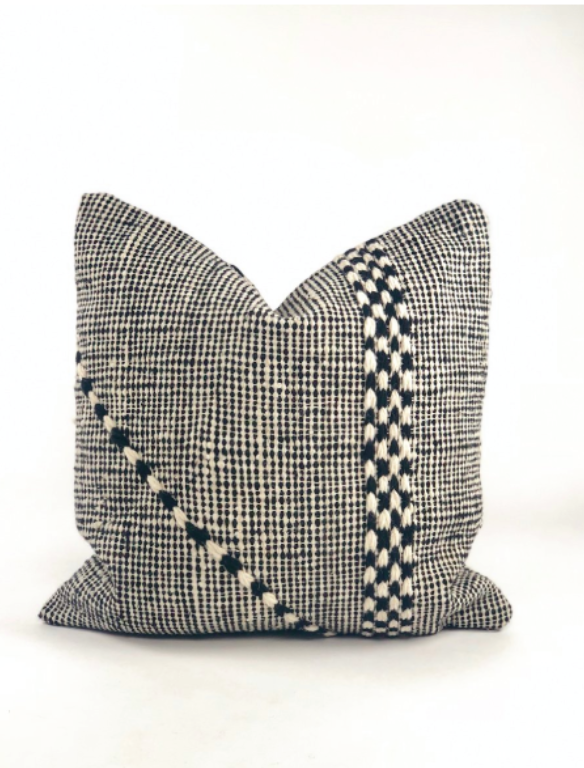
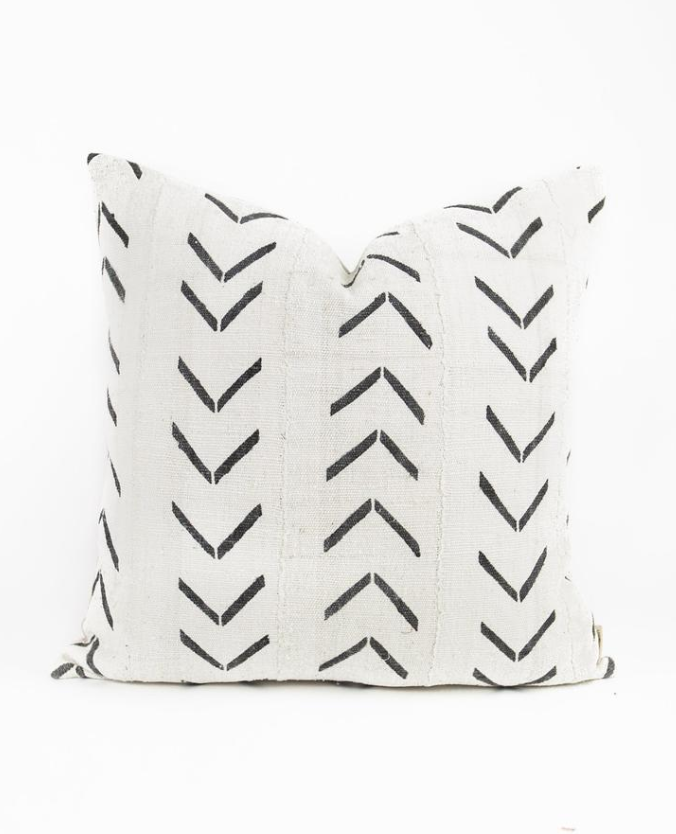
Here are the West Elm accessories and pillows we used in the living room:
I seriously love what the Polaris Arc Floor Lamp adds to this space. It just really wouldn’t be the same without it. You can buy this statement maker lamp for your own home right here! Just click on the picture to buy from CC and Mike THE SHOP.
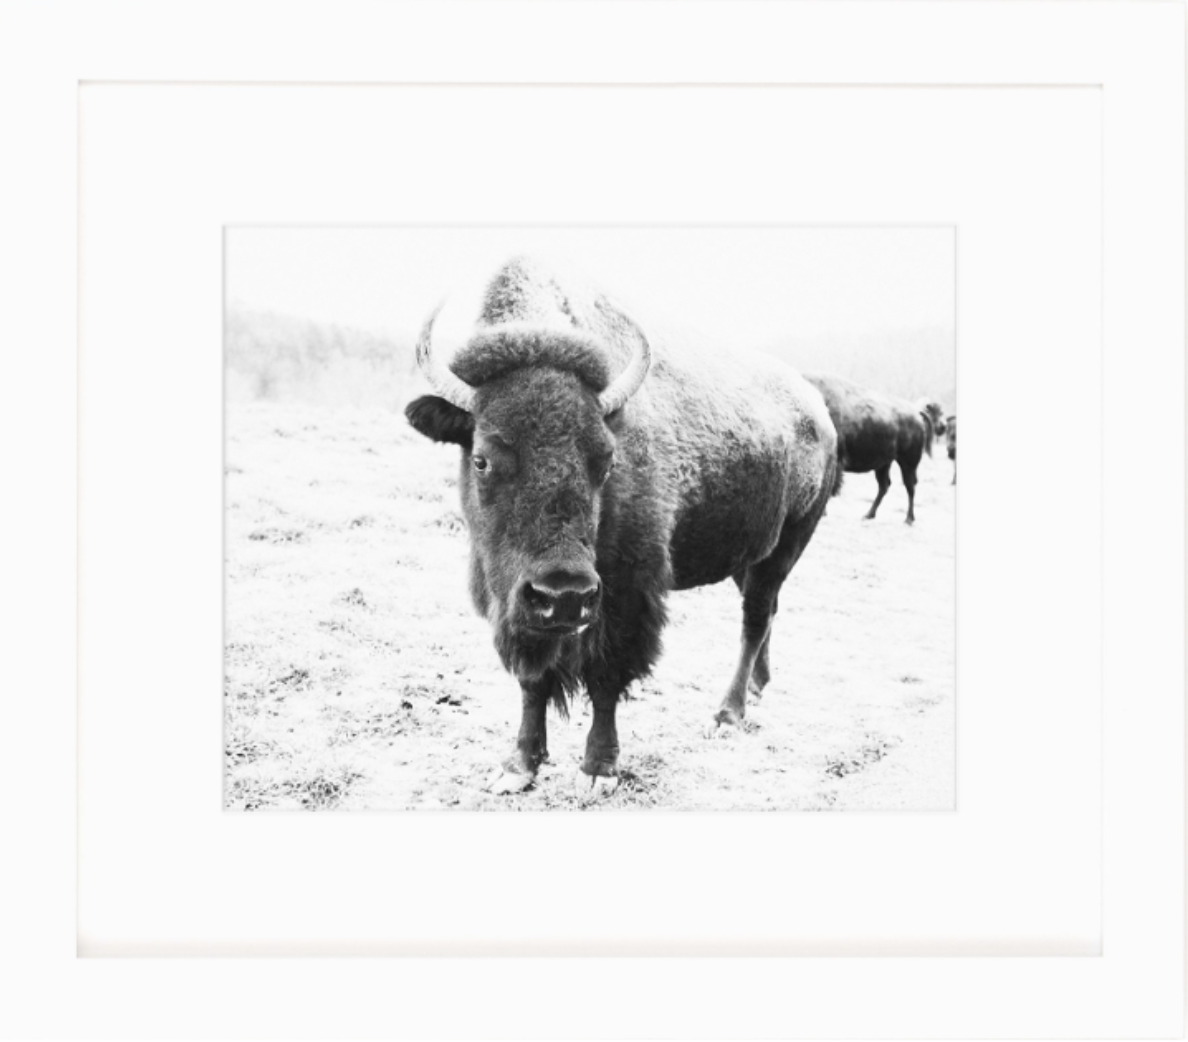
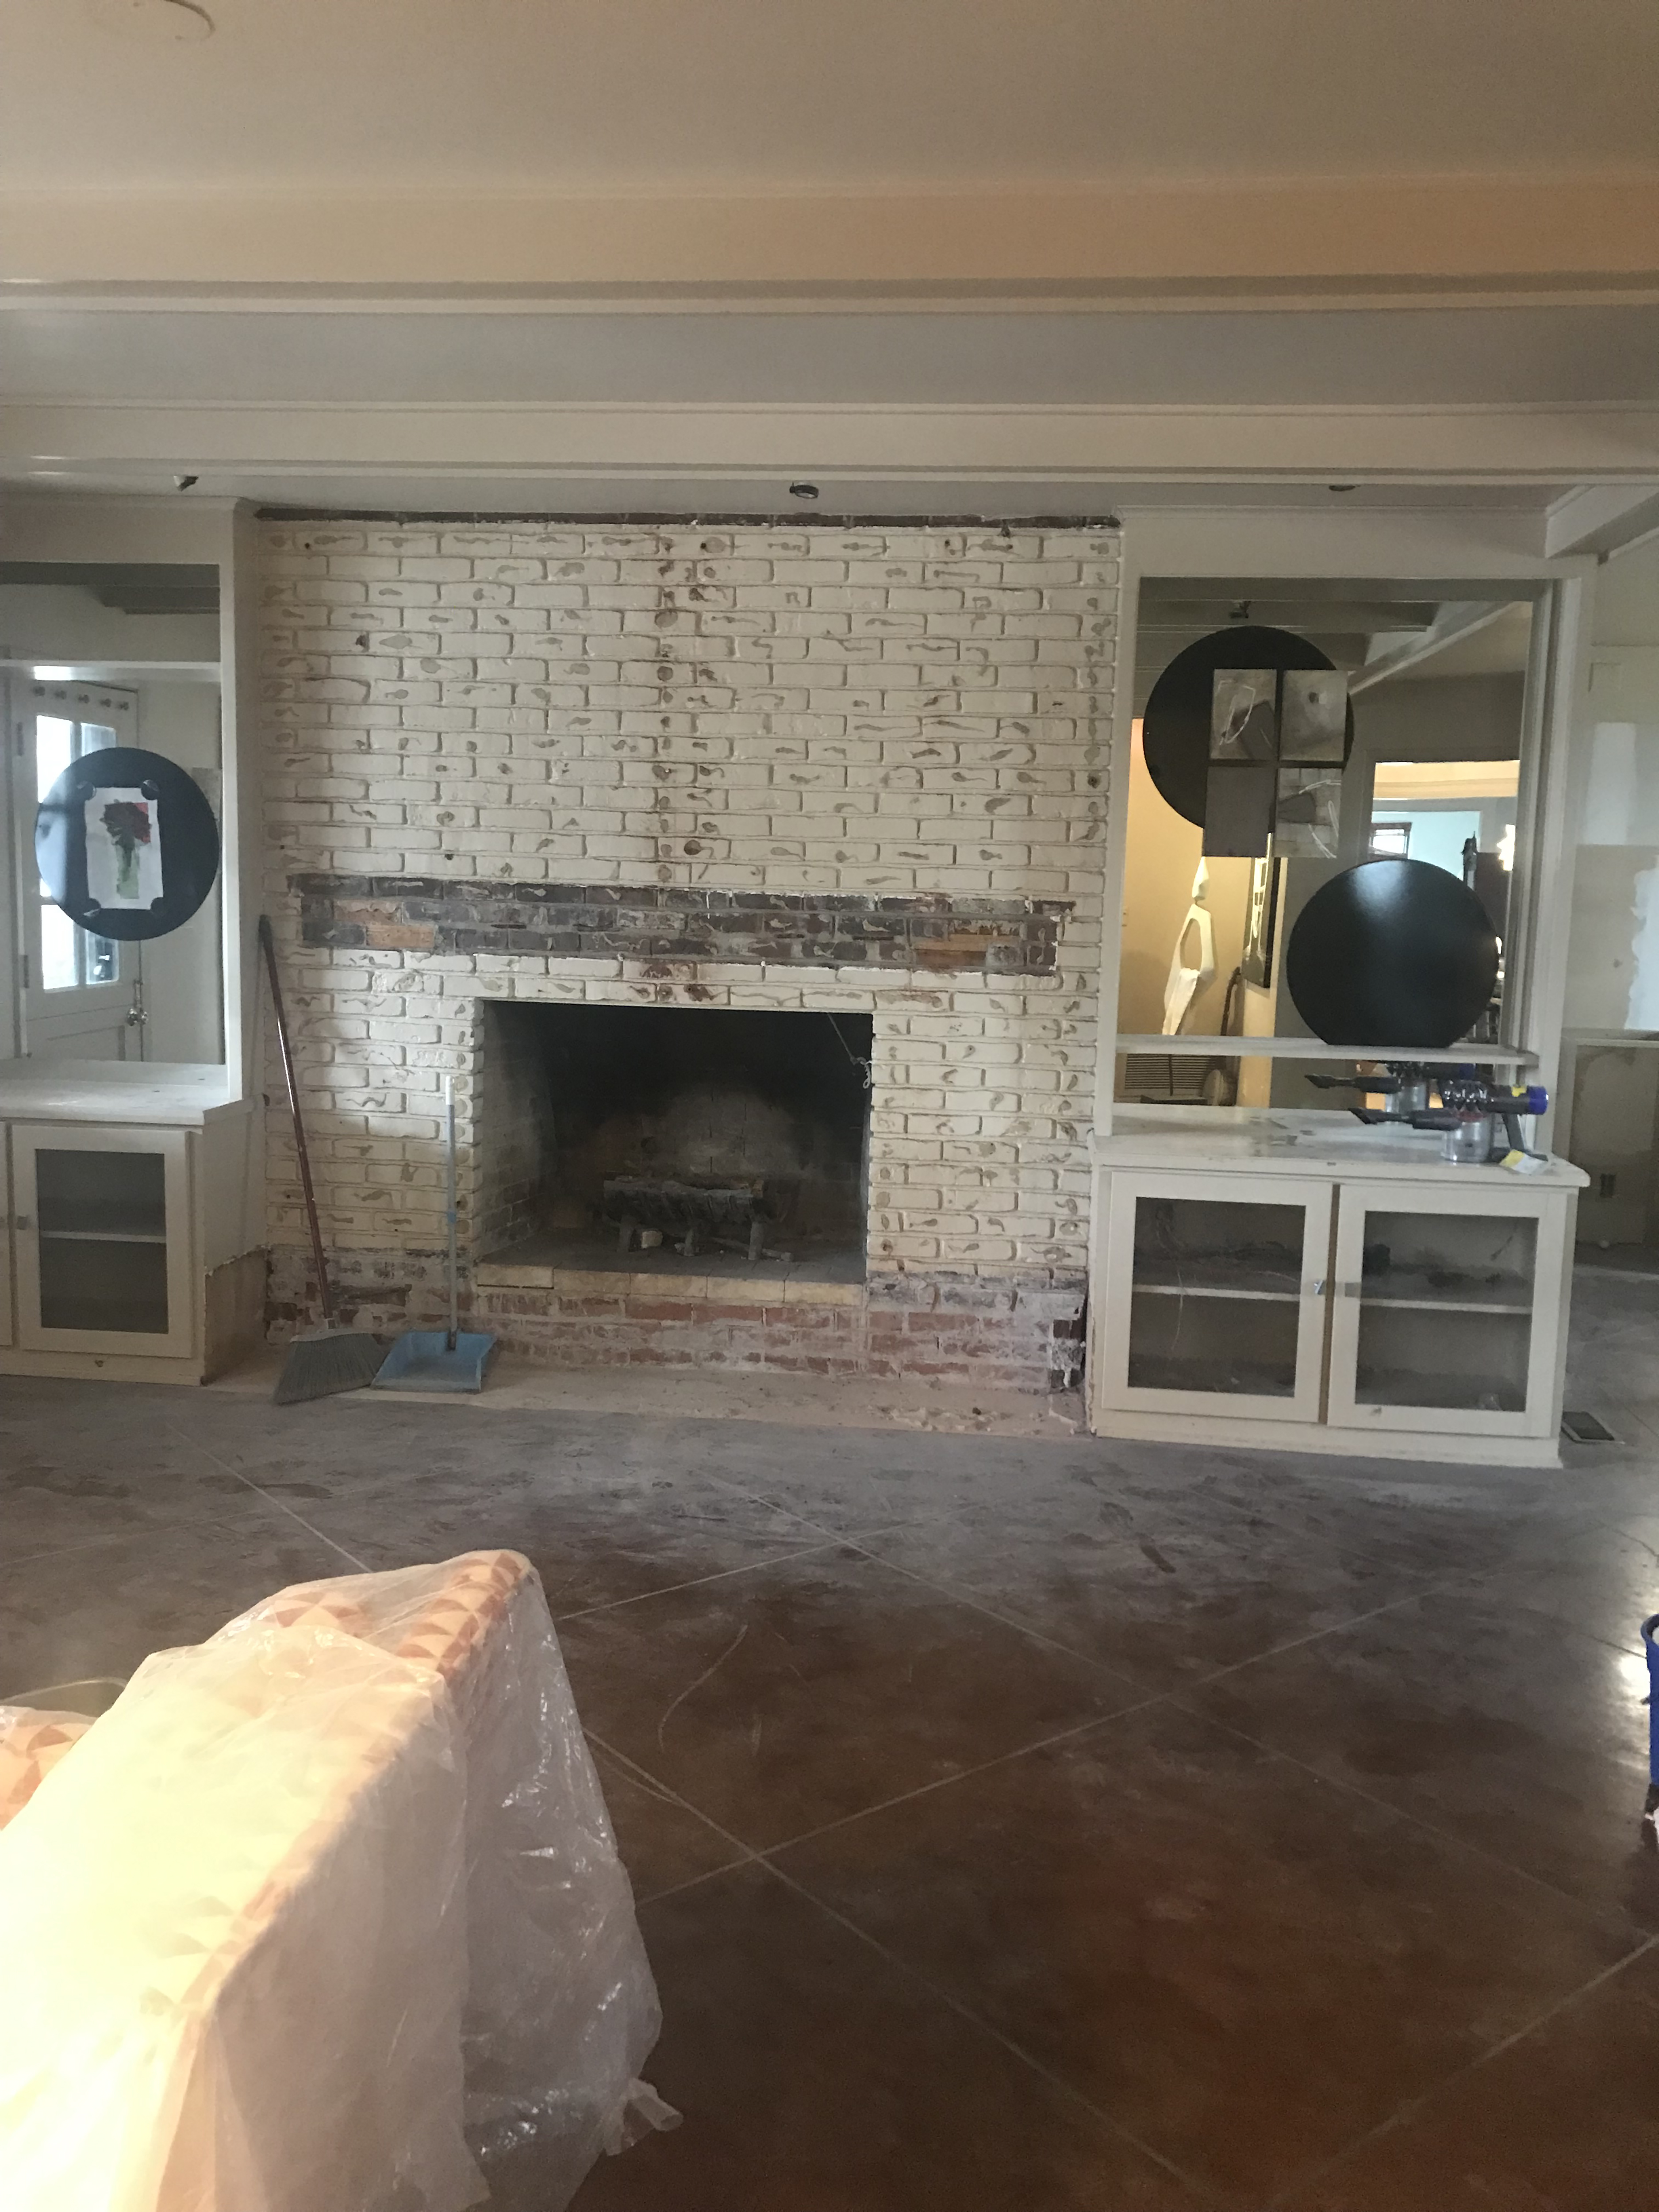
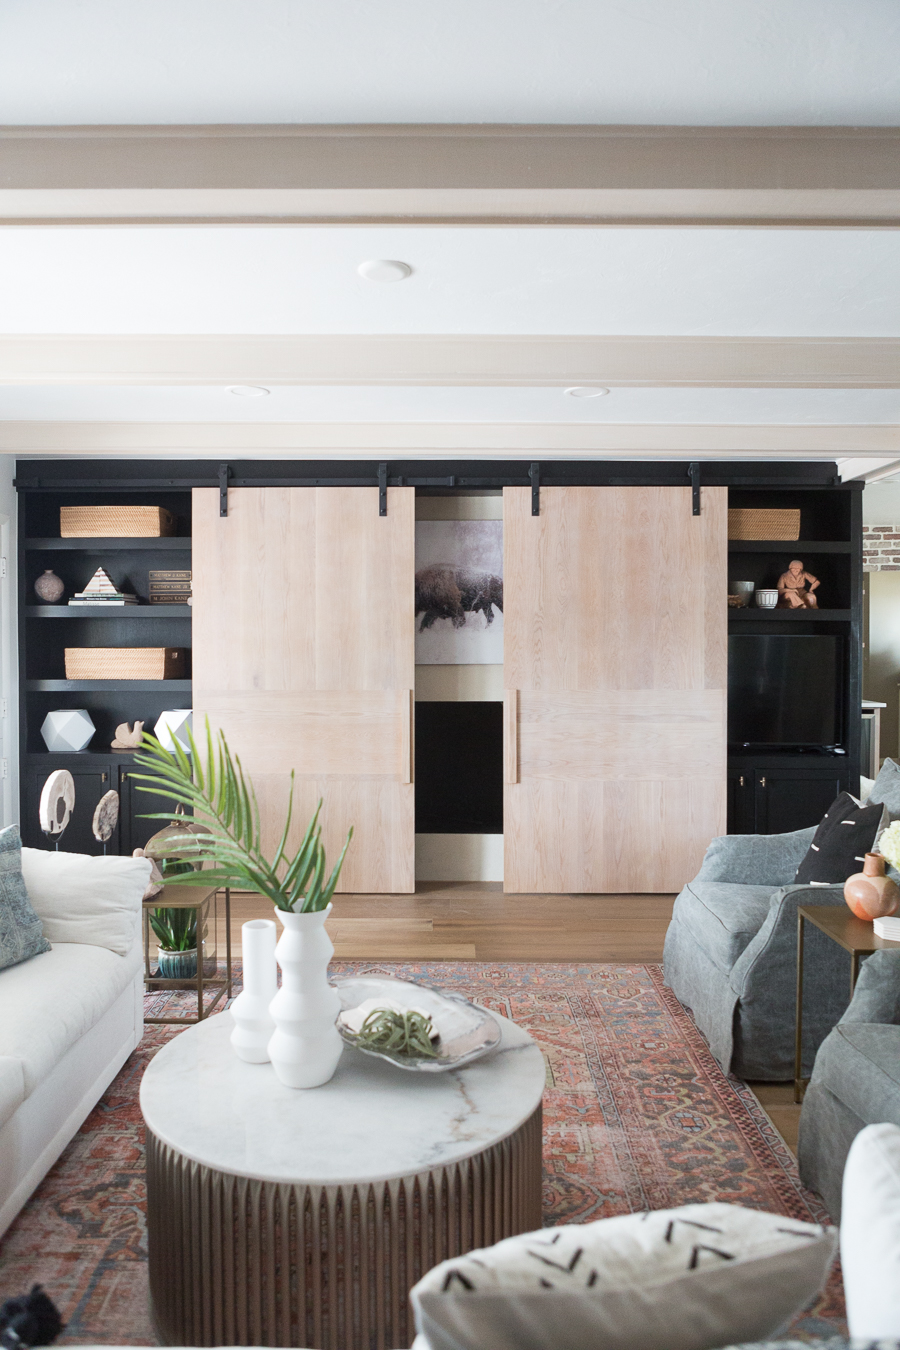
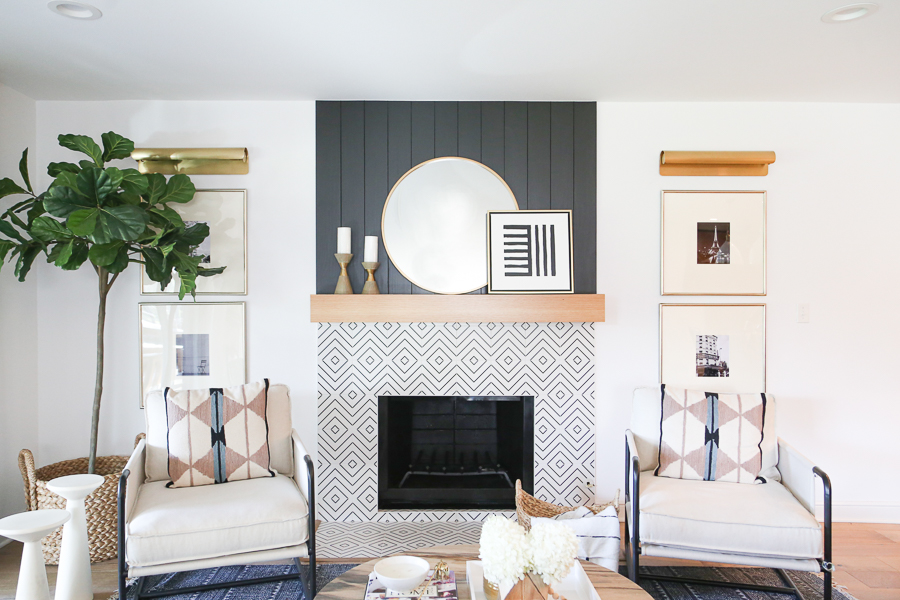
Another area we needed to focus on was the fireplace wall. We ended up ripping out some tile that was on the Kane’s fireplace and covering it with a stucco/cement type finish. Then we painted the shelves black and had sliding barn doors made to cover the wall. I absolutely love how it turned out! The buffalo art above the fireplace was a custom piece by John Kane, Cyndi’s husband. If you are looking for similar art, we have a buffalo print available in CC and Mike THE SHOP!
You can also shop the products we used from WEST ELM to style the shelves including baskets, vases, and book ends, here:
HERE IS THE BEFORE OF THE FIREPLACE WALL
AND HERE IS THE AFTER
One of my absolute favorite moments of this remodel is when Cyndi brought out these three beautiful mandolins (pictured below) that her brother hand-made. We were missing something on that back corner wall in the living room and I was trying to sort it out when I remembered Cyndi had told me about some mandolins her late brother had made for her. To be honest, I didn’t even know what a mandolin was but I asked her about them. She disappeared to another room and brought these three beautiful, hand-made wooden mandolins out with her. And I literally gasped out loud. I knew they were perfect and they were meant to be on that corner wall. We both were in tears when we hung them and saw how the perfectly completed the room. I firmly believe that no room is complete without something meaningful —handmade, painted, or gifted to you by someone you love, etc..—in it. The mandolins that Cyndi’s brother made truly completed this room, don’t you agree?
Another notable mention in this project are these gorgeous Abrams sconces, also from Hudson Valley Lighting. HVL is always a dream to work with and we also recently used them for every light in our Jenks Flip House project which I can’t wait to reveal soon.
SHOP HUDSON VALLEY LIGHTING & ALL LIGHTING USED FROM CC AND MIKE THE SHOP HERE:
We hope you enjoyed the CC and Mike Kane Project Remodel Reveal! We sure had a blast doing this project together and hope you find some inspiration for your own home!! Follow along for our upcoming reveals: The FRISCO PROJECT, Meadow lark Project, Frisco II project, AND our Jenks house reveal!! You can subscribe to our blog or follow along with us on Instagram – CCANDMIKECREATIVE – for daily updates in our feed and Instagram stories! Hope to see you there!
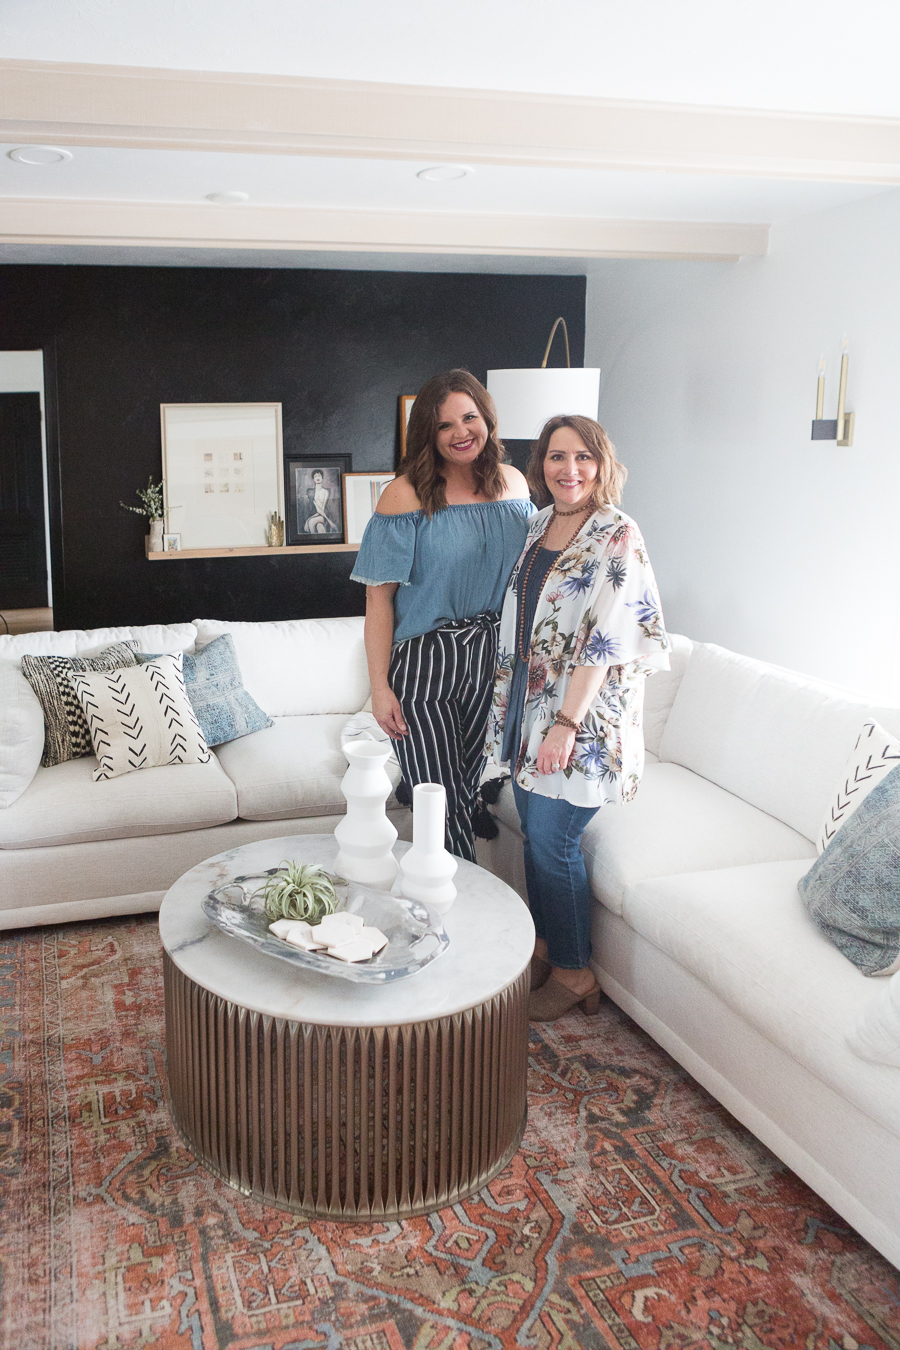
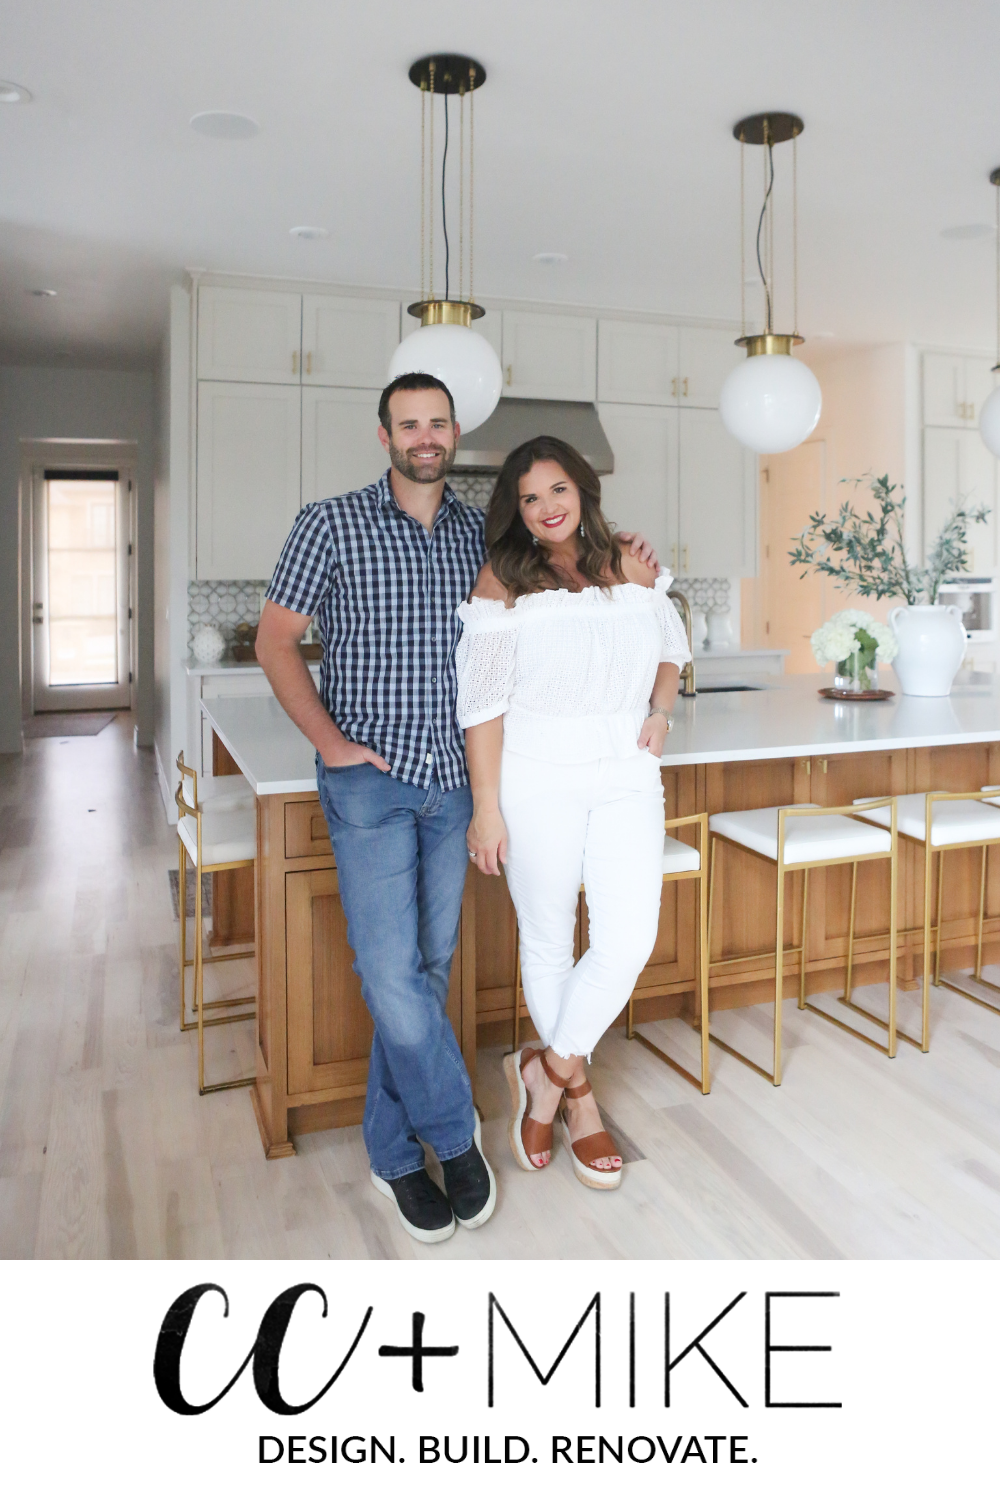
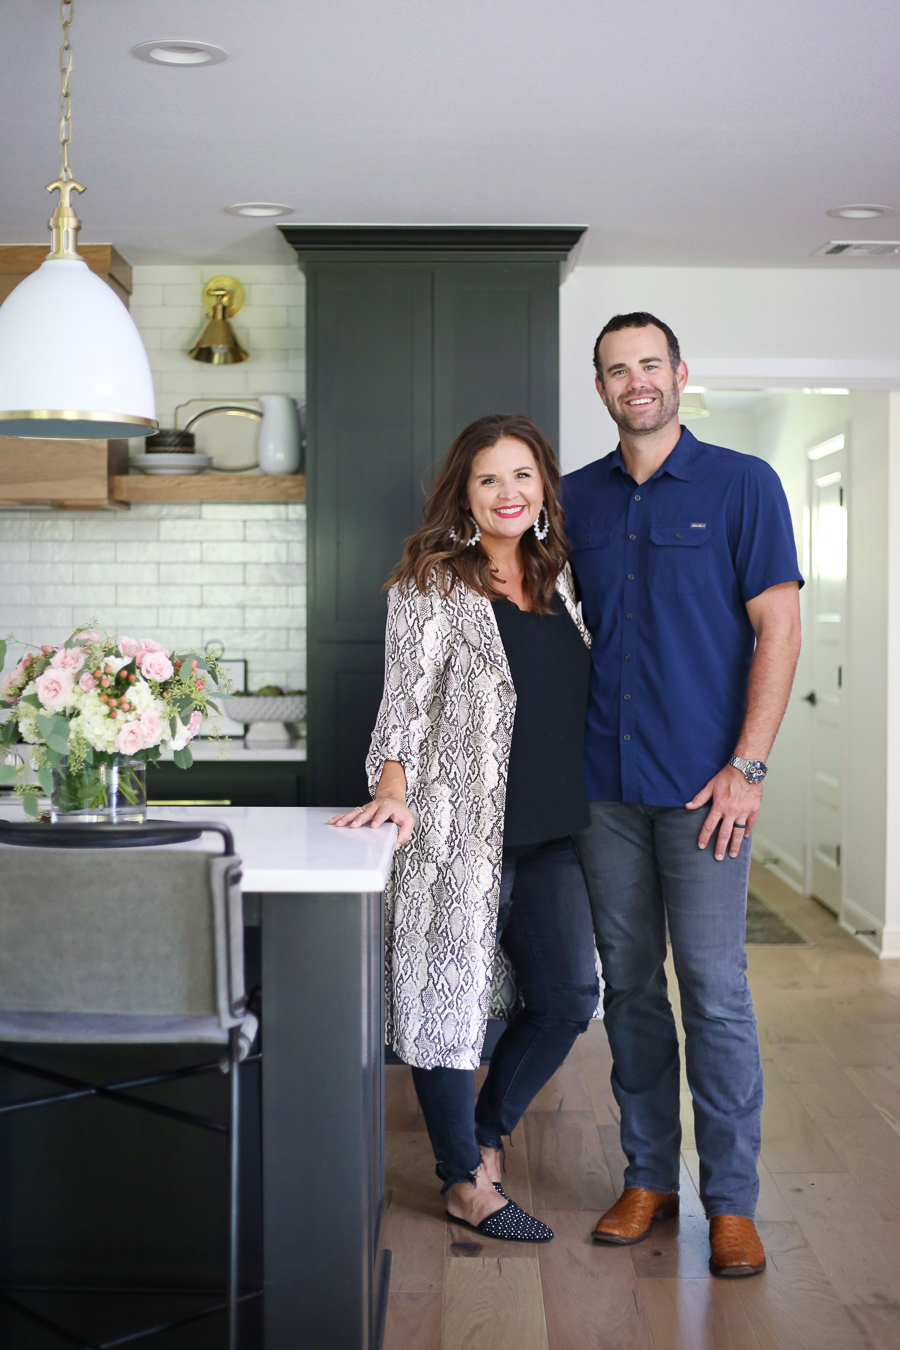
Here’s me and my friend Cyndi. She’s the best. No seriously, she’s the best. Love you CK. Thanks for letting me be a part of this project with you and for trusting me even when I had crazy ideas like black statement walls.
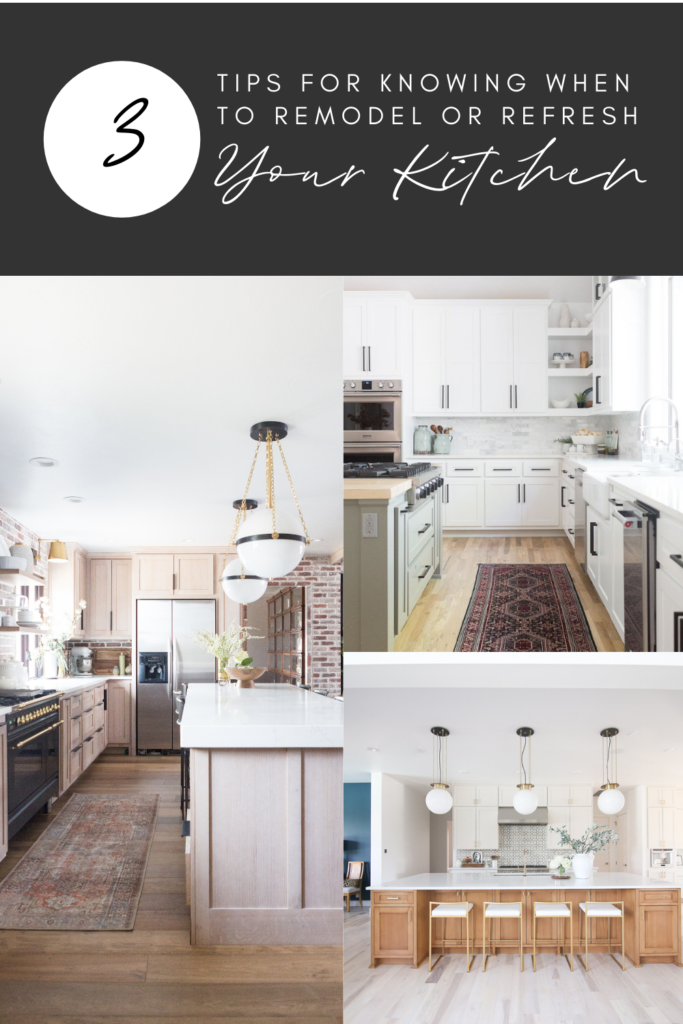
One of the most frequently asked questions we get is about kitchen remodels. This is why we are sharing 3 Tips for Knowing When to Remodel or Refresh a Kitchen with you today. People come to us knowing they want a new kitchen look, but oftentimes they have absolutely no clue how much a full kitchen renovation can cost. From brand new cabinets to floor refinishing, to backsplash, countertops, sinks, hardware, lighting, paint, and much, much more. A full kitchen renovation can start at around $50K depending on the size of the kitchen and scope of the project. It can go up from there depending on the selections chosen and how extensive the remodel work is.
When people hear that number they are often shell-shocked and are suddenly left wondering if a full kitchen remodel is within their budget or not, and if not, what to do? So begins the debate – DO WE GO ALL IN AND DO A KITCHEN REMODEL, OR CAN WE GET AWAY WITH JUST DO A KITCHEN REFRESH? When determining whether or not to refresh or remodel your kitchen you should consider the quality of the existing cabinets, the function of the kitchen, and the cost.
1. CONSIDER THE QUALITY OF THE PRE-EXISTING KITCHEN CABINETS:
When deciding whether or not to refresh or remodel a kitchen the first thing to consider is the shape of the pre-existing cabinets. In the Kane remodel, my recommendation was undoubtedly to do a FULL KITCHEN REMODEL, including gutting the cabinets. Let’s talk about why….
CC’s RECOMMENDATION: Full kitchen remodel because the cabinets were not in good enough condition, in my opinion, to be painted successfully and the kitchen layout was not functional for the family.
This family-centered home had a heavily used and loved kitchen that was the heart of the home. The cabinets were original to the house and when she told me they wanted to remodel I took a close look at the cabinets. I noticed that some of the cabinets doors didn’t seem to function well and the cabinets had already been painted multiple times. I felt that painting the cabinets again would be a waste of time and money and would not give the client the desired end result, so I recommended a full remodel for this kitchen.
Now Let’s talk about the Stonebrook Kitchen Refresh that we just completed!
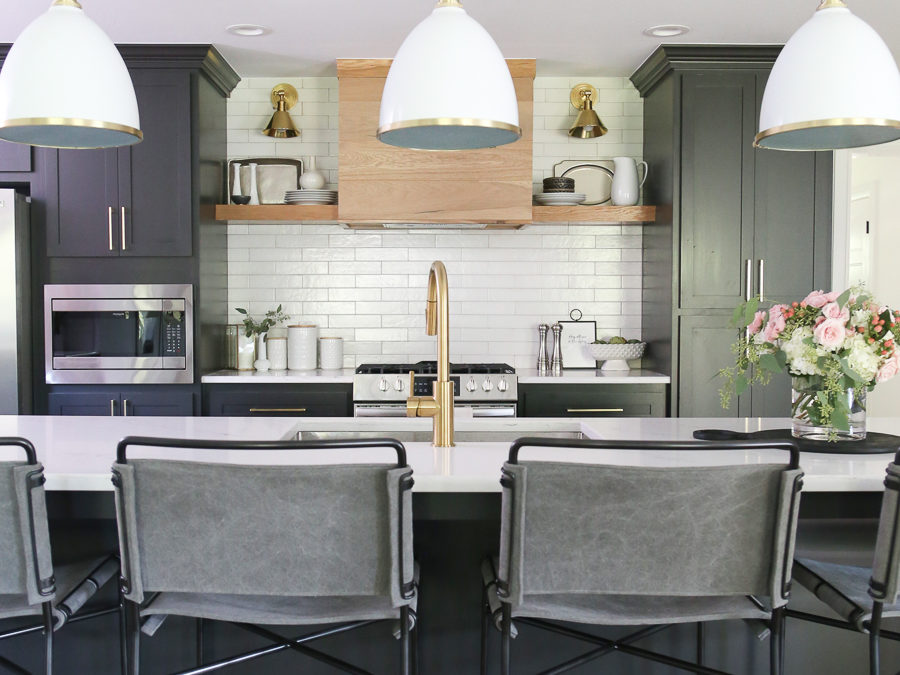
In comparison to the Kane Remodel, if you look at before pictures of the Stonebrook kitchen, you will notice the cabinets were less than 10 years old and were very solid and heavy quality cabinetry. My recommendation in this instance was that a coat of paint alone would update the kitchen cabins and give the client the desired end result. In other words, a full kitchen remodel (including gutting the cabinets) was not necessary for the Stonebrook remodel.
BEFORE OF THE STONEBROOK KITCHEN REFRESH
As you can see from the before photos, the Stonebrook kitchen had great, quality wood cabinets. These were high end cabinets in a home that was around ten years old. BUT, the kitchen was dark and dated and the homeowners wanted to brighten it up!
CC’s RECOMMENDATION: For the Stonebrook Kitchen, I recommended a refresh which meant keeping the pre-existing cabinets and just painting them then updating with hardware, and new countertops.
In contrast to this, I will show you the Good Remodel Project that we completed in 2017. This was another kitchen that had the original cabinets that were over 30 years old and the function and layout of the kitchen needed updated to work for the family. So, my recommendation in the Good Remodel was also to do a full remodel not just a refresh (see photos below).
CC’sRECOMMENDATION: For the Good Kitchen, I recommended a full remodel since the cabinets were original to the home which was built in the 1970’s and the function and layout of the kitchen wasn’t ideal for the family. Which brings us to my second question that you need to ask yourself when trying to consider whether to do a kitchen refresh or a kitchen remodel.…
2. CONSIDER THE FUNCTION OF THE KITCHEN:
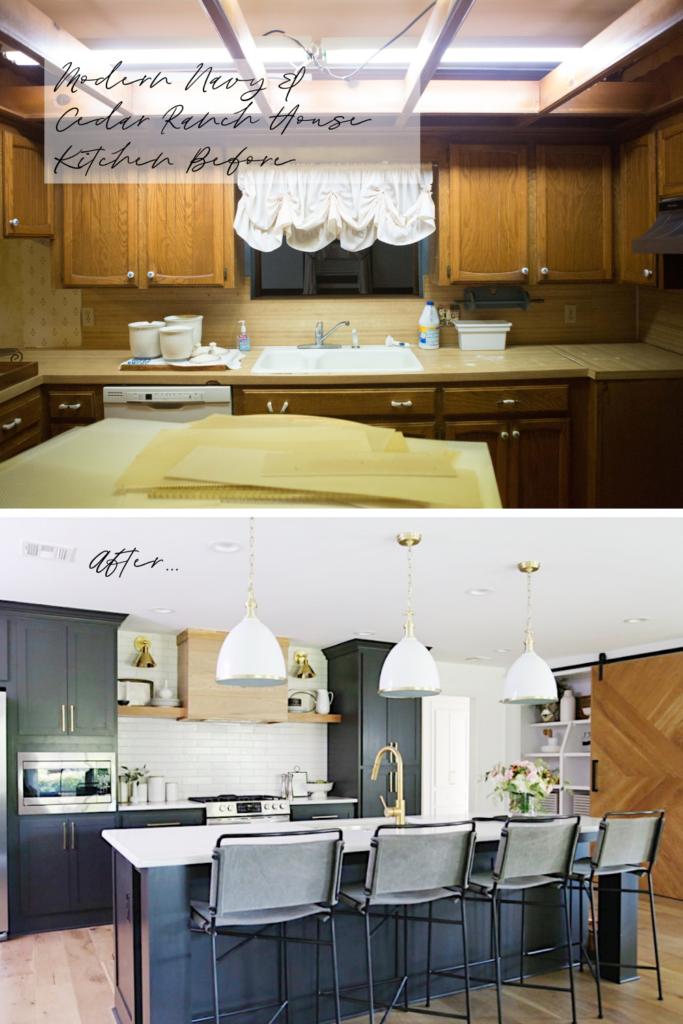
If the kitchen doesn’t function the way you want it to, then you probably want to consider more of a full remodel. Gutting the cabinets and doing a full remodel allows you to replan the space and move elements where you want them to go (within reason considering where your plumbing elements are) so that it works for you. Again, in the Kane remodel, Good Remodel, and Navy and Cedar Modern Ranch remodel (See below), I recommended a full kitchen remodel because the function of the kitchens were limited and very dated. I felt by doing a new kitchen design, including new cabinets, we could not only drastically improve the look of the kitchen but we could also improve the function. This is in contrast to the Stonebrook kitchen refresh were I recommended a refresh because the fiction of the kitchen was perfect as it was.
We completely gutted the cabinets and did a full remodel in the Modern Navy & Cedar Ranch House for the same reasons – the pre-existing cabinets were in no way going to work both because they were in bad condition and they didn’t function properly.
Stonebrook Kitchen Refresh
The Stonebrook Kitchen Refresh
In contrast to this, my recommendation for the Stonebrook Project was to refresh not remodel because their kitchen design functioned beautifully. There really wasn’t anything that the homeowner needed to change from a function standpoint and the flow of the kitchen was perfect, so we did a refresh (painting pre-existing cabinets) instead of doing a full remodel (gutting the kitchen and doing new cabinetry).
Just to revisit what this kitchen looked like before, let me show you another picture just so you can see what a fresh coat of paint, some new hardware, countertops and some new barn stools, and some styling, did for this kitchen!
3. CONSIDER THE COST
I would be remiss if I did not mention the cost. It’s probably one of the first things people want to ask us about when the call for a consult. Bottom line is, full kitchen remodels are costly. The larger the kitchen, the more costly it’s going to be for new cabinetry, flooring, lighting, backsplash, countertops, and so on and so forth.
After you take a good hard look at #1 (IS THE QUALITY OF THE PRE-EXISTING CABINETS GOOD?) and #2 (DOES THE KITCHEN FUNCTION WELL?) then it is time to be really honest with yourself. If you answered NO to both of those questions, then you are probably just going to waste your money by painting and updating low-quality cabinetry that doesn’t function well for you. I would recommend saving your money and waiting until you can do the kitchen the right way and do the full remodel! But that’s just my two cents.
Are you considering a full-scale remodel? If so, CC and Mike can help make your dreams into a reality. From concept to completion, CC and Mike can help you remodel your home or turn a dated home in an amazing neighborhood into your dream home. We do, however, only accept full-scale remodel projects. To see if we are fit for your next project, please fill our contact form with details about your remodel needs and we will be in touch!
Welcome to the CC and Mike Modern Navy and Cedar Ranch Style Remodel Reveal! Wow, that was a mouthful – ha! :).
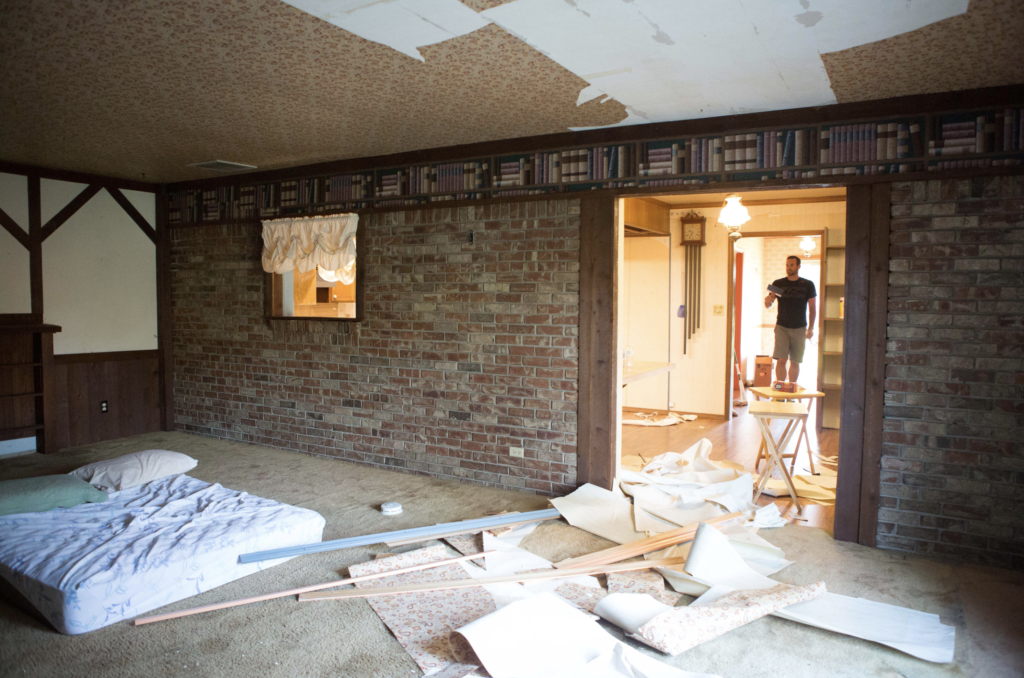
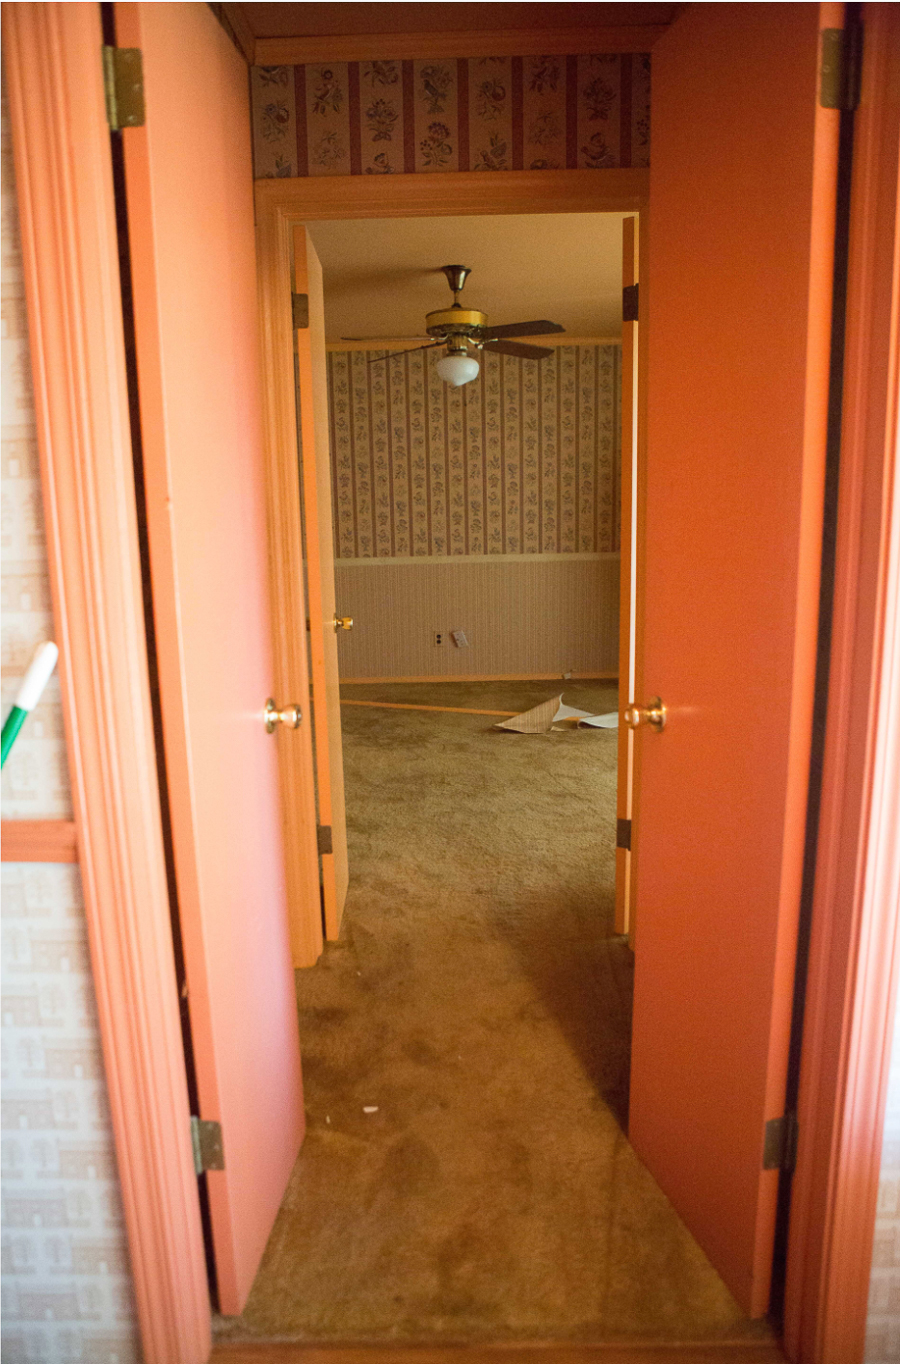
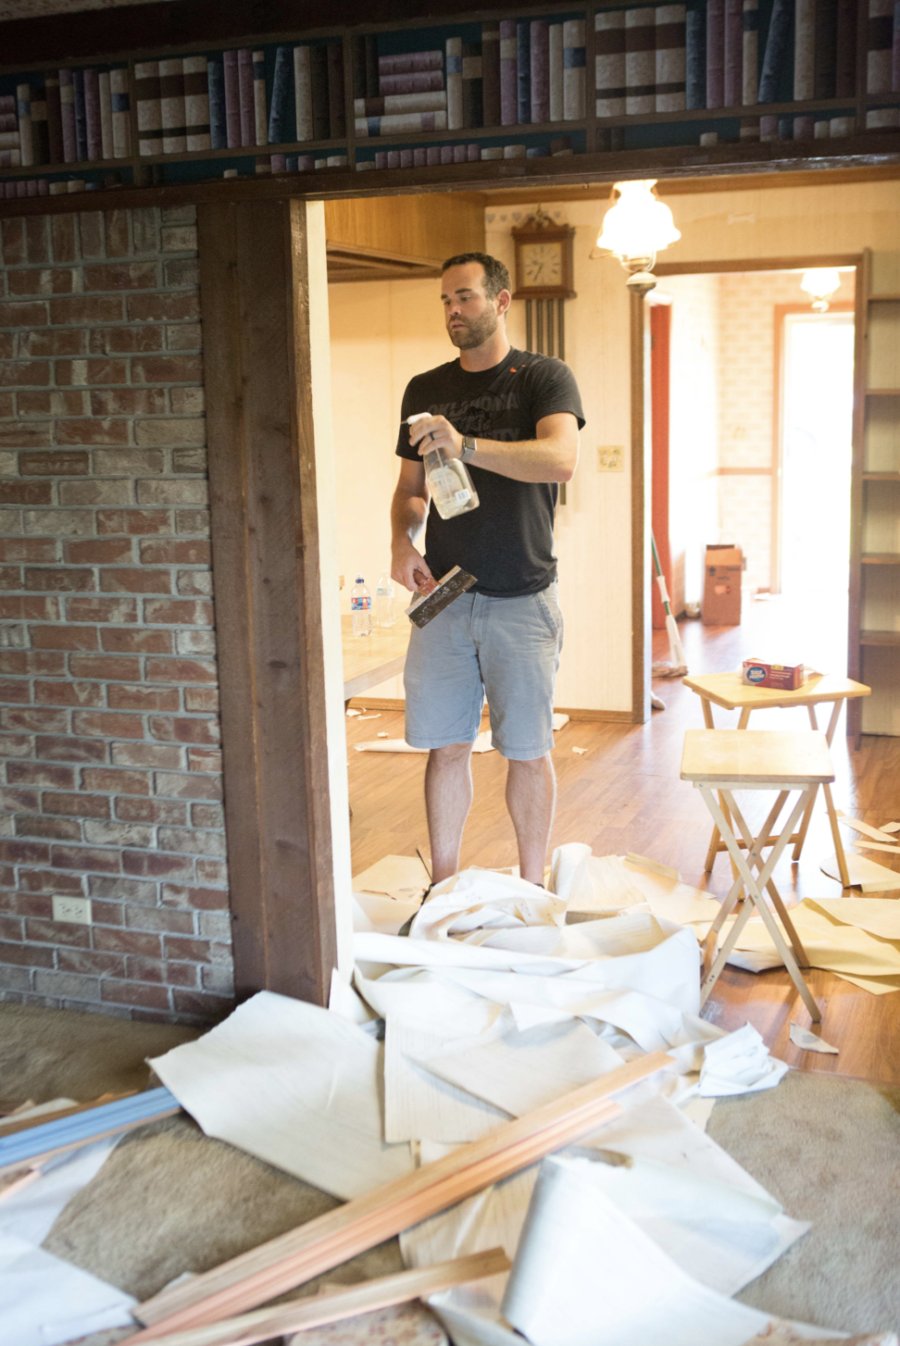
When my friend from college called to tell us she had a ranch style home in downtown Jenks that she thought we should look at, we hopped in the truck to head that way. When we pulled up to the large lot with a ranch style home stretching across it, I knew I wanted it. Mike Miller took a little more convincing when he saw the peach walls, floral wallpaper — covering the ceilings I might add — and the closed-off kitchen with dark cabinets and dropped ceilings. Oh yes, and the house was a 2 bedroom 1 bath which Mike thought would be difficult for resale.
THE BACKSTORY
As we walked through the house, my friend explained to us that the daughter of the original owner was selling it after she had passed away. The same person had built and owned this house for over half a century. She raised her family and made thousands of memories between those very walls. By the time we left, we decided to buy it and remodel it. What I didn’t know at that time, though, was that throughout the course of remodeling this house we would meet Dorothy, the sweet 90-year-old neighbor who was best friends with the original owner, and we would completely fall in love with the story of this home. We loved listening to Dorothy recant her memories of sitting on the back porch drinking coffee and hanging out with her friends around the kitchen table. After meeting Dorothy, we truly fell in love with this home and neighborhood and developed such a sense of pride in becoming a part of this story…
You see, I’ve realized that EVERY HOME HAS A STORY. And what an honor it is to get to be. a part of this story, to know the memories that were made within its walls and to be able to prepare it for a new family, the sweet newly married couple who ended up buying this house, to make a lifetime full of memories in.
Come on in! And Welcome to the CC and Mike Modern Navy and Cedar Ranch Style Remodel.
THE EXTERIOR:
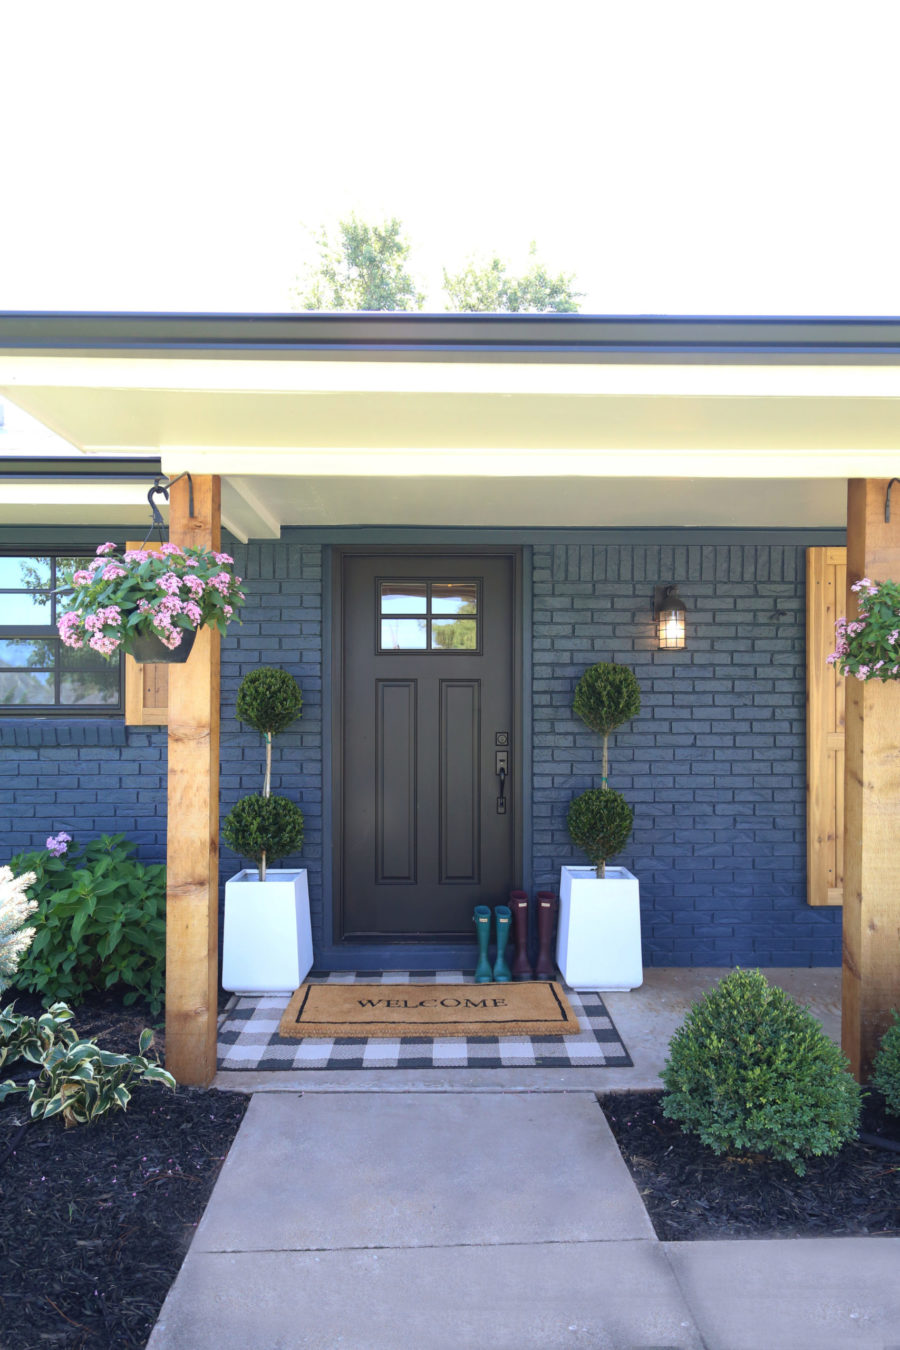
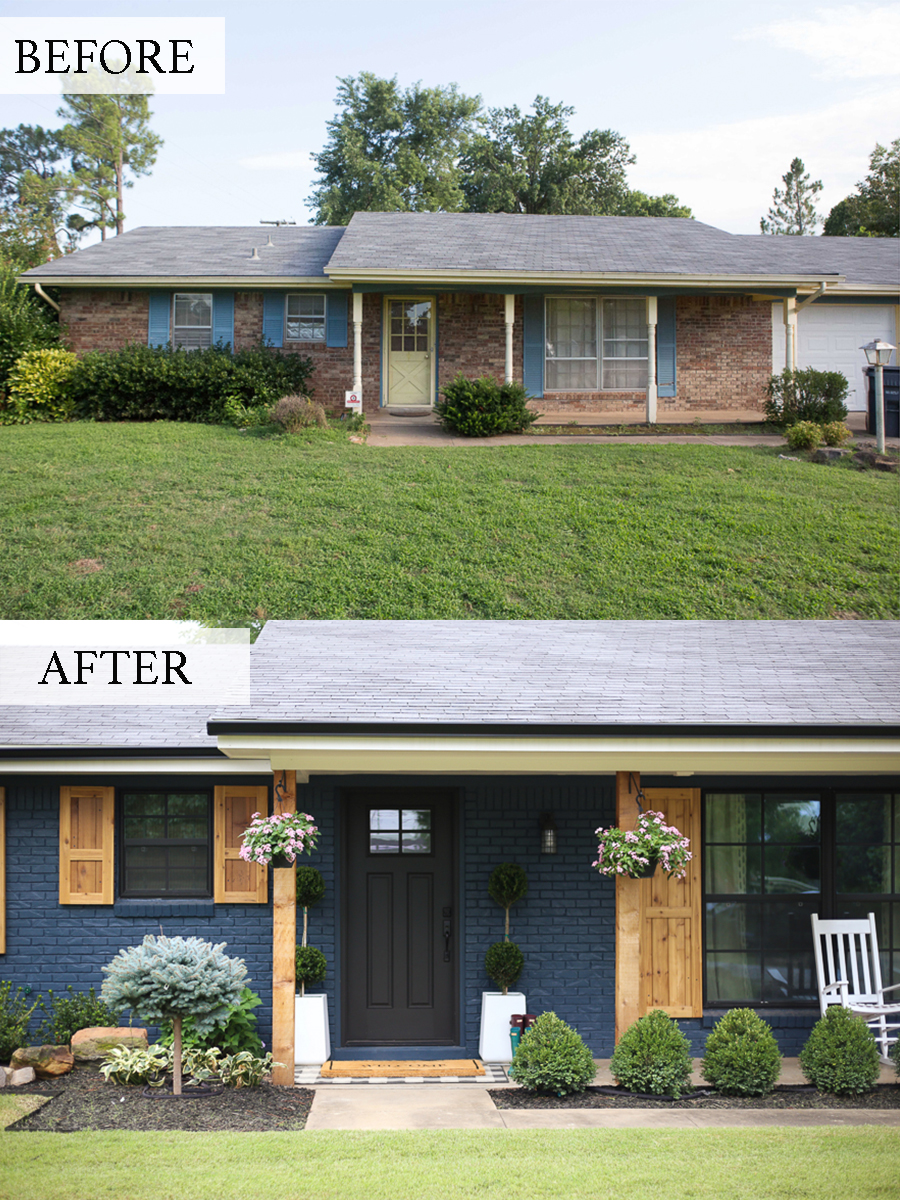
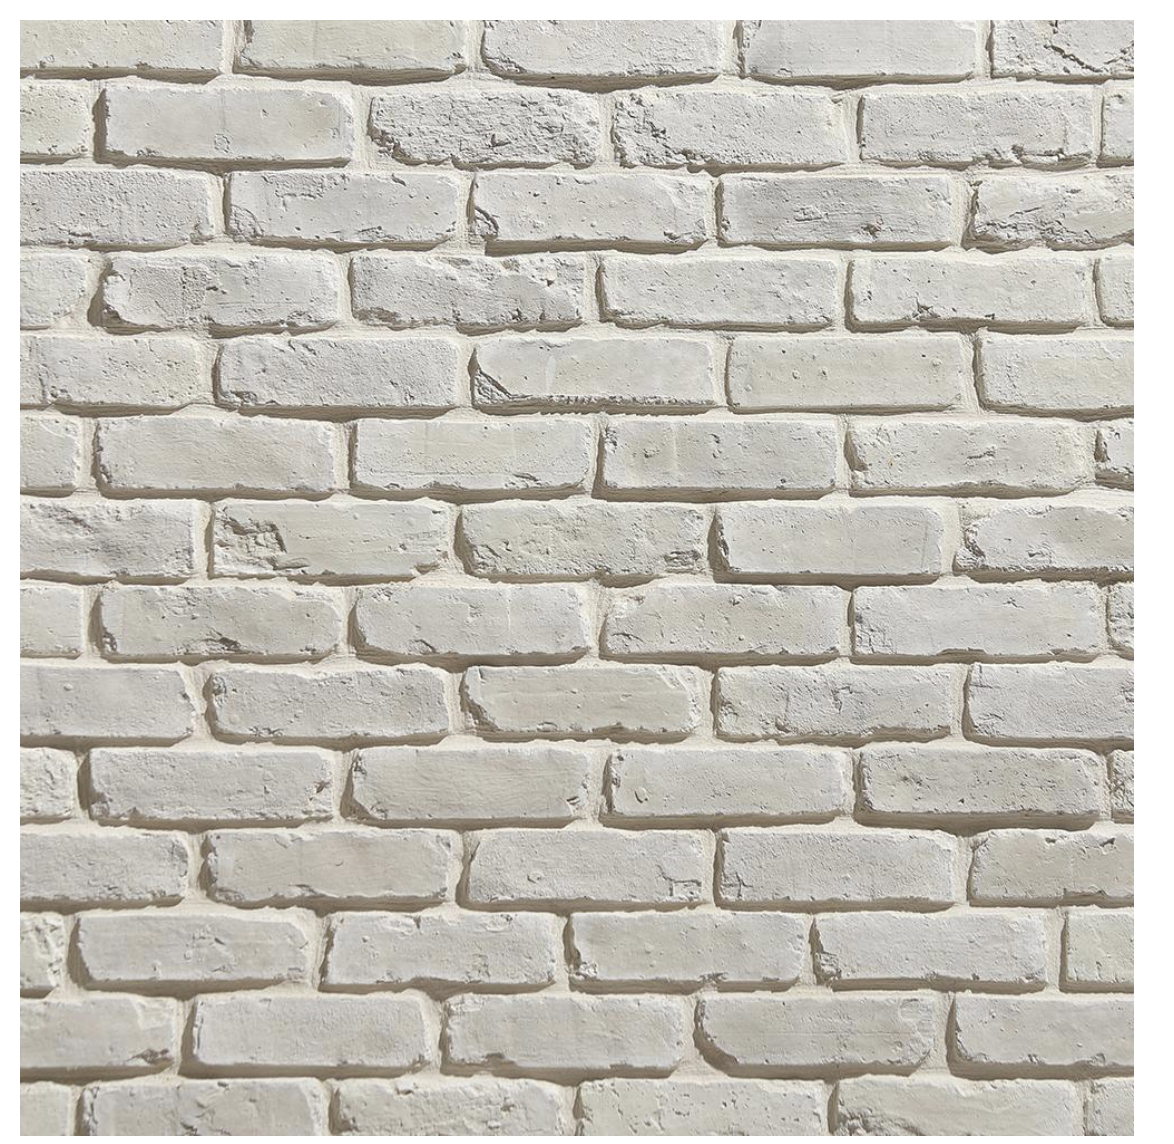
I knew immediately that I wanted to do something different on this beautiful ranch style home that was originally built in the 1950s. I didn’t want to do just white if you know what I mean. Don’t get me wrong. I love white. My entire house is painted white brick.
But the beauty of this home is that because of the size of the exterior, I felt it could totally pull off something more dramatic and moody. I knew I wanted to go with a deep blue color on the exterior and pair it with cedar shutters and accents. I absolutely love the way it turned out.
PAINT COLOR: Brick is Sherwin Williams Gale Force, Trim and Door are Sherwin Caviar
SHOP THE FRONT PORCH LOOK:
THE BEFORE AND AFTERS:
RANCH STYLE OPEN CONCEPT
HGTV came out to this site to film a pilot at the beginning of this project. Mike and I got caught up in the excitement of “demo day” while the film crew spurred us on! Unfortunately, they decided not to continue filming and we had already knocked down an entire wall! We literally sat on the house for a year before Mike finally let me run rampant with the design. It was a blessing in disguise because we would not have torn the wall down otherwise. It looks amazing and completely opened up the house. Thank you HGTV!
Here are the dramatic BEFORE and AFTERS of how we took this kitchen from a dark, closed-off kitchen with dropped ceilings and dated wallpaper, to a stunning, open concept kitchen with a large island, open shelving, and plenty of WOW!
THE KITCHEN
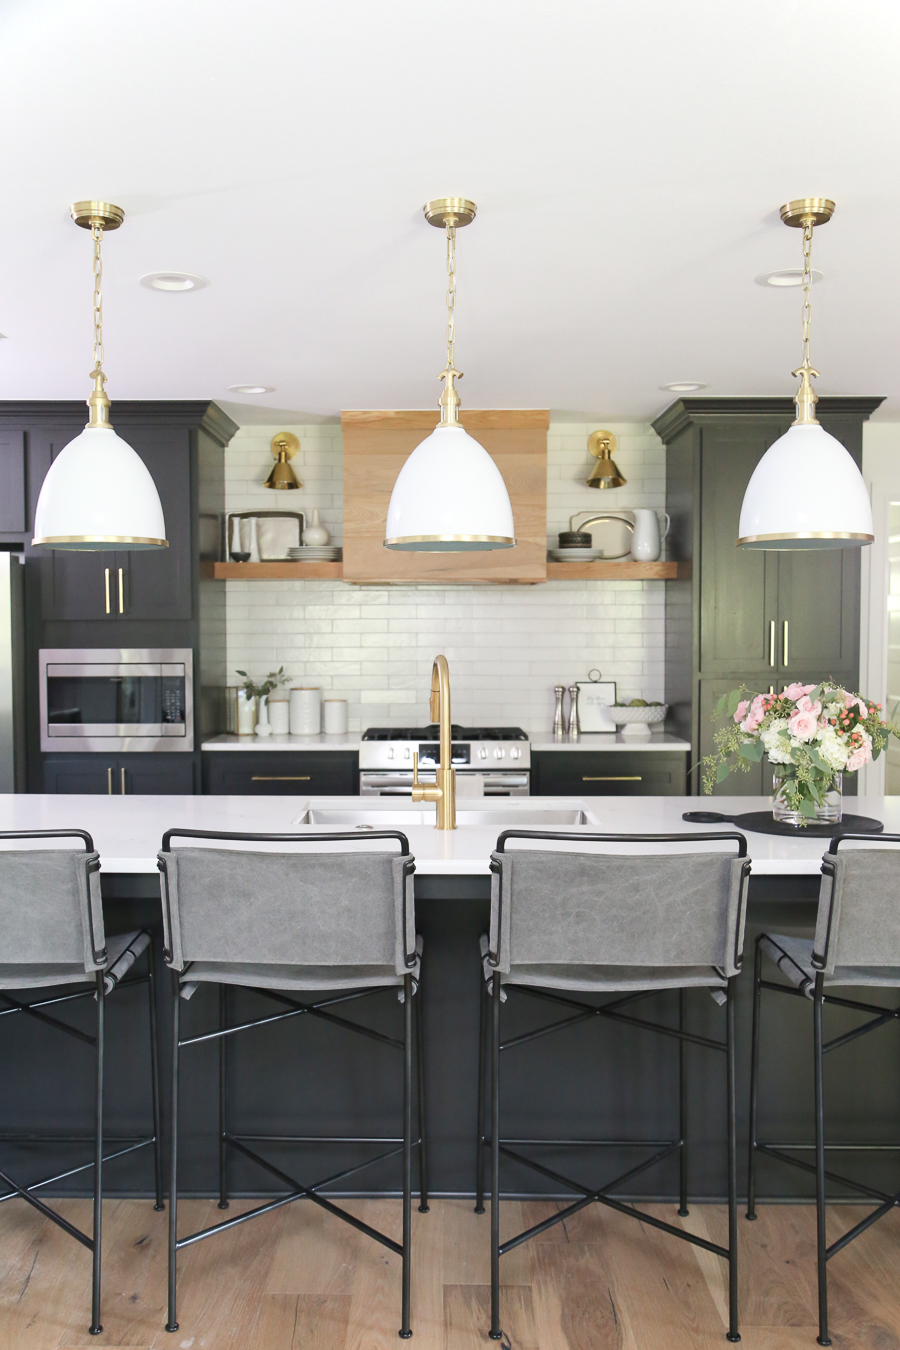
The flip house kitchen was a perfect opportunity for me to have a little fun and do some design work that I knew Mike probably wouldn’t go for in our personal home – in other words, BLACK CABINETS mixed with warm wood tones. It’s no secret that I love black and white in design and you will often hear me say; “You know what never goes out of style? Black and white.” I also wanted to incorporate some open shelving and sconces and the sliding pantry door was a nice, bold touch for impact!
Wood floors were provided by Mill Creek Carpet and Tile. They provided all flooring and tile for this project and we absolutely loved working with them. They were so helpful throughout the selection process and their customer service all the way through installation was incredible. If you are local to Tulsa or Oklahoma City, I highly recommend using Mill Creek and you can even go in and tell them you want to see CC and Mike’s favorites and they have a board put together of items we used on our flip house! The floors we selected were Bella Cera Monza Collection in French Oak Bivio.
If you are not in Tulsa, you can purchase the flooring we used in the flip house project here:
SHOP KITCHEN STYLING ITEMS:
QUARTZ: London Skye by Corian Quartz
VENT HOOD: We created this vent hood look by using the same wood flooring that we used throughout the house, on the vent hood. We had our trim carpenters cut the Bella Cerra engineered wood floors to fit the size of the vent hood then attached them to the front and sides of the vent hood. It was actually Mike Miller’s idea and I absolutely LOVE how it turned out!
PAINT: Cabinets are Benjamin Moore Black Beauty and walls are Benjamin Moore Decorator’s White in Eggshell finish
It’s unbelievable to me now when I look at these photos that this is the same room! Knocking out the brick wall which used to be the original exterior of the wall, was no easy task. It also wasn’t an easy task convincing Mike Miller to go for it – ha! But I definitely think it was the right decision. Especially when you see these before and afters of how the bricked wall completely closed off the kitchen from the living room.
THE LIGHTING:
All of the lighting in the flip is from HUDSON VALLEY LIGHTING. We absolutely love working with them and use HVL in all of our products. CC and MIKE THE SHOP also proudly offer Hudson Valley Lighting in our SHOP and here are some of our favorites:
SCROLL AND TAP TO SHOP HUDSON VALLEY LIGHTING FAVORITES:
We are loving these canvas gray bar stools from CC and MIKE THE SHOP. They also come in leather which is absolutely stunning. We have been using both of these bar stools in several of our upcoming projects and not only do we love them, but our clients do as well!
APRICOT MIST SKY KITCHEN RUNNER – we love this runner and the beautiful colors and patterns. It makes a statement wherever it goes and we love how it looks in the flip house kitchen!
BELOW you will see the original laundry room of the house. One of the major things we did with the kitchen remodel is to knock into the garage and frame out a new laundry room, making the original laundry room a part of the new kitchen. We made it into a bar area with open shelving in front of the window and it made the kitchen much larger and more functional!
SHOP THIS LOOK
PANTRY
The original pantry door was pretty small and had a lot of hidden space around the corner. But it wasn’t accessible and the design was awkward. I knew that we needed to make the wall into a design statement. We came up with the idea of the sliding barn door to accomplish that. Mike is more function and I am most definitely fashion, so this pantry has the best of both worlds now. The large pantry is fully accessible and is one of my favorite features in the home.
WOOD FLOORS, TILE, AND BACKSPLASH:
We were so thrilled to work with MILL CREEK CARPET AND TILE for our flooring and backsplash in the kitchen. One of the most beautiful items in the entire house is the Bella Cera engineered wood floors that we put throughout the house. Mill Creek has all our favorite design selections saved so you can just go in and ask for the CC and Mike Special and they will get you taken care of!
Kitchen Backsplash is available locally at Mill Creek Carpet and Tile – Eden Bianco 3 x 11 | If you aren’t local to Tulsa you can buy this Ceramic Subway Tile to recreate our backsplash look
I’ll let the before and afters do the talking for the living. I will mention that I think the fireplace redo is one of my favorite statements in the room!
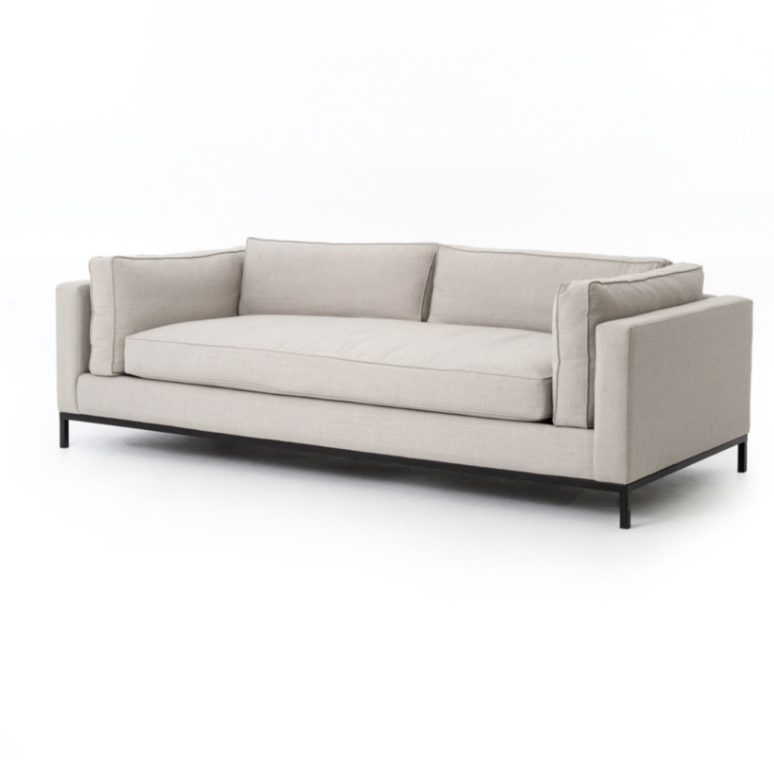
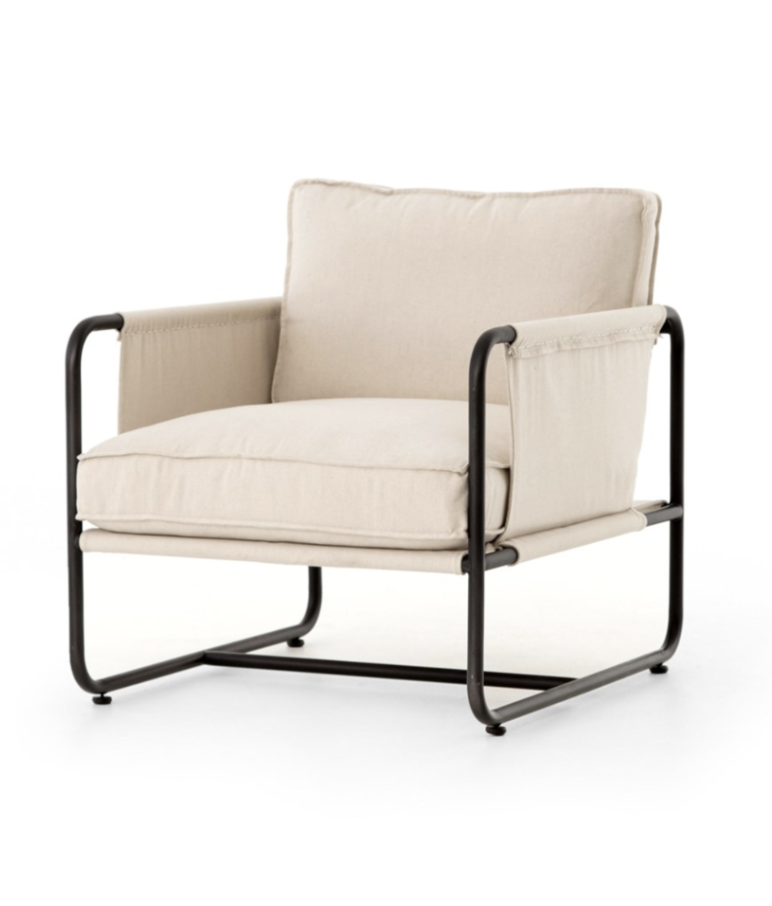
If you are looking for a great, clean-lined couch for your living. We highly recommend the Gramercy sofa from CC and Mike THE SHOP. It pairs beautifully with the Isabel chairs and Hudson coffee table for a beautiful living room feel!
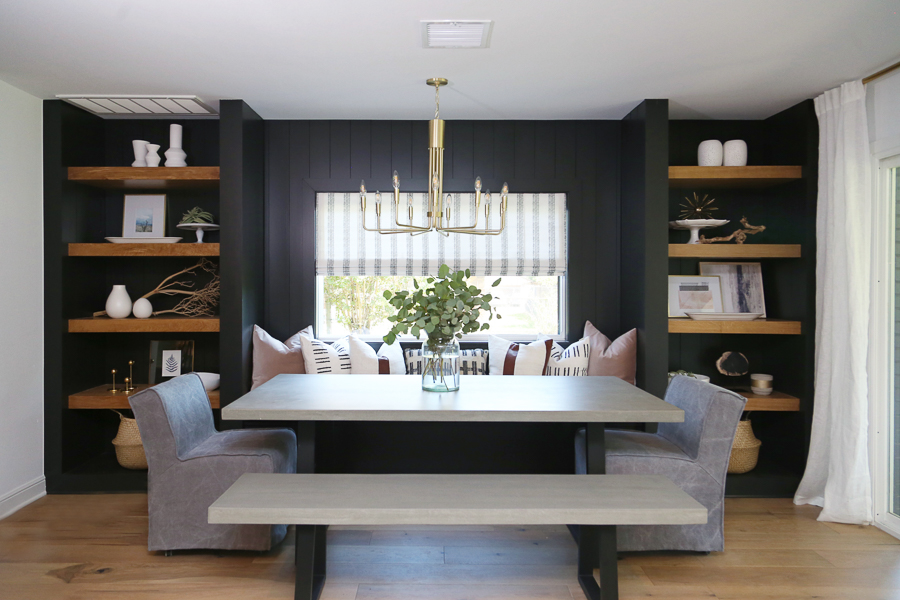
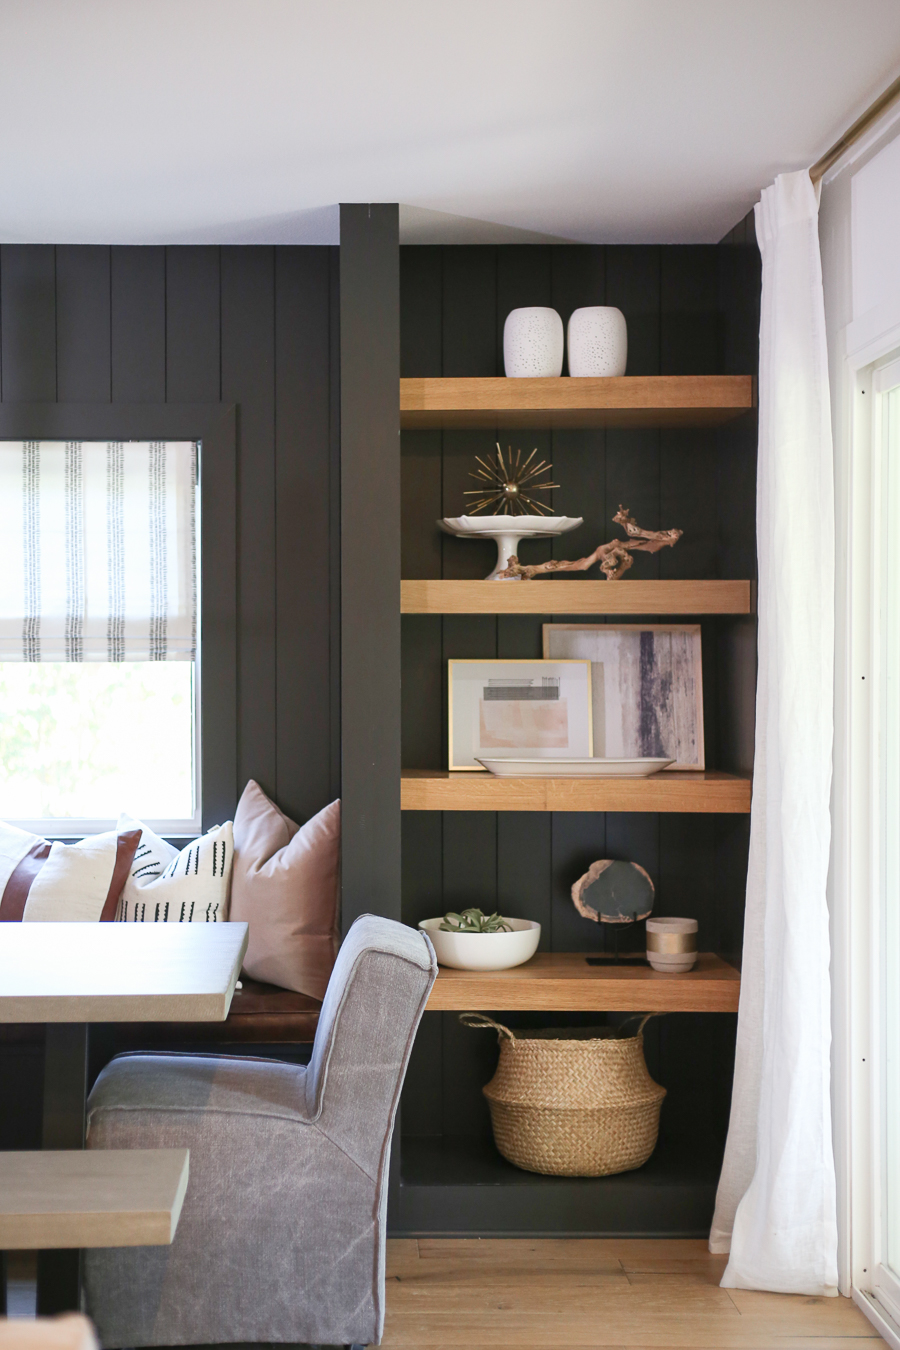
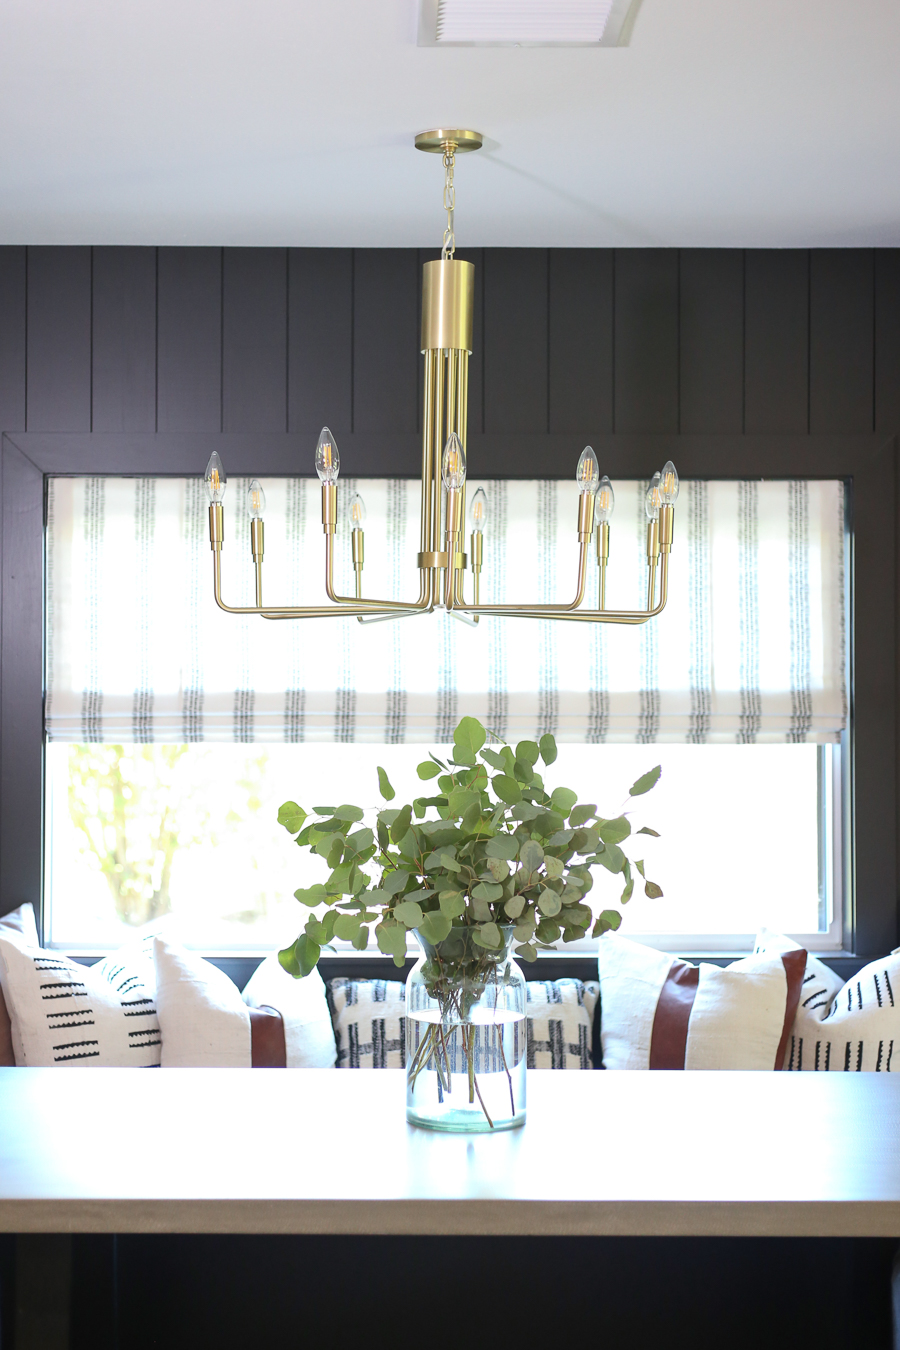
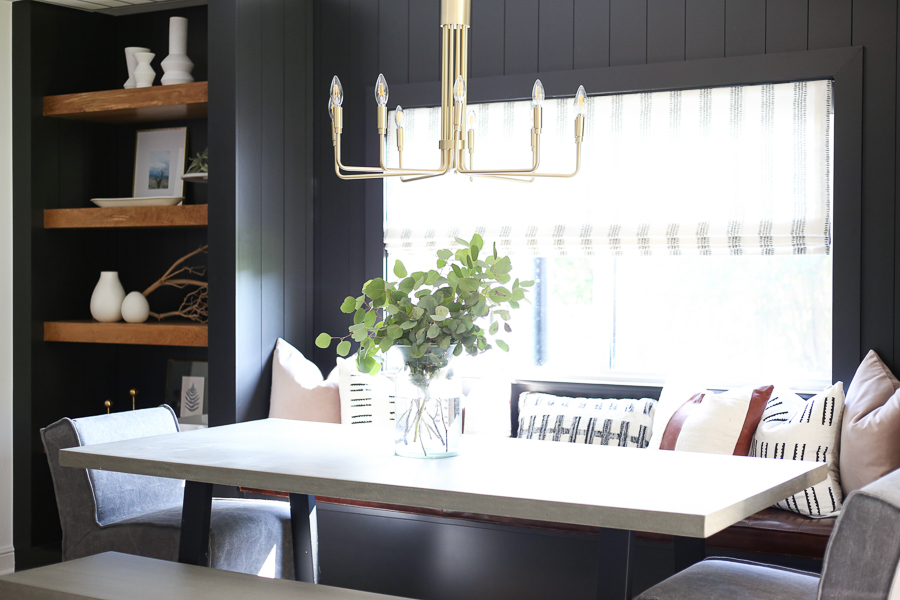
One of the biggest problems that needed fixing in the ranch-style house, once we opened up the kitchen and knocked out the brick wall, was that there was no dining room. My idea was to do a built-in breakfast nook on the back wall of the living room and turn that space into the dining area. It was a great use of space and turned an otherwise boring wall into a bold statement with a functional use as a dining area!
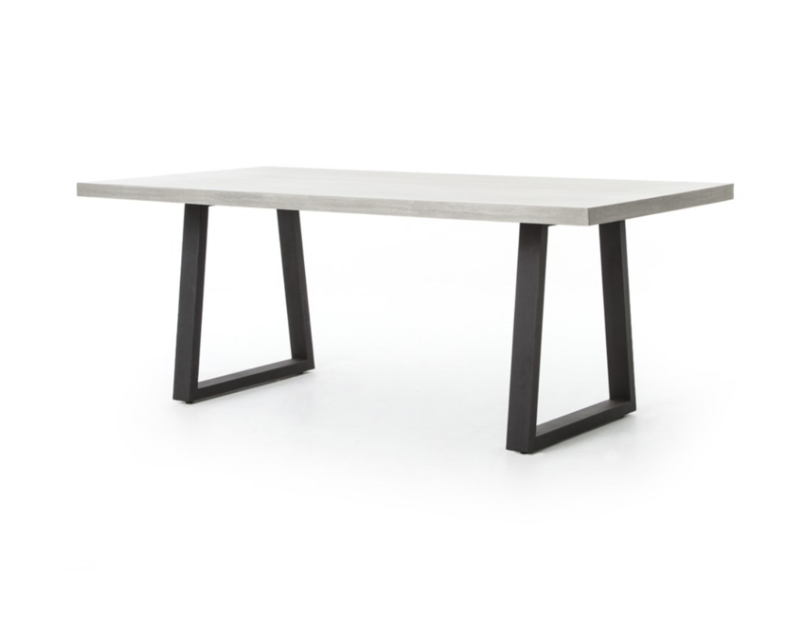
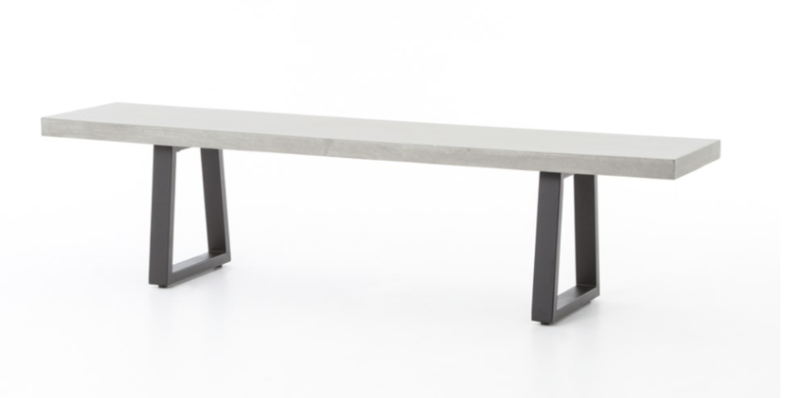
We used the Cyrus Table and Bench in this built-in breakfast nook design. It fit the space perfectly and I love how it paired with two upholstered slipcover dining chairs at the end. This table can also be used as an outdoor table and I love the cement looking finish!
If you are looking to style bookshelves in your home like we did in the Jenks flip house dining room, check out the new CC and Mike the SHOP line of HOME ACCENTS. We just added all of these items to the shop because we think that they are perfect for bookshelf styling!!
SCROLL AND TAP TO STYLE YOUR BOOKSHELVES WITH CC AND MIKE HOME ACCENTS:
THE MASTER BATHROOM
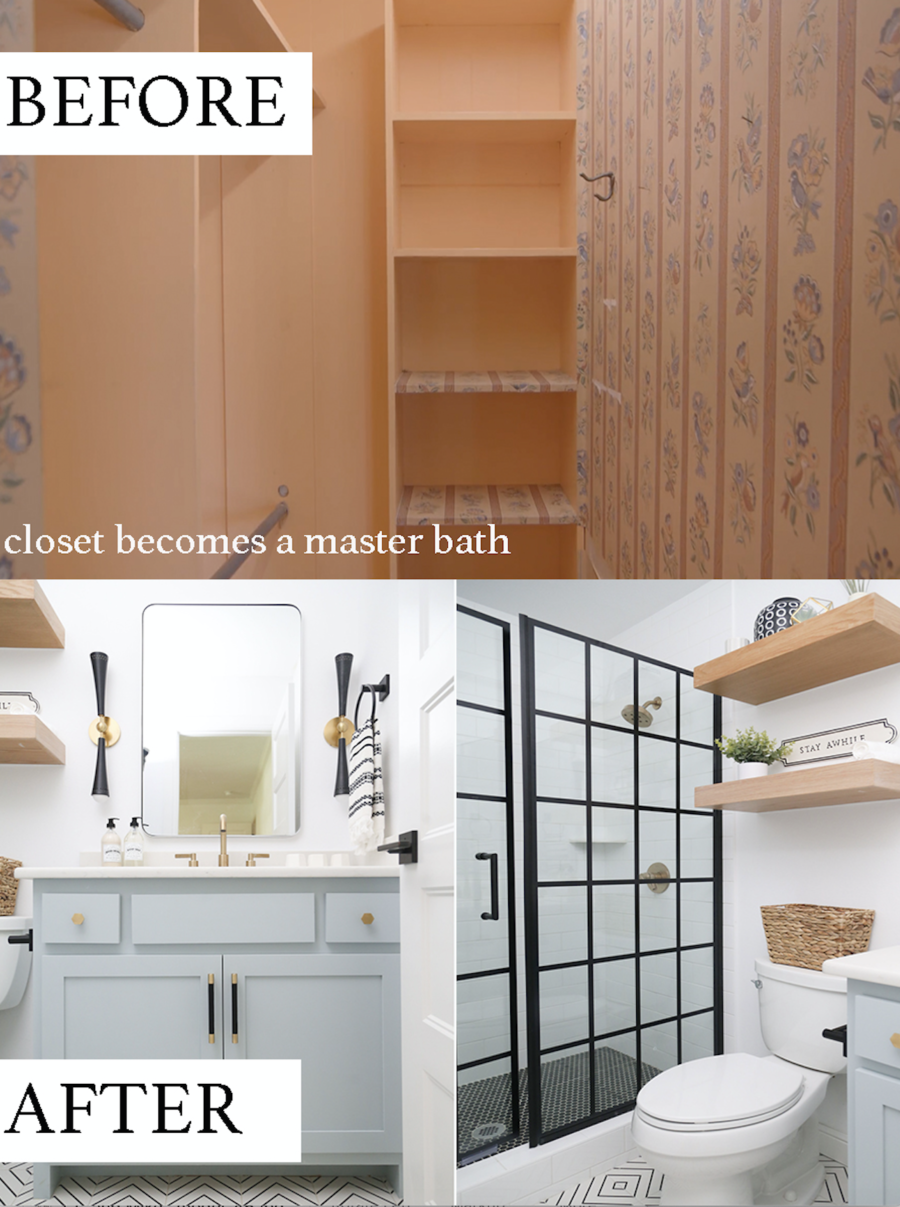
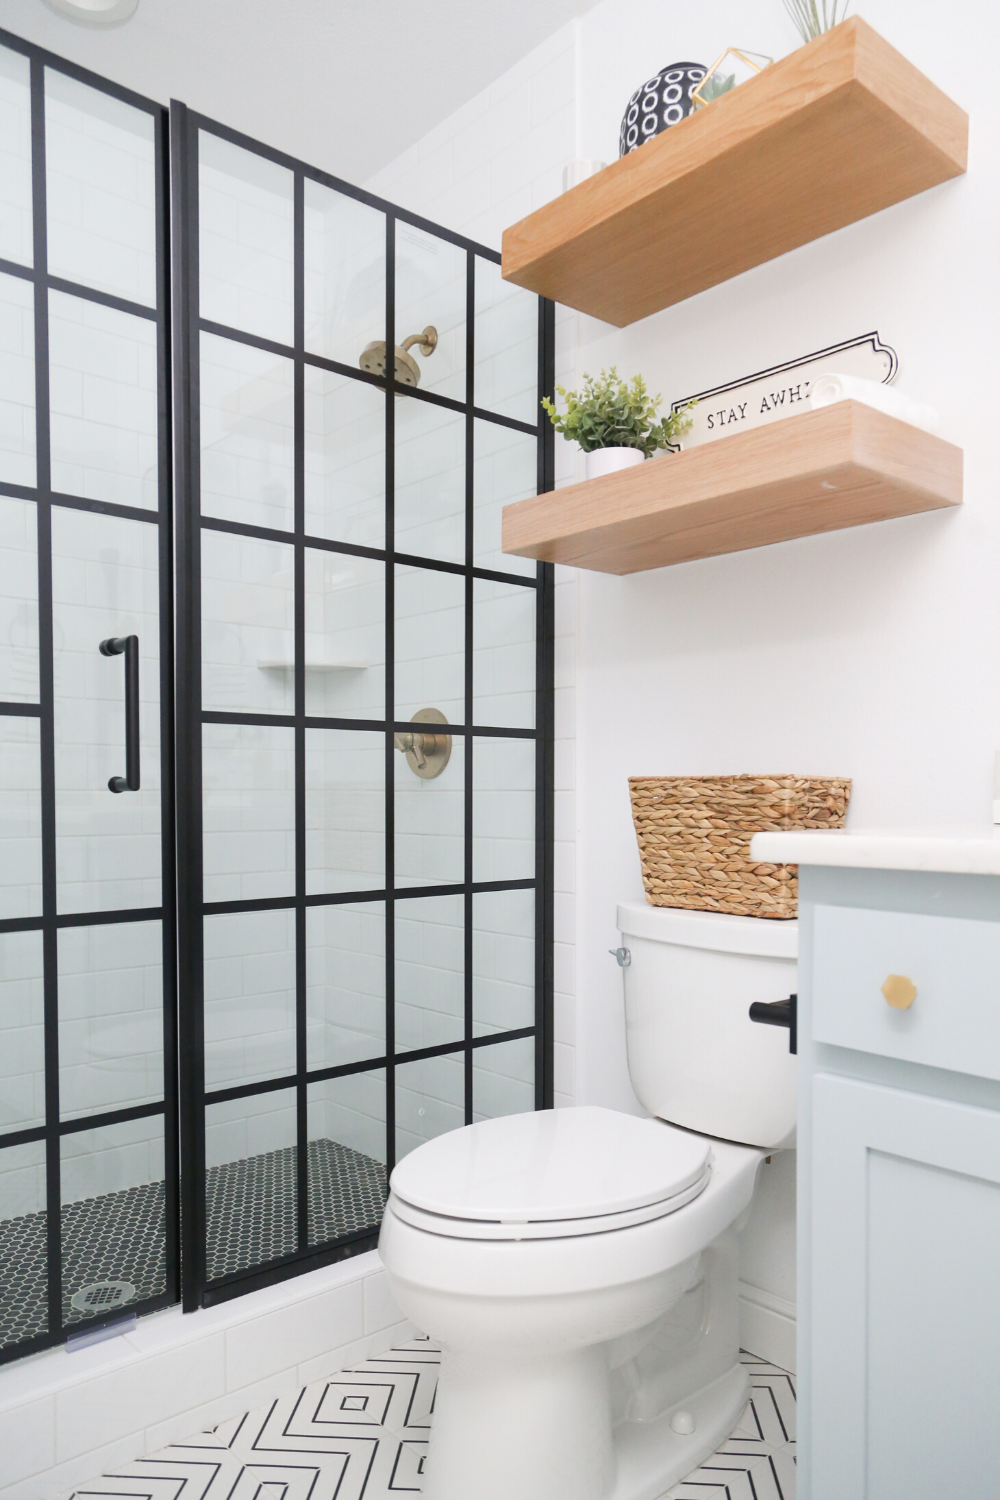
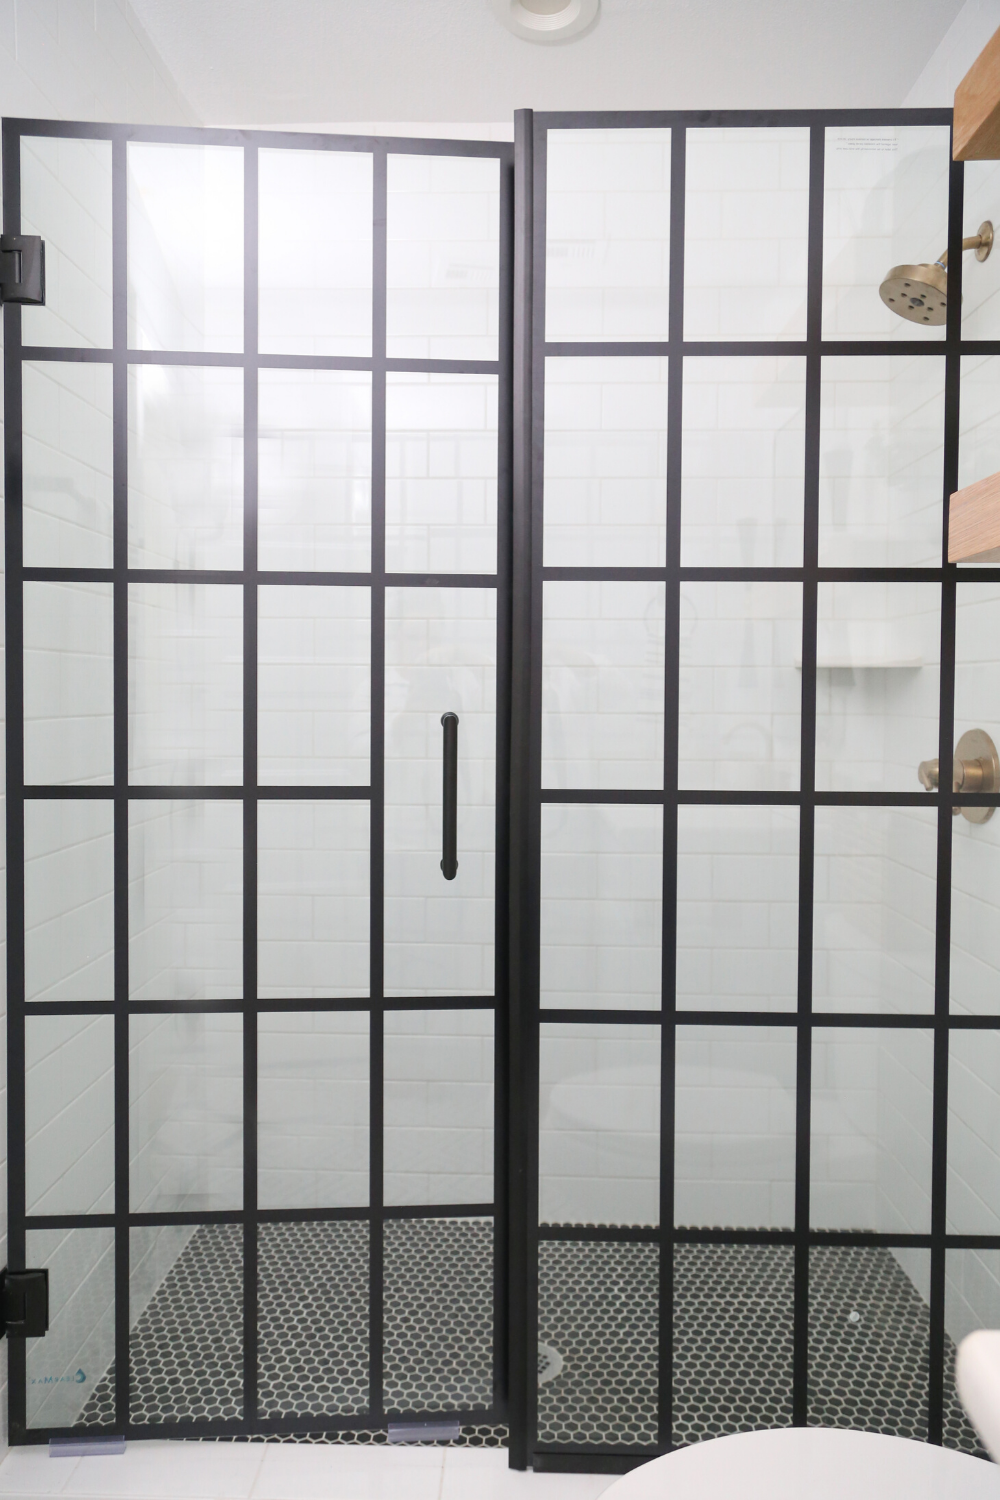
Without a doubt, one of the most dramatic changes we made in this flip house, is turning this peach and floral wallpaper CLOSET, into an awesome MASTER BATHROOM! When I walked into this house, I had a vision of what I wanted to do with outdated ranch style home. I immediately saw the potential. Originally, this home only had three bedrooms and one bathroom. It now has three bedrooms and TWO bathrooms! We literally took a tiny, wallpaper filled closet and converted it into the master bathroom. It is the thing that I am the proudest of, on this project. It was a big deal to add this room but it was paramount to the design of this house.
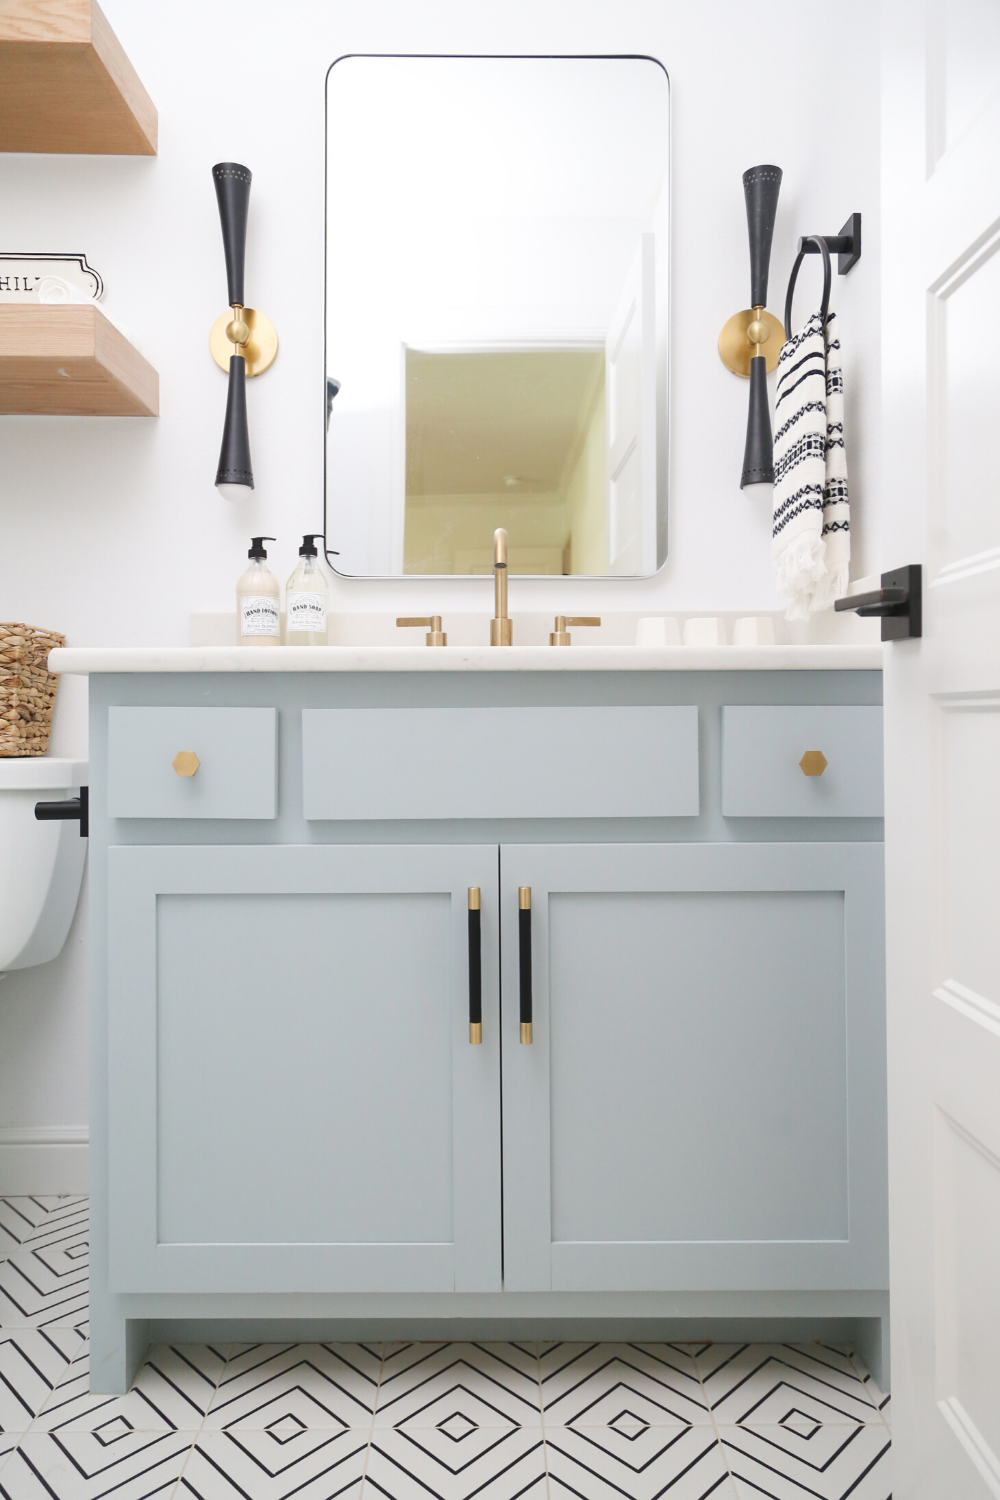
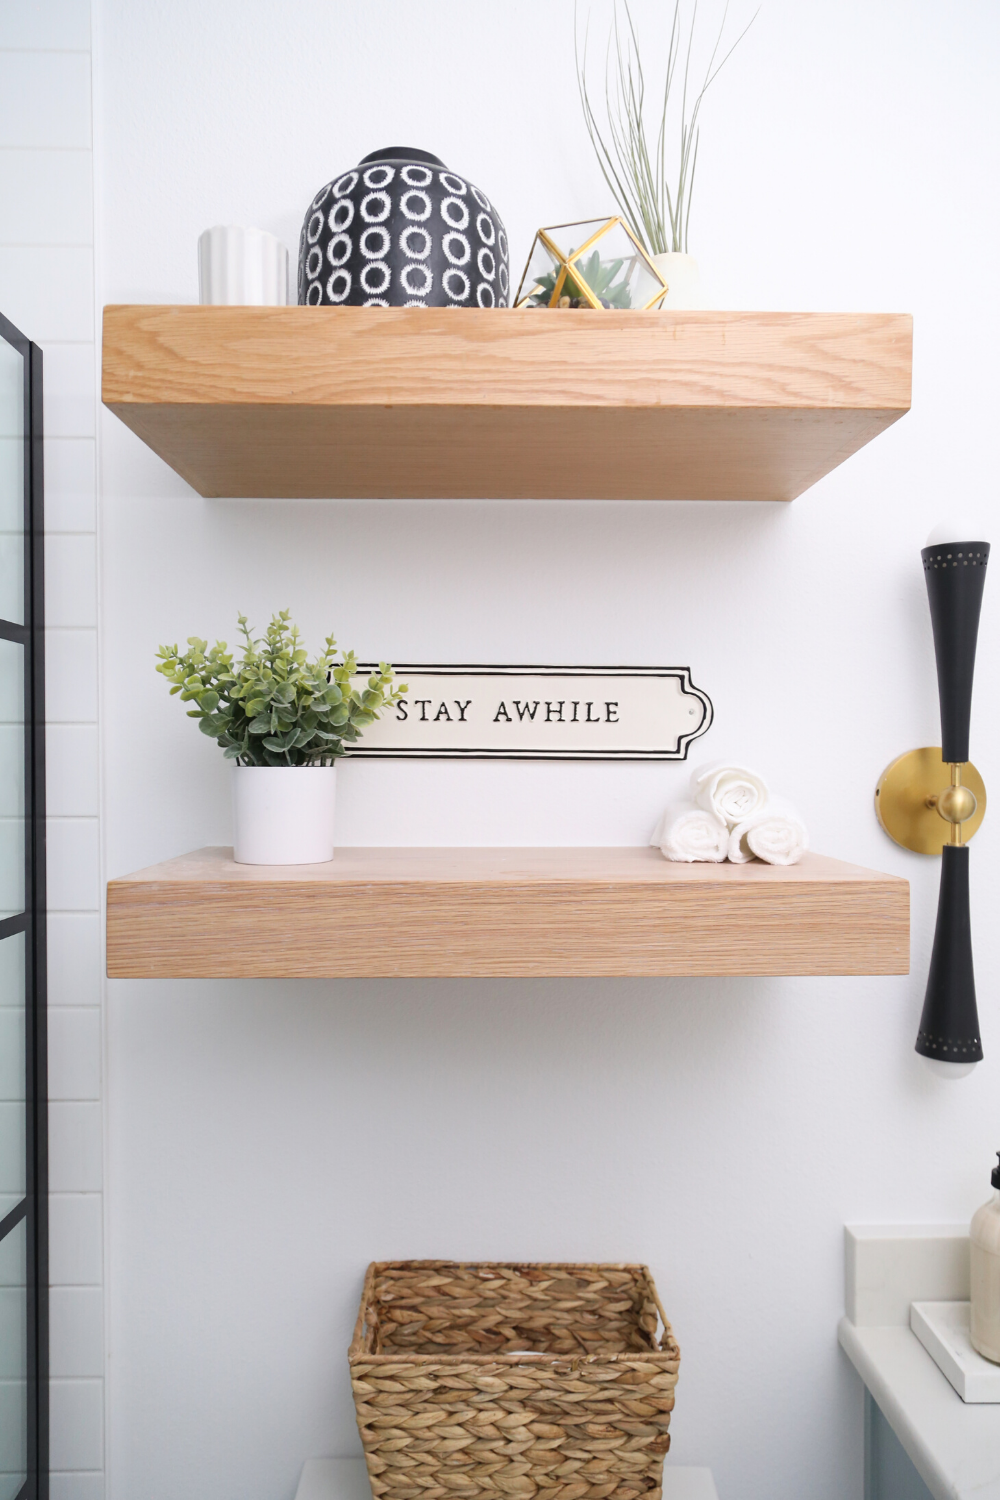
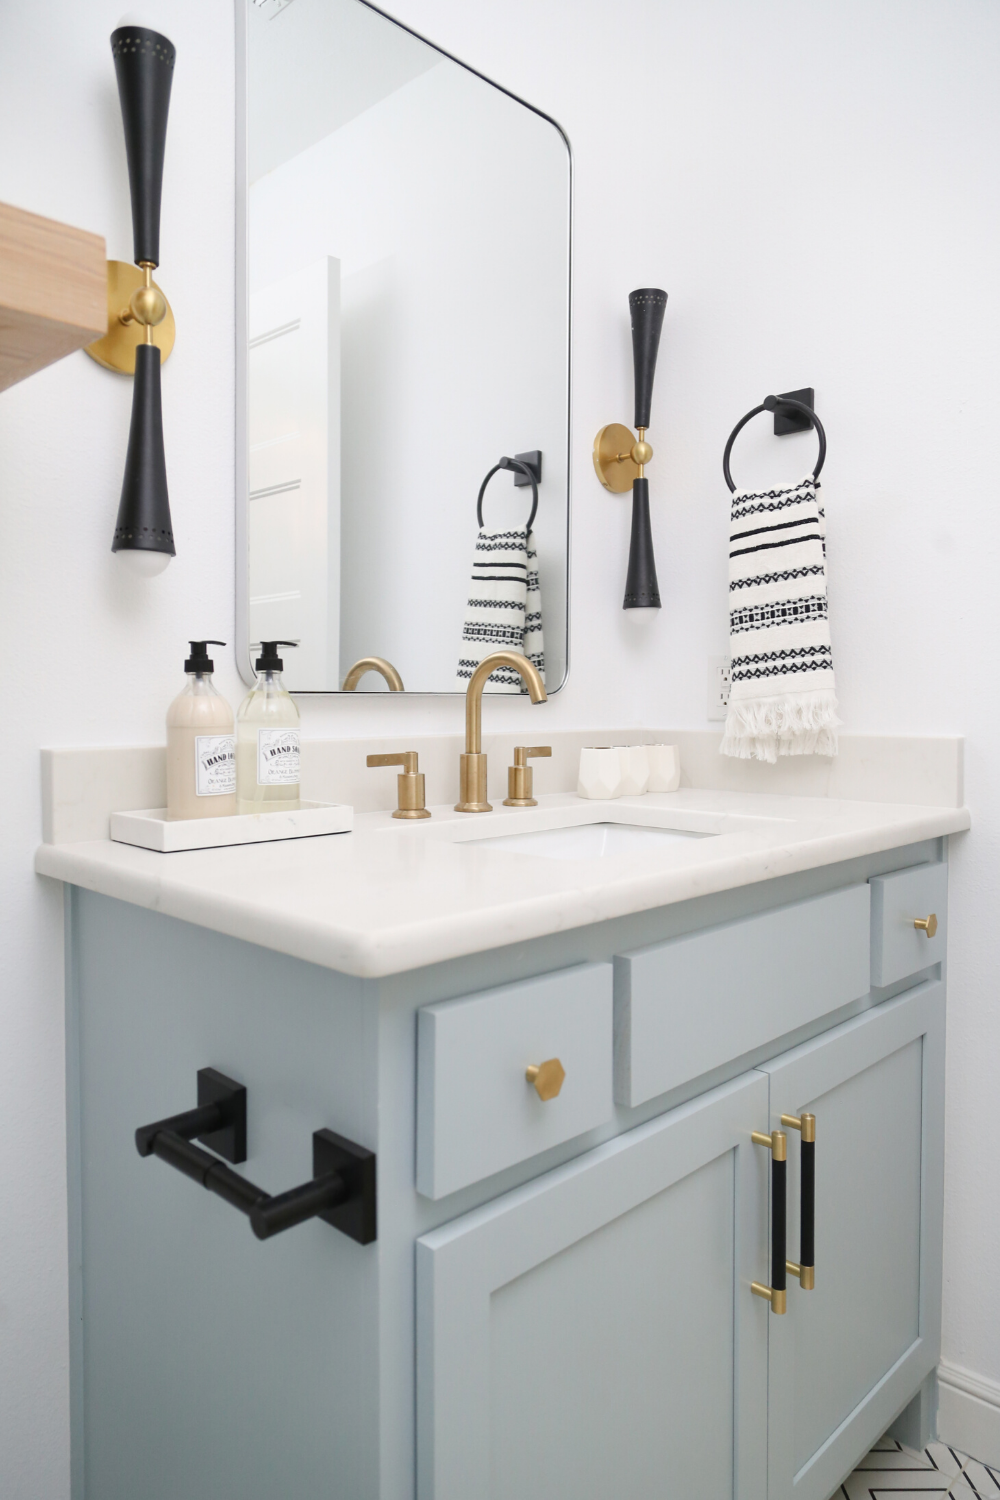
One of the best features of this master bathroom is the SHOWER DOOR that we sourced from Home Depot. These window pane shower doors are so on trend and we love them paired with the black and white geometric line tile floors, blue/gray cabinet color, and black and gold hardware!
SHOP OUR SHOWER DOOR HERE:
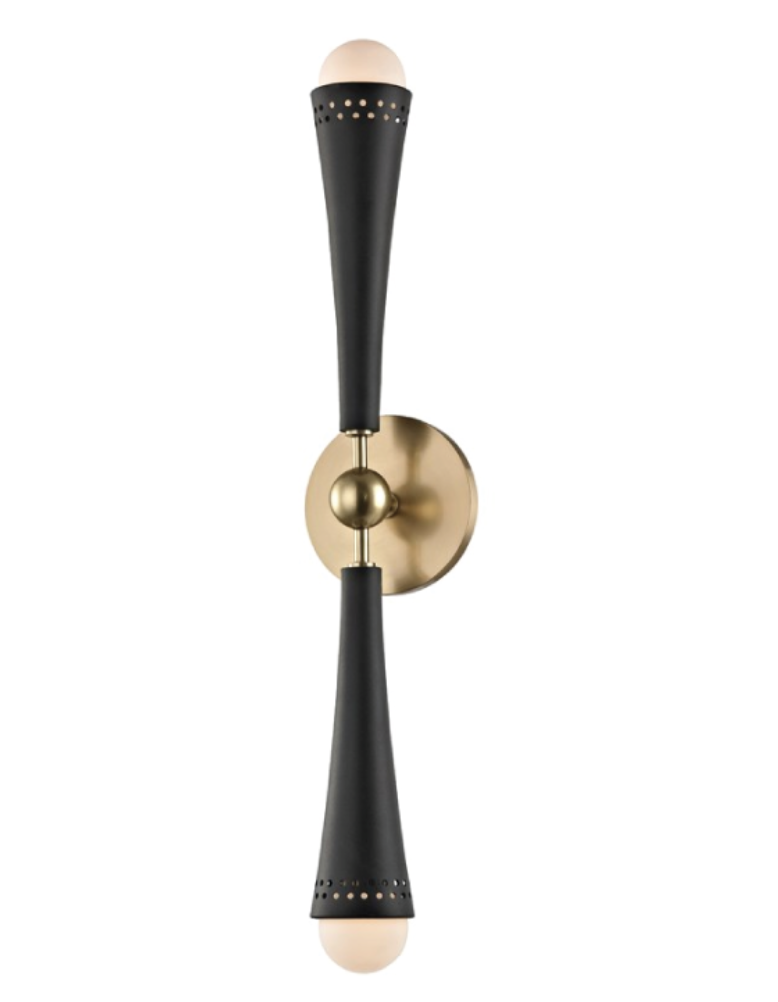
OK so it’s not fair to talk about our master bathroom addition and not give the original bathroom some love as well. This bathroom was once the only bathroom in the house but with our renovation, it became the hallway bath for guests and also fo the two bedrooms to share. We kept with the same palette but switched up the floor, mirror, and sconces:
RECREATE THIS LOOK:
Last but not least in theCC and Mike Modern Navy and Cedar Ranch Style Remodel Reveal, I want to show you just a few more before and afters. Because who doesn’t love a before and after!
THE FRONT ENTRY
In the original home, when you walked in the front door, there were two double doors that led into the closet area (that we turned into the master bath) and what I’m assuming was the original living room. This had been converted into a master bedroom over the years but had no bathroom. We walled off these doors, turned the closet into the master bathroom, and turned the original living room in the master suite. We knocked a wall out in the kitchen and framed into the garage then made an entrance into the master suite off the kitchen.
SHOP THIS FRONT ENTRY LOOK:
I’ll leave you with some pretty little details. This project was a long time coming but we loved the journey. From HGTV coming to film and choosing not to come back and finish the pilot, to us letting it sit for a year while we finished the Good Remodel and Rebsamen Remodels, to us meeting Dorothy and finding the absolute perfect buyers meant for this home…I wouldn’t change a thing.
I hope you enjoy the CC and Mike Modern Navy and Cedar Ranch Style Remodel!
We are so thrilled to be a part of this transformation and to update this home for the next generation to make a lifetime full of memories inside these walls and in that big, gorgeous backyard just like the generation before them did.
EVERY HOME HAS A STORY. We are honored to be a part of this story.
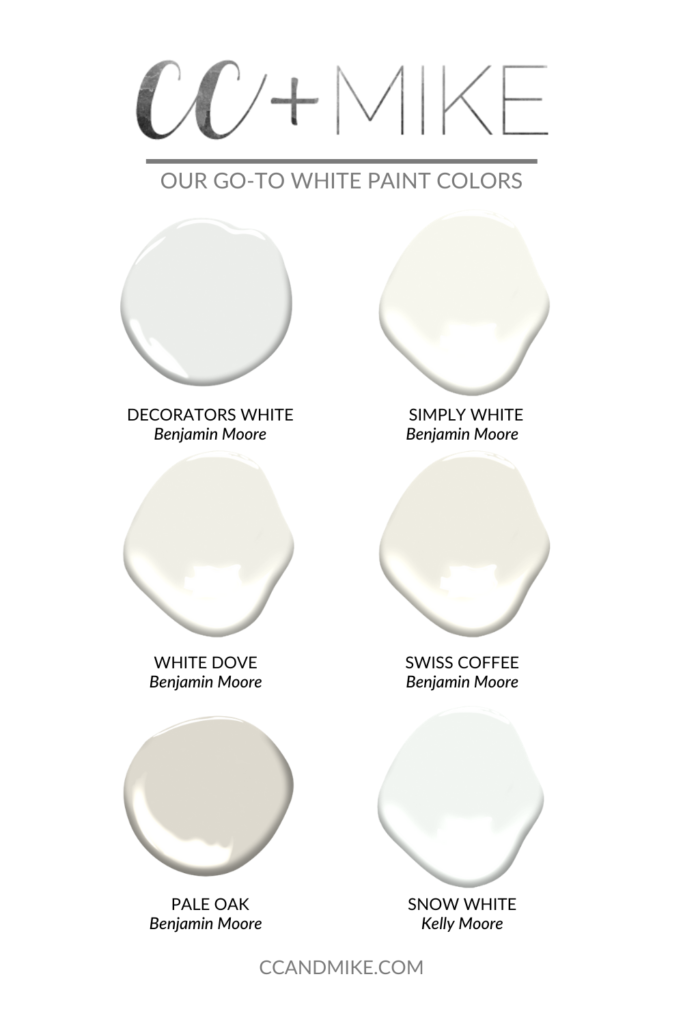
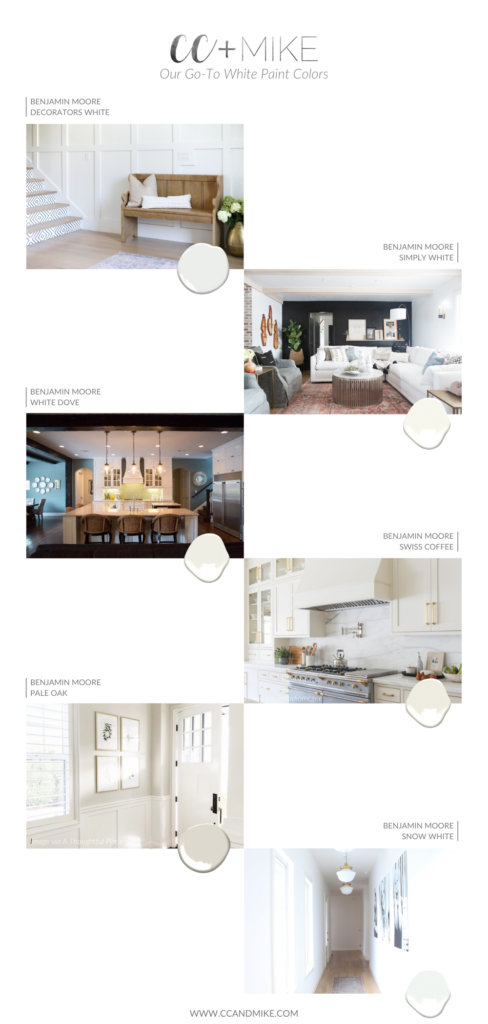
Today, we are talking about our go-to white paint colors. Finding the perfect shade can be tricky. This is why one of the most frequently asked questions we get is “What is the best white paint color?”. There are so many factors to consider to find the right hue like the paint’s undertones, lighting, and the finishes in your home. Wisdom is the tears of experience. Mike and I have decorated, remodeled, and built enough houses to know all whites are NOT created equal. These 6 picks are my tried-and-true favorites. You can see examples of each shade from our projects below!
1. BENJAMIN MOORE’S DECORATORS WHITE
This is what I use EVERYWHERE because I love a nice stark white with no gray or greige undertone whatsoever. I always use an eggshell finish on walls and satin on trim.
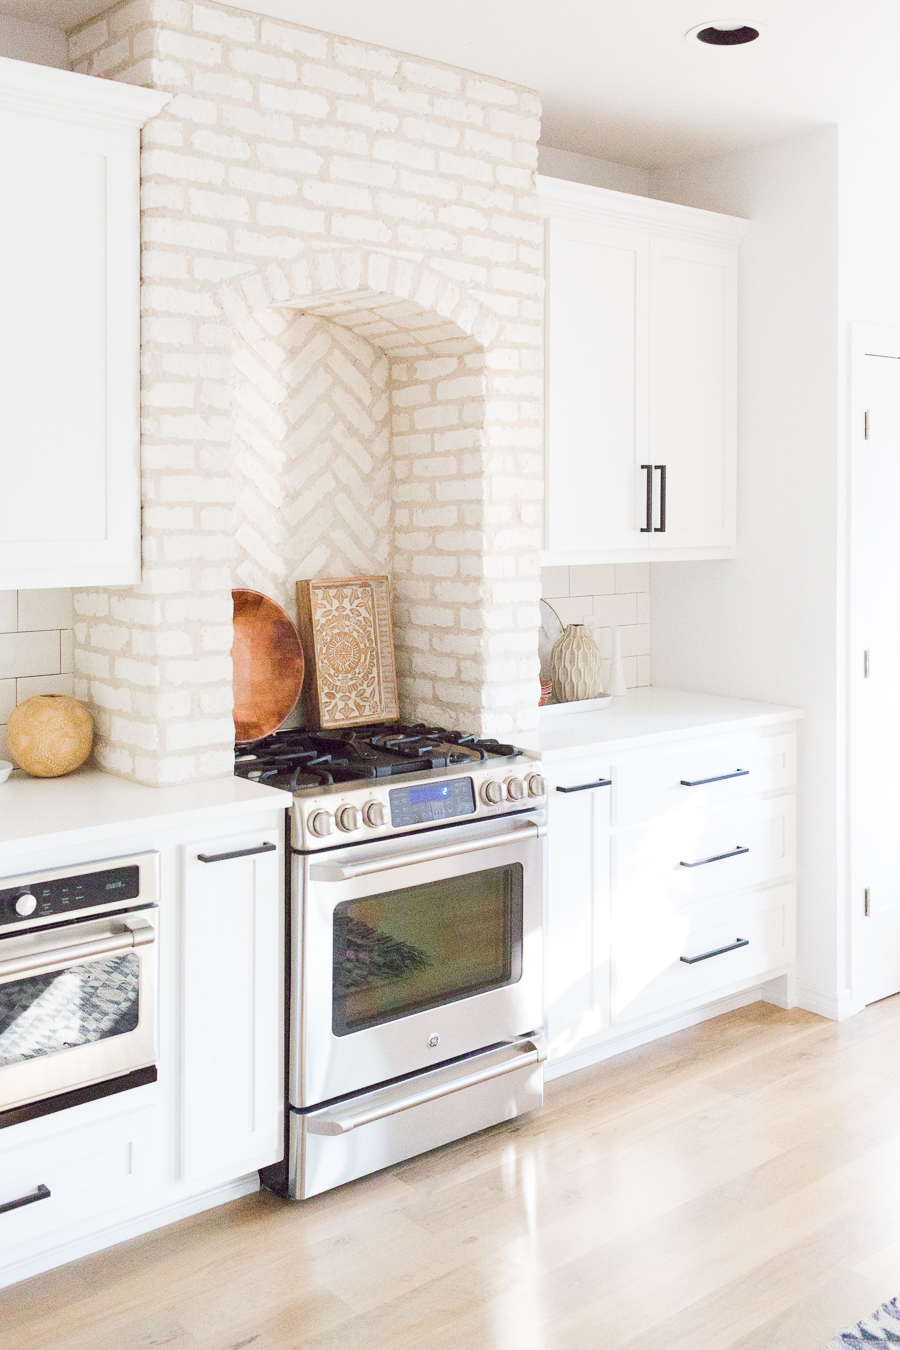
I used this soft, warm hue for the main color for my friend and client Cyndi Kane’s remodel. The ceiling and side wall is painted simply white with a black accent wall. We were honored when our Kane Remodel Project was featured in The Pioneer Woman Magazine!
3. BENJAMIN MOORE’S WHITE DOVE
Stonebrook I Project | Kitchen Cabinets in White Dove
This is the house Mike and I designed and lived in for two years in 2009. The cabinets are White Dove and I still love them to this day. I also love White Dove as an overall wall color. Again, in an eggshell finish.
4. BENJAMIN MOORE’S SWISS COFFEE
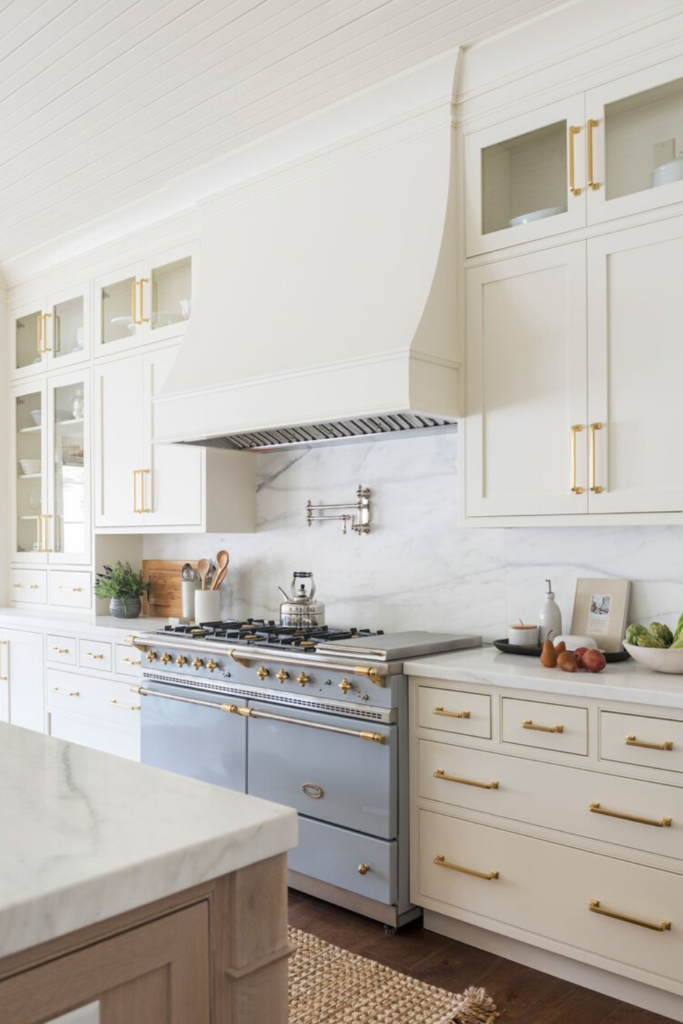
Image courtesy of Studio McGee
Swiss Coffee is warm without being too yellow. This beautiful kitchen designed by the talented Shea McGee is a beautiful example.
5. BENJAMIN MOORE’S PALE OAK
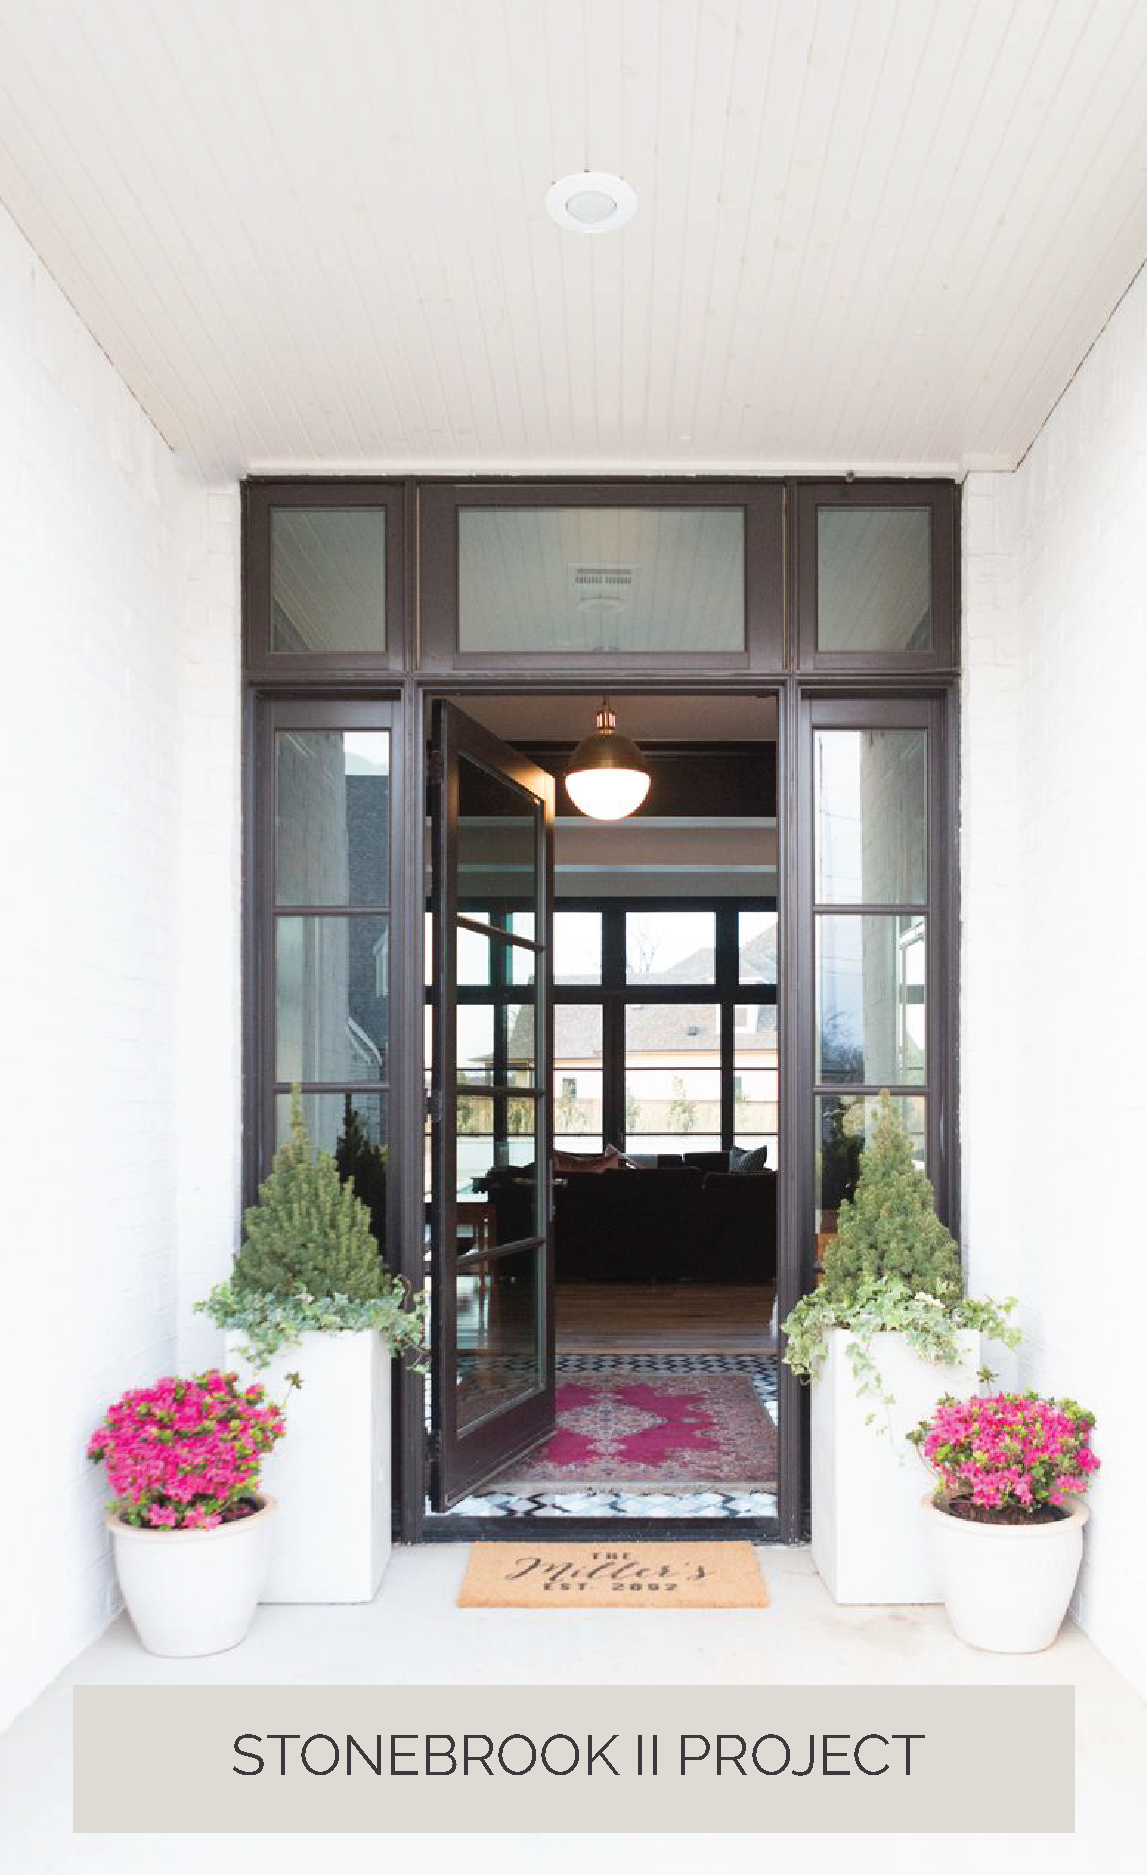
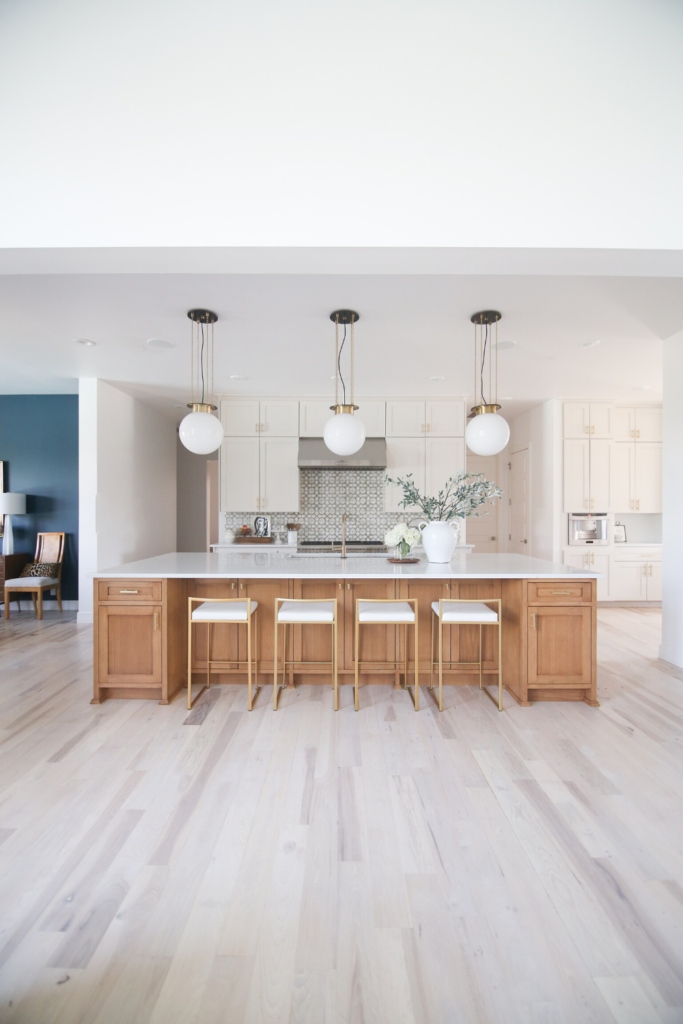
Photo courtesy of A Thoughtful Place BlogStonebrook II | Kitchen cabinets painted Benjamin Moore’s Pale Oak
CC + MIKE | KITCHEN REMODEL:
Here are the details all in one spot for you of the products in my kitchen — a one-stop-shop if you want to find all the information about our kitchen remodel.
I love to use Benjamin Moore’s Pale Oak when I need a darker white with gray undertones. My friend Courtney from A Thoughtful Place used this color throughout her entire home. It is a very warm, pale grey. Her home is flooded with natural light. Depending on the lighting, it looks like a very, very light grey or white with grey undertones on walls. It pushes towards grey. On cabinets, it looks like a true white and is a good choice to avoid looking too stark. Which is why I chose it for my own kitchen!
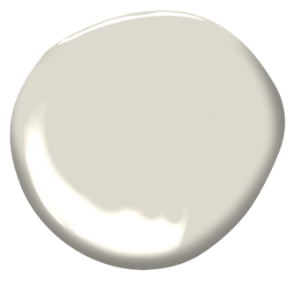
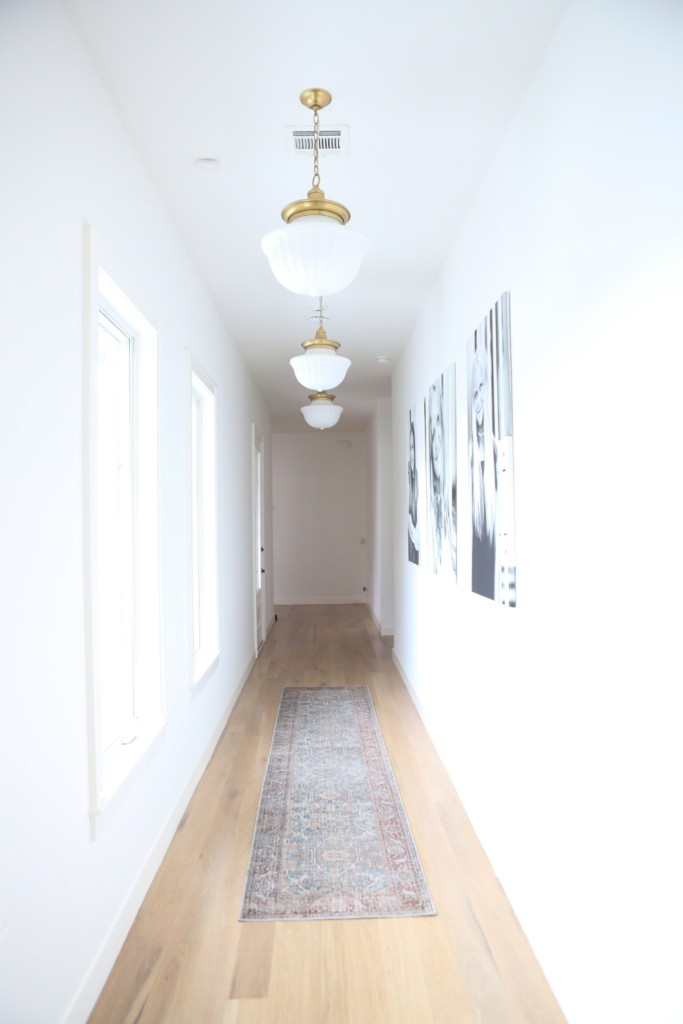
6. BENJAMIN MOORE’S SNOW WHITE
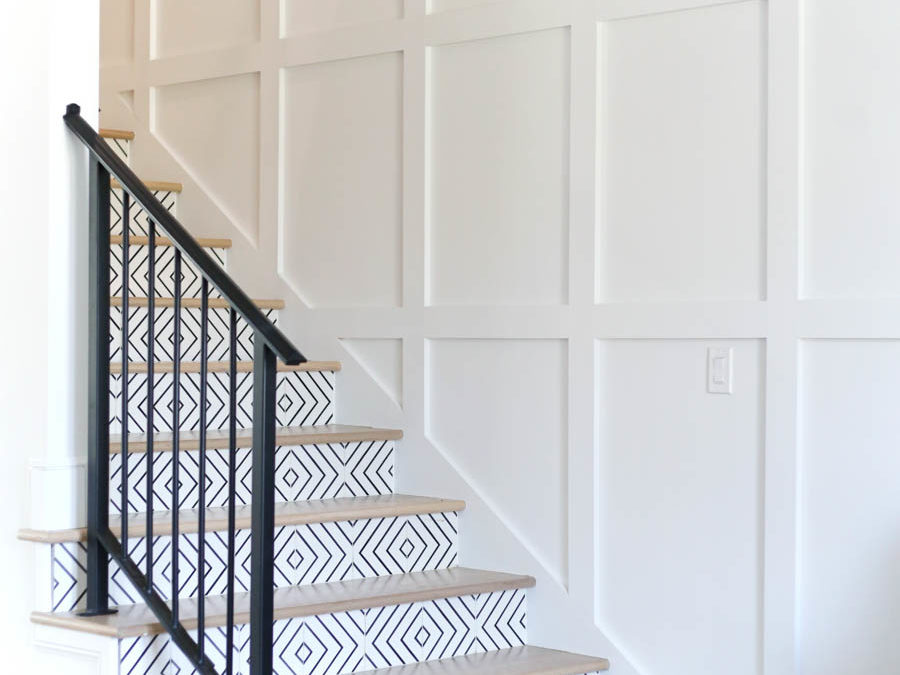
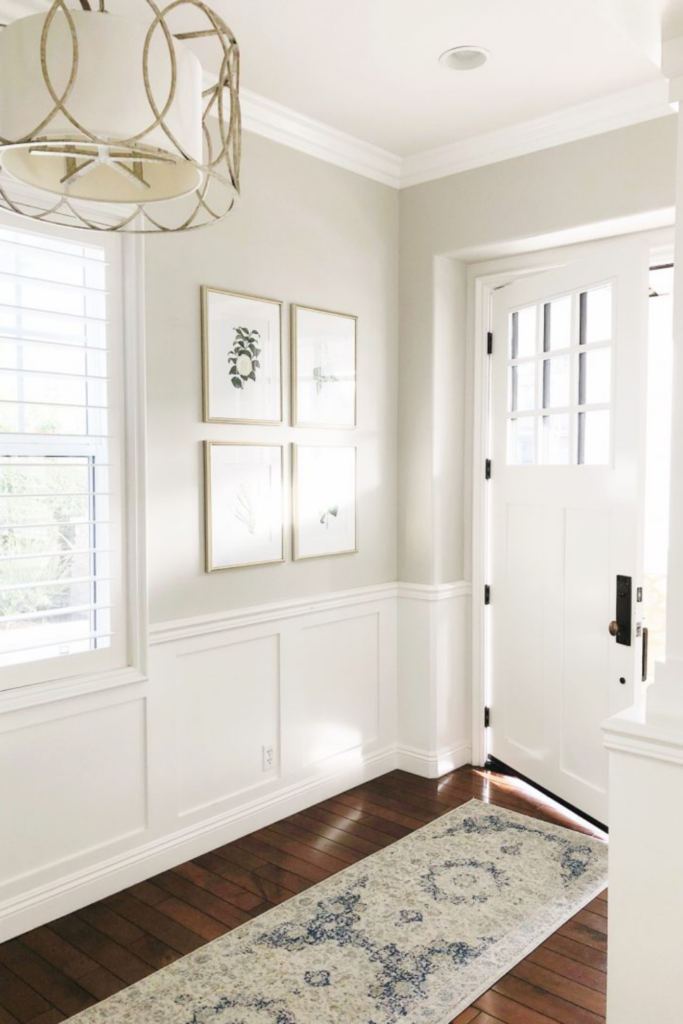
Frisco II Project | Walls and ceiling painted Snow White
This color has slight green and blue undertones. It worked perfectly in this light-filled hallway. By the way, look forward to the full reveal coming soon! This is our Frisco II project and Mike Miller built this house but my best friend, Molly, was the designer. She loves a coastal vibe. The interior is gorgeous with white oak floors and grasscloth wallpaper on the entry,
Although choosing the right white paint can be difficult, you can’t go wrong with these 6 fail-proof colors! Are you considering hiring a designer, renovating, or building your dream home? CC + Mike has everything you need to MAKE DREAMS HAPPEN. We are a husband and wife team that offers a variety of services that ensures a seamless one-stop shopping experience for those who are looking to embark on full-scale design projects for their home or business.
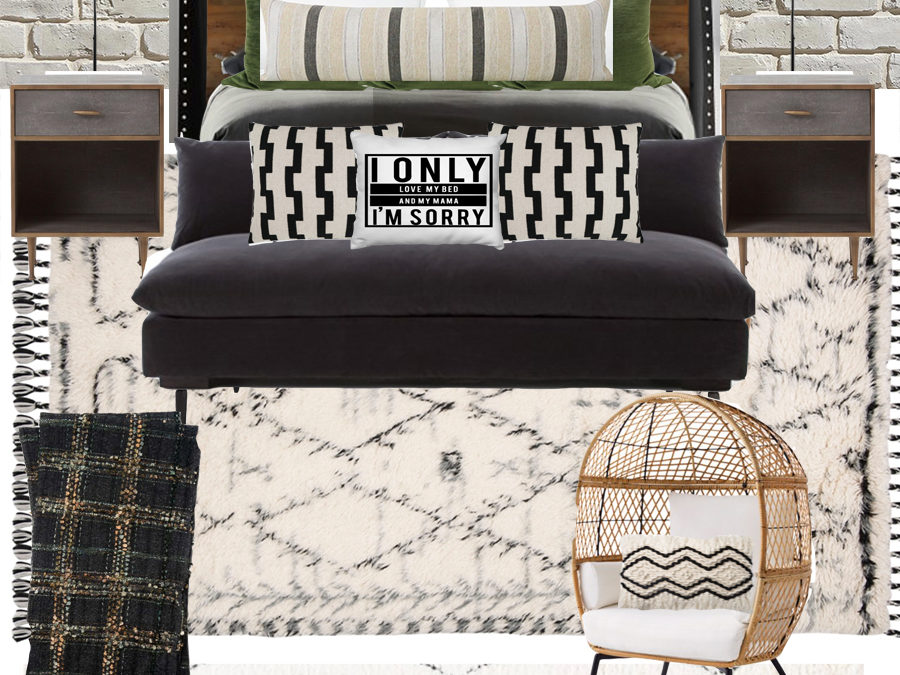
I’ve decided I need to start sharing more of my DESIGN PROCESS with you guys which is why I’m sharing 5 Tips for Boys Bedroom Design today as well as the design board I just completed for Easton’s room.
HERE ARE ALL THE PRODUCTS WE ORDERED AND SOURCED FOR EASTON’S ROOM (Pictured Above). I will discuss each in more detail below but I wanted to provide one easy place for you to access everything that we are using for Easton’s room redo!
OR YOU CAN SCROLL AND TAP ON THE PICTURE TO SHOP EASTON’S ROOM DESIGN
With all this at home time we’ve been having, we’ve decided to tackle some projects around the house that have been left undone. The top of that list being, the boys bedrooms. We moved into our house 4 years ago and I have never once shown you the boys bedrooms and trust me, there is a reason for that.
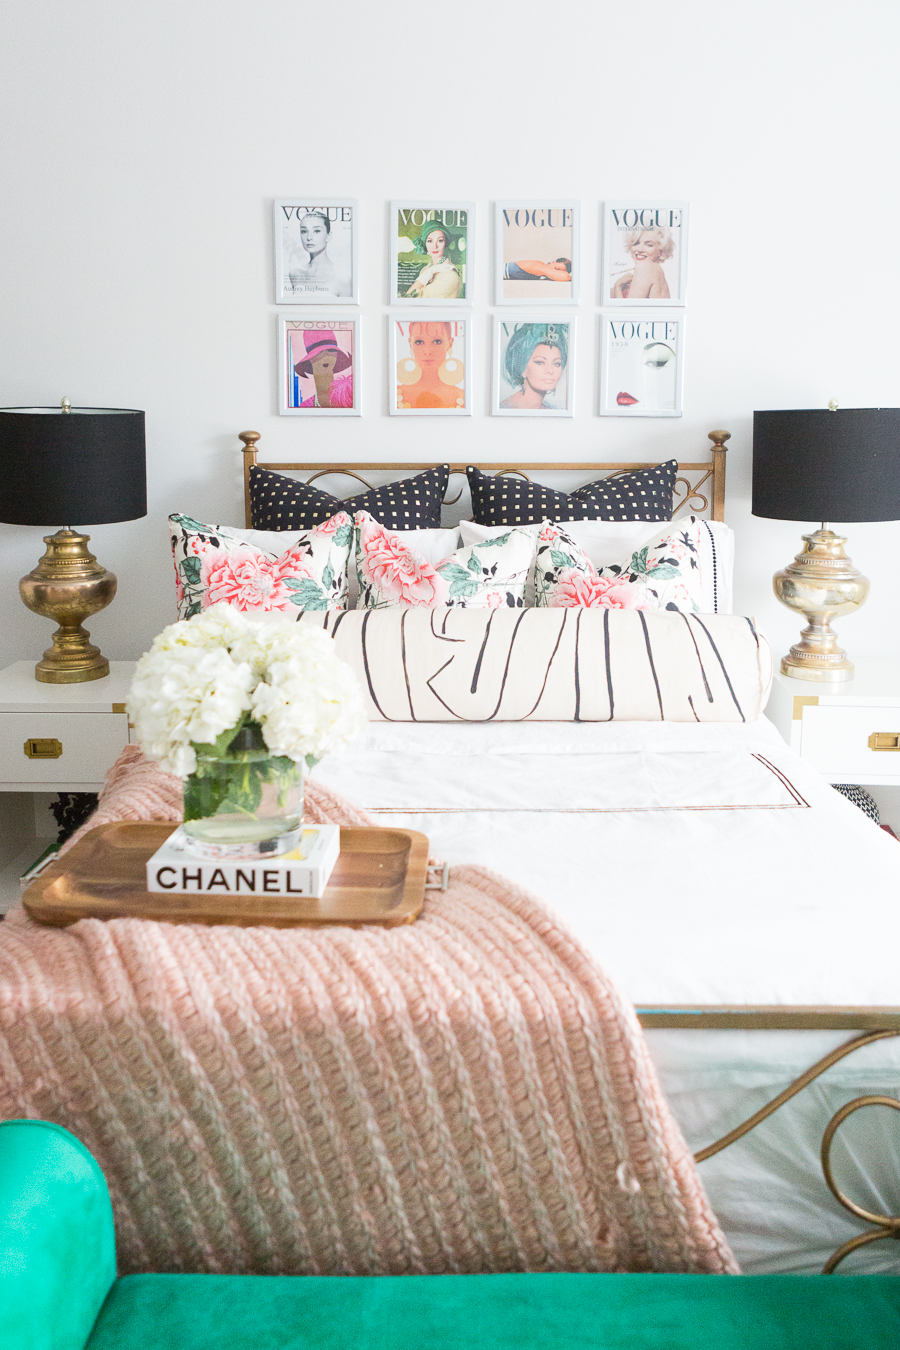
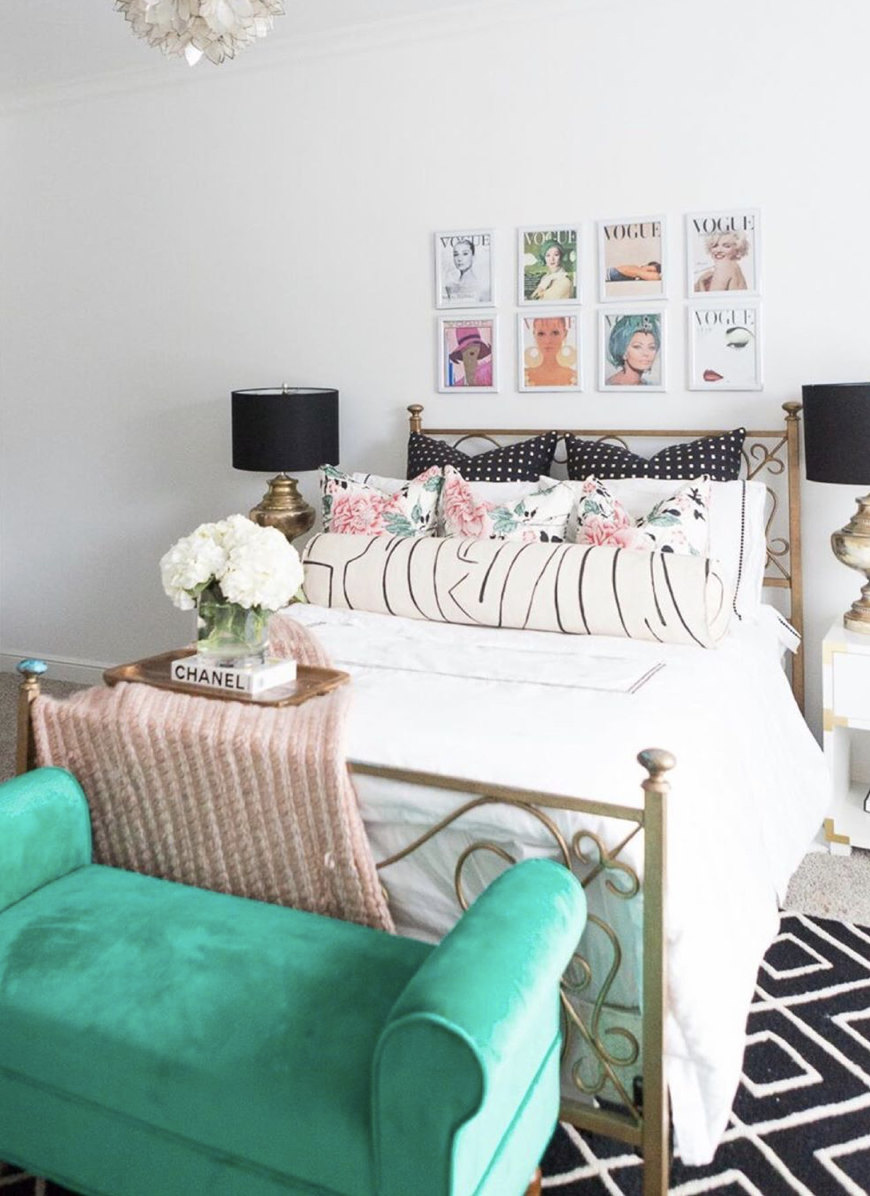
When we moved into our house, I really focused most of my design efforts on the downstairs areas and neglected the boys rooms. I’ve really never heard the end of it especially since we definitely didn’t neglect Emmy’s room and bathroom when we moved in – ha! What can I say, I got a little carried away with Emmy’s VOGUE themed bedroom. (See below)
YOU CAN SCROLL AND TAP ON THE PHOTO TO SHOP EMMY’S VOGUE BEDROOM AS WELL.
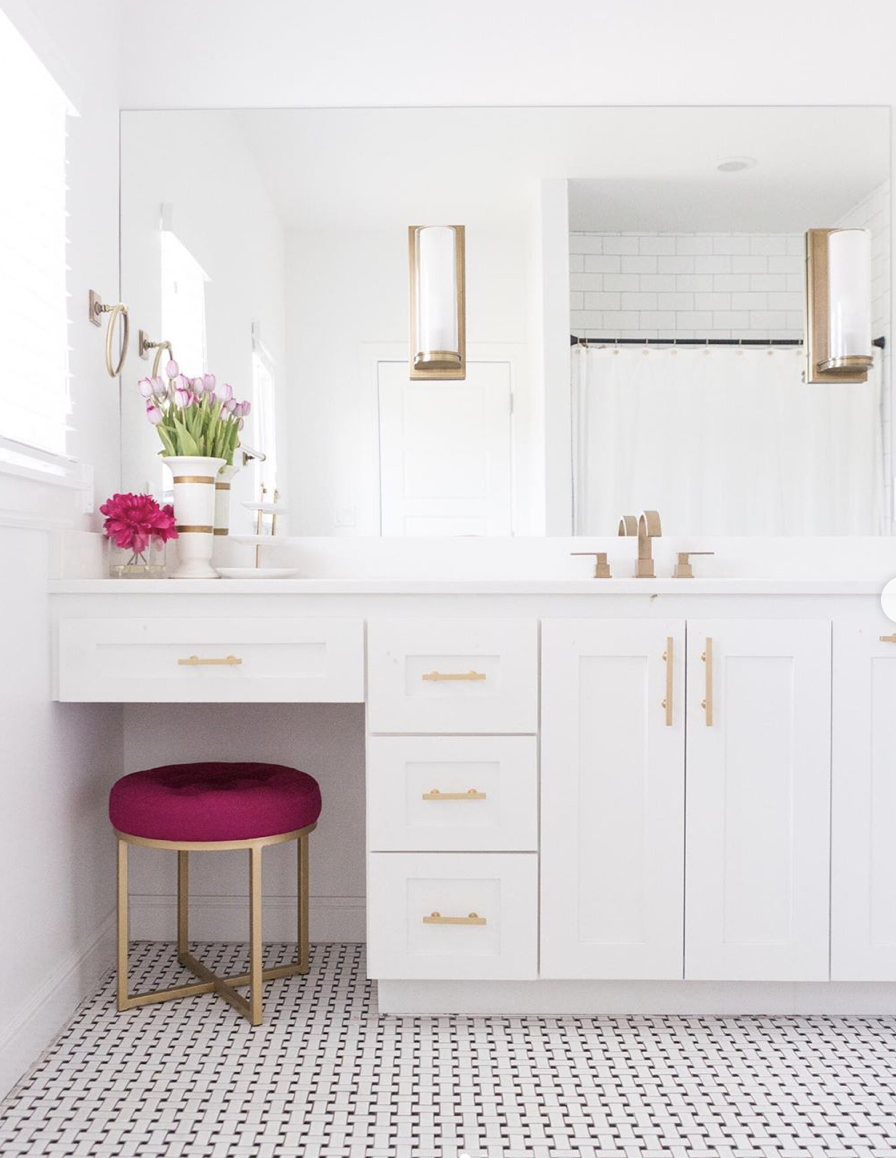
SHOP EMMY’S BATHROOM DESIGN
Well now that I’ve totally jumped ship and started talking about Emmy’s bedroom design, let’s get back to the topic at hand which is 5 Tips for Boys Bedroom Design
1. START WITH INSPO PHOTOS
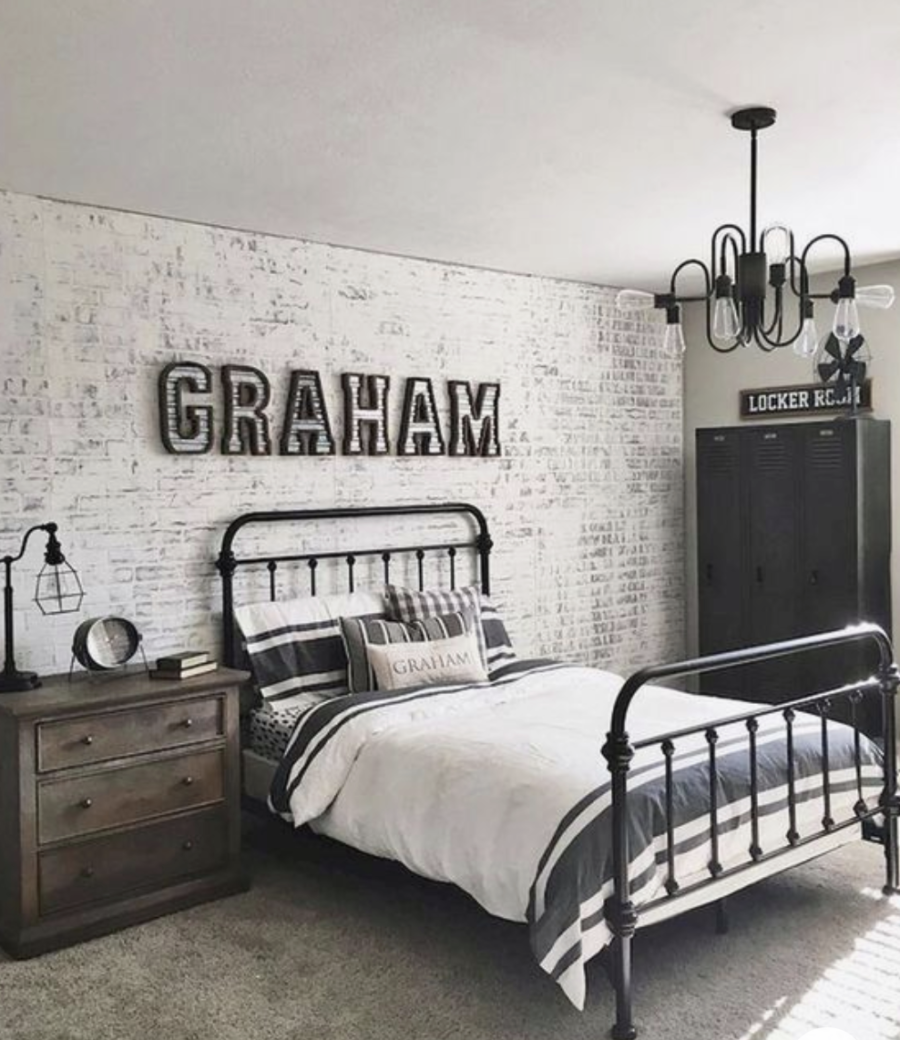
I think it’s always important to incorporate my kids into our house designs and especially their bedroom designs. We always sit down together and look at Inso photos and make a list of things that are important to each kid. This is definitely important with teens most of all! Easton instantly was drawn to pictures that had wood or brick treatments on the wall like this from houseon8055.com
We decided to go for it on the brick wall right from the get go and chose this OLD CHICAGO BLANC brick flats. We’ve used this product before and absolutely love it. It’s a great thin Brick product that allows you to install an interior brick wall without fear of it being to heavy and needing to be a load bearing wall.
We used this same product in our Rebsamen Remodel and also a similar product in our Kane Remodel. We will be doing a DIY and install video for you guys while we install this in Easton’s room!
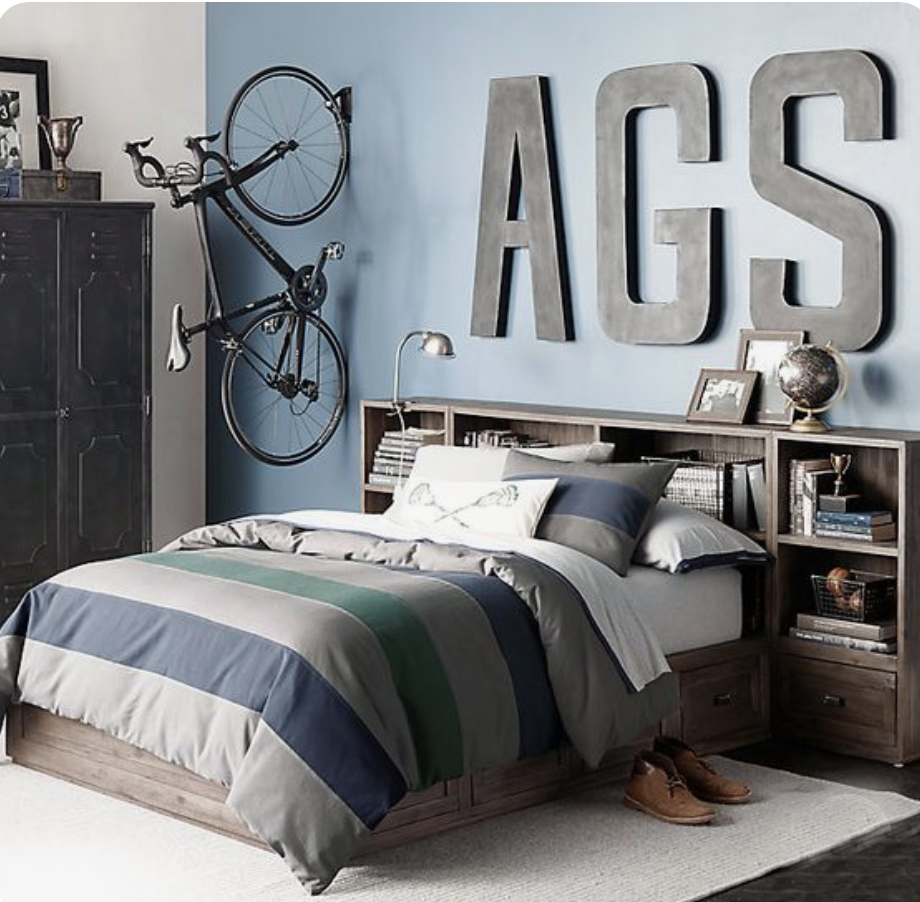
Easton also was drawn to a lot of pictures from RH TEEN which I wholeheartedly agreed with!
We also liked the vibe of this fun room from House and Home. We definitely loved the moodier, edgier vibe in this room and the guitar painting on the wall. Easton expressed he wanted to have a music theme using all his favorite album covers as the integral part of the design so we also pinned this room as an inspo photo as well!
2. LET THE BOY/TEEN BE INVOLVED IN THE DESIGN!
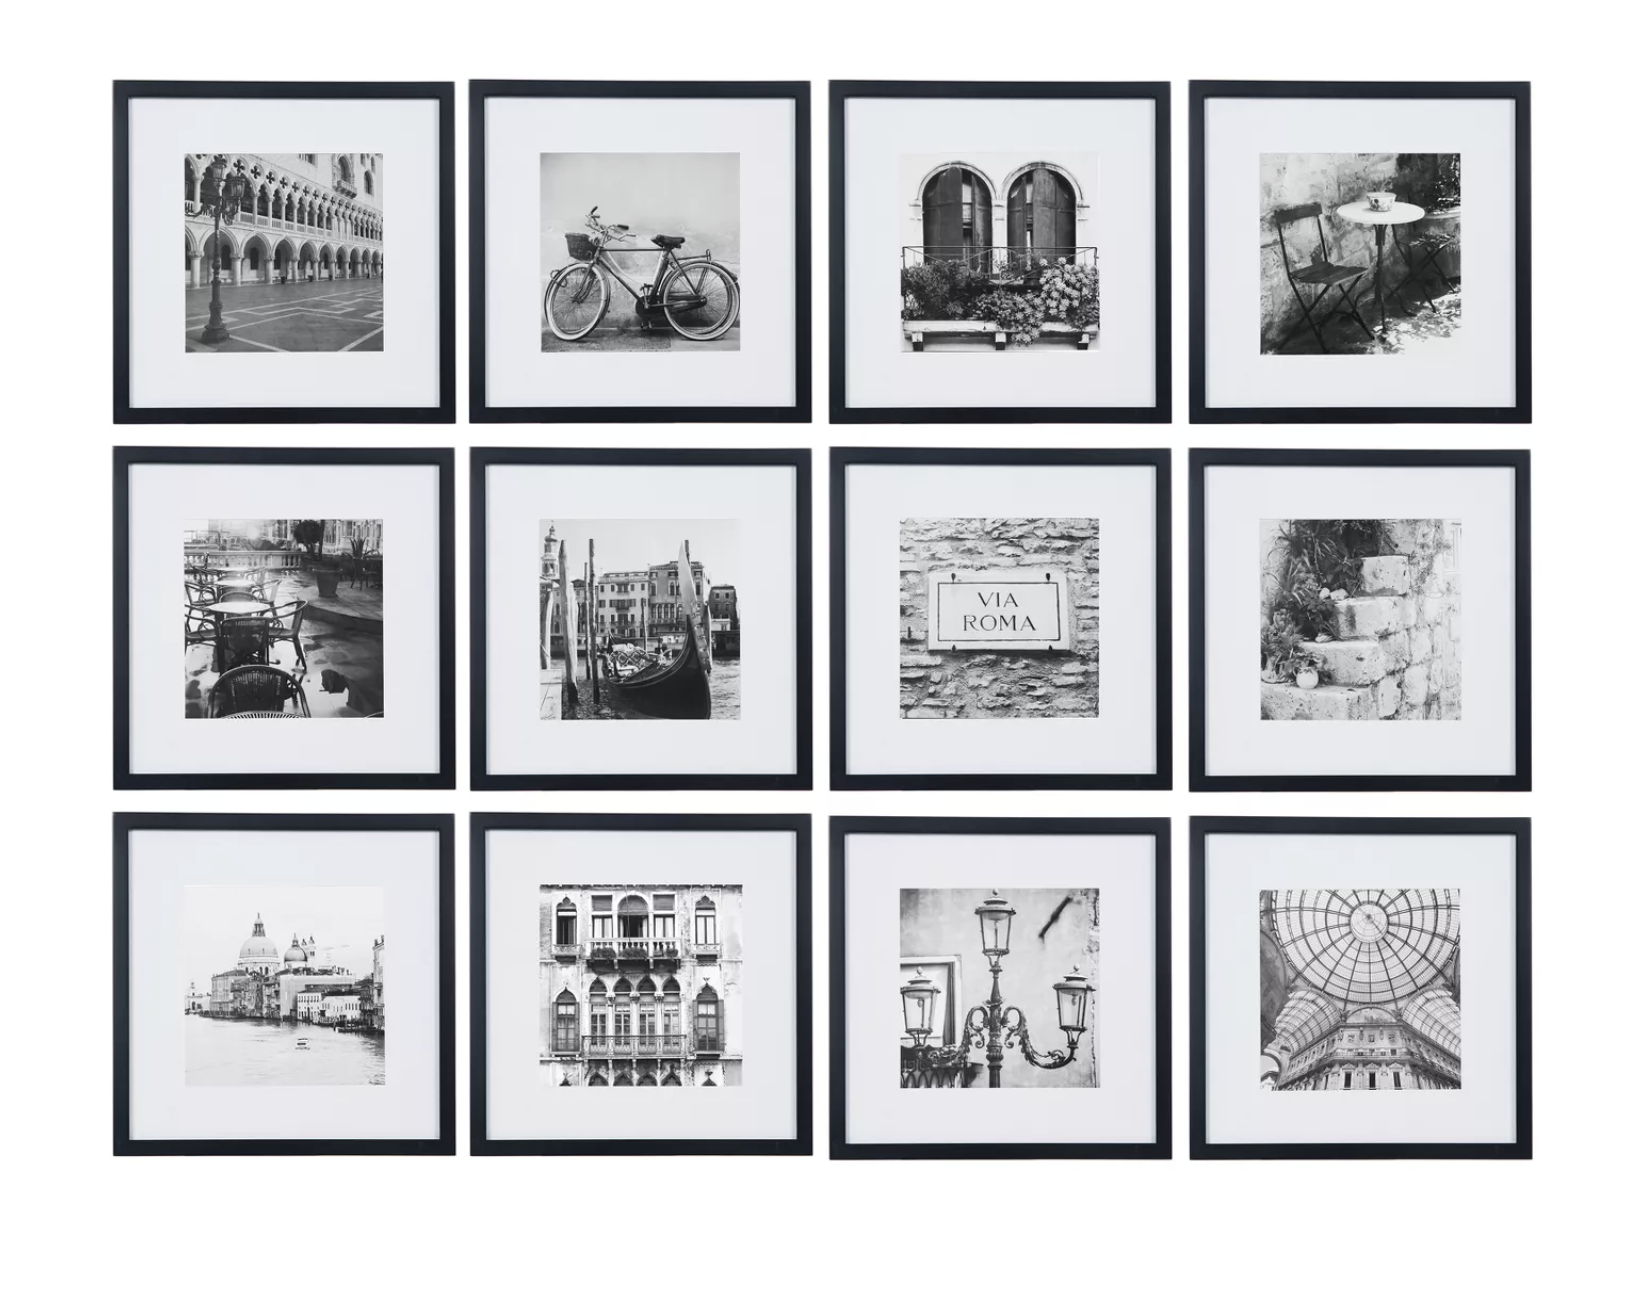
So had I been choosing, I would have really gone with the RH TEEN vibe, but as I mentioned, Easton’s idea was much edgier – shocker! 🙂 He is a big fan of Drake and wanted to have the overall “theme of the room to be music centered. So, our idea was to round up all his favorite album covers and do a big accent wall to the left of the bed using our new favorite Target gallery wall set.
You guys! I’ve been USING THE HECK out of this TARGET GALLERY WALL SET and it’s been a best seller on our blog and social media channels. It’s so affordable and easy to install and is such a great way to cover a tricky bare wall.
Easton has big plans to fill these frames with all his favorite album covers which I think is going to look pretty darn cool once we get it all done. I also love that he feels connected to this room design and feels like it’s him, BUT, thanks to this collage frame set, momma likes the LOOKS of it as well!
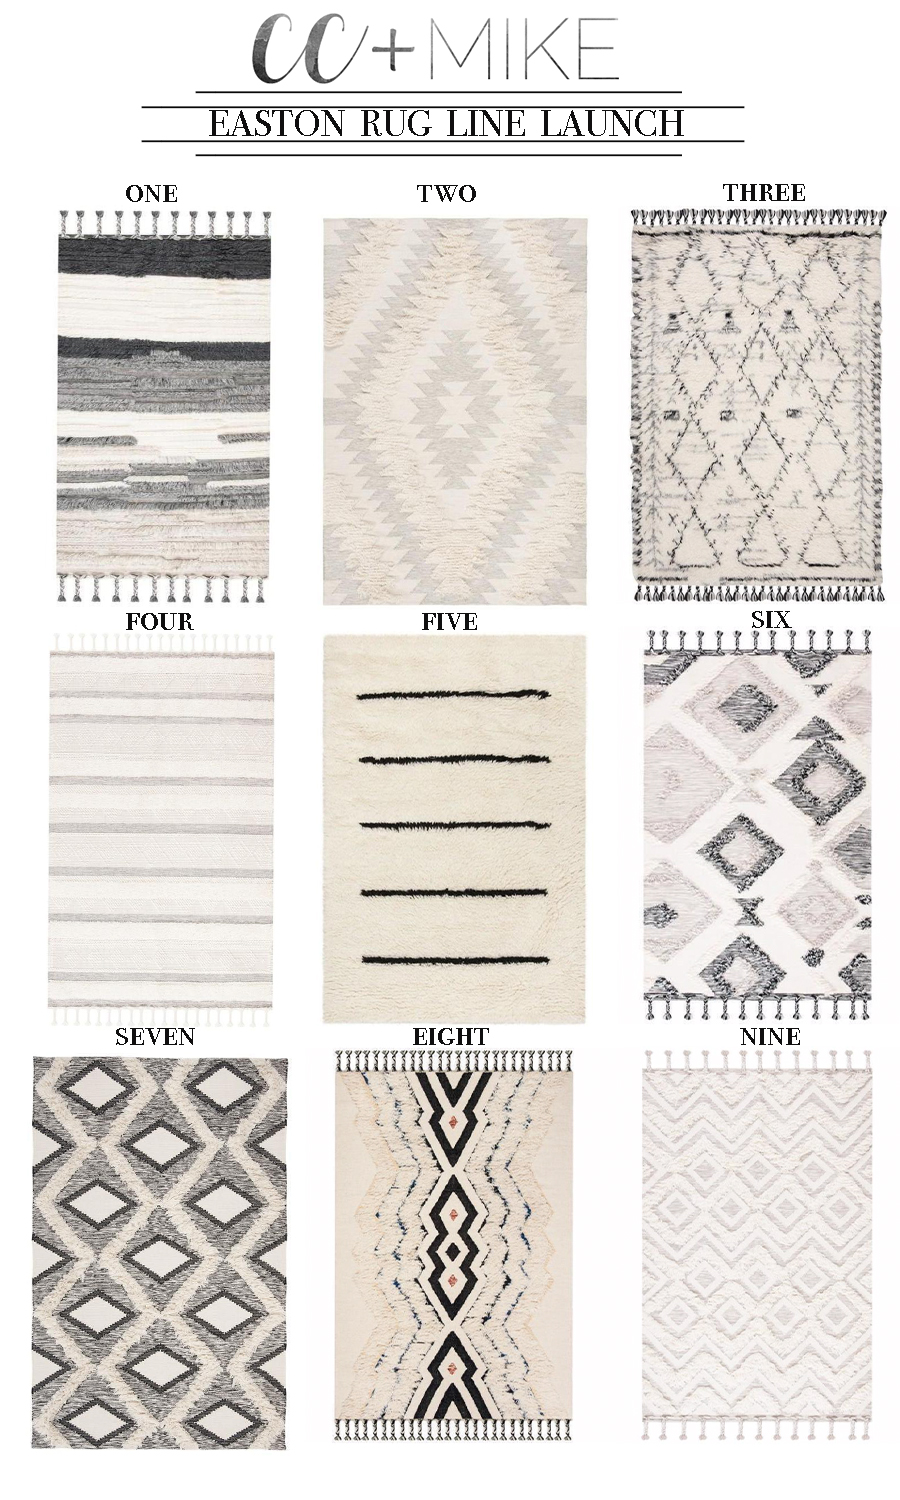
3. CHOOSE A COZY RUG
Easton really wanted to be involved in picking out the rug in his bedroom. He wanted cozy and specifically said that he wanted it to be “soft and fluffy” – ha! He elaborated that he wanted it to be comfy for when his friends are over and the are all lounging or even sleeping — good gracious these boys will literally sleep anywhere — and hanging out. We spent weeks looking through my photos from market and ultimately decided on a rug line that we both loved. Easton loved it so much, in fact, that we decided to name the rug collection THE EASTON RUG COLLECTION – now available in CC and Mike THE SHOP.
We are so excited to launch this rug line and I have plans to put this rug line not only in Easton’s room but in Cohen’s room as well. I also would LOVE one in our game room. These beauties make fabulous living room rugs as well. The texture is fabulous and they are so plush and cozy. I also love the
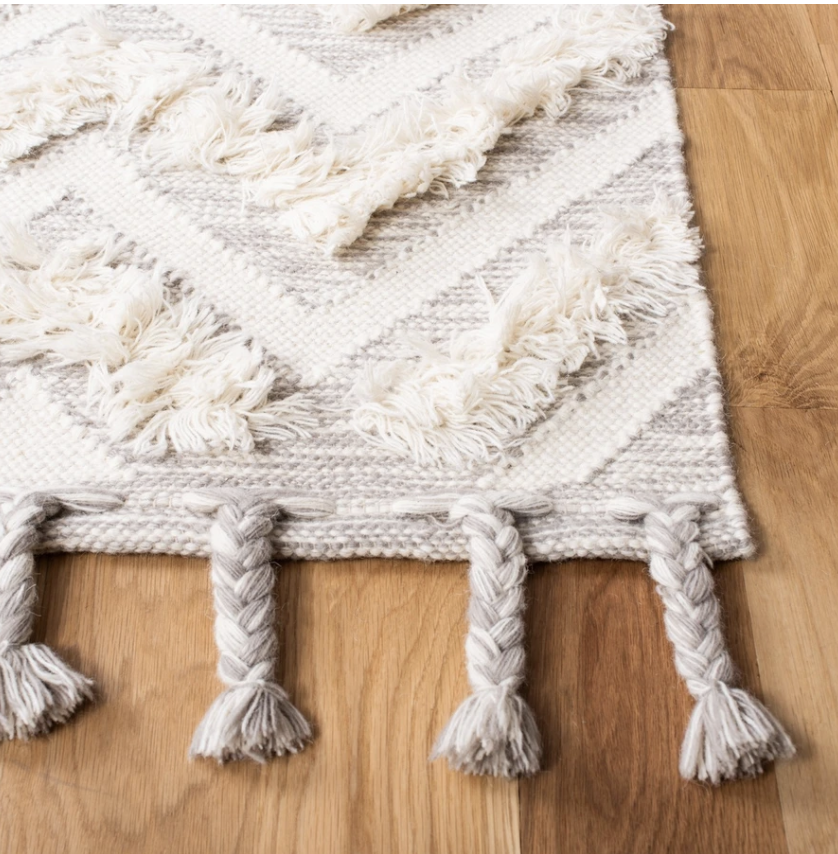
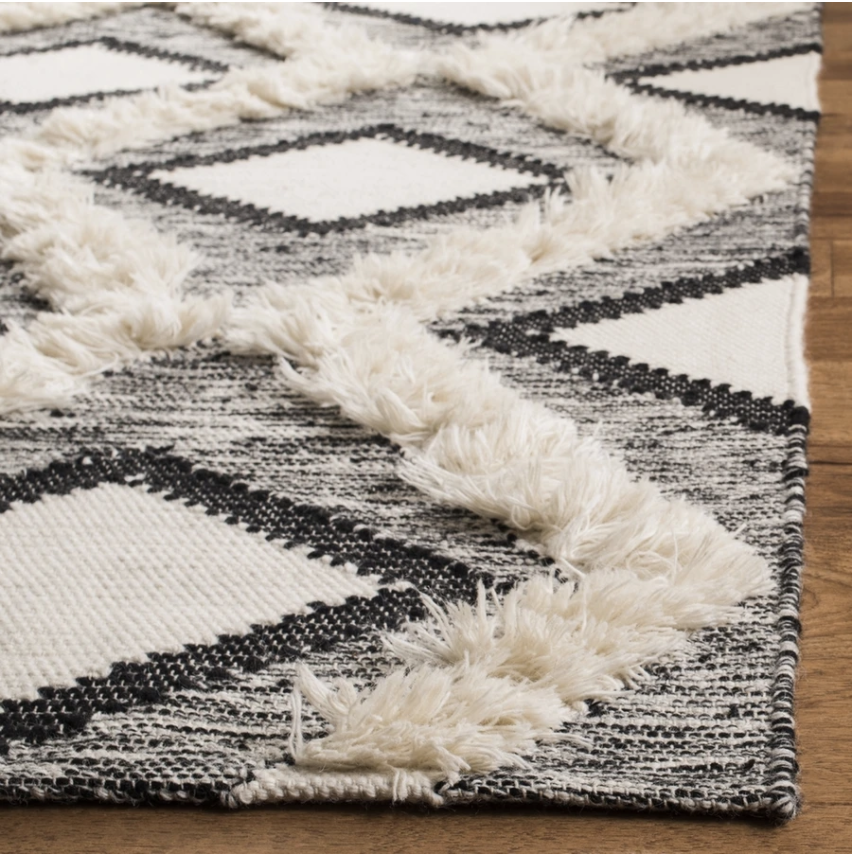
Make sure you check out the up close photos of these rugs on our website. It really shows how beautiful the details on the rugs are!
I hope you guys love the Easton rug line as much as we do! I can’t wait to see these rugs in your homes! We are going to start working on the brick wall and painting in Easton’s bedroom this weekend so hopefully we can get his room finished up and revealed soon so you can see how gorgeous this rug is in his bedroom!
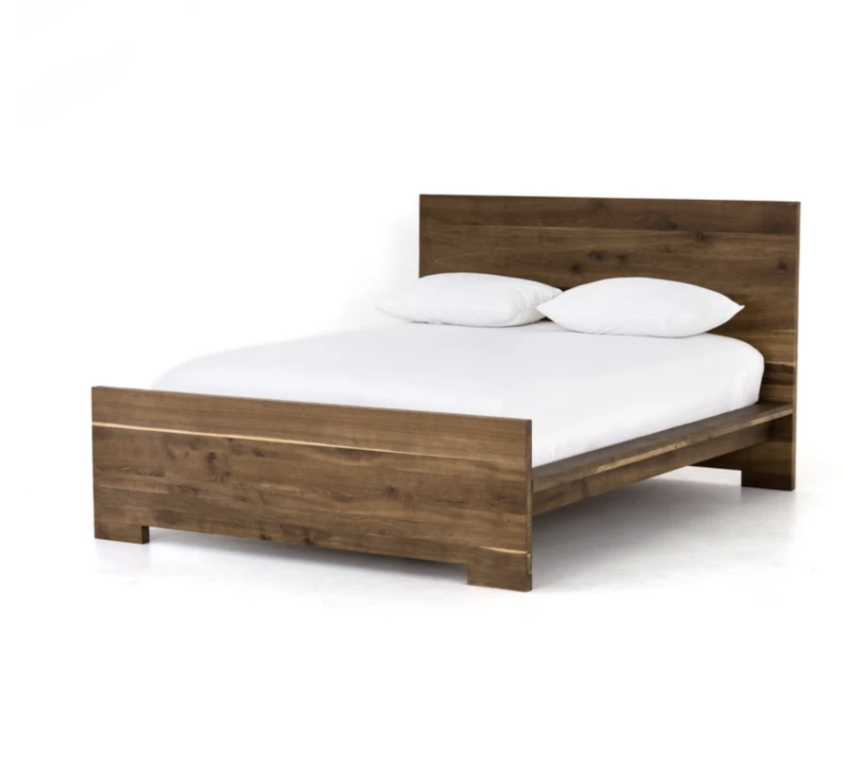
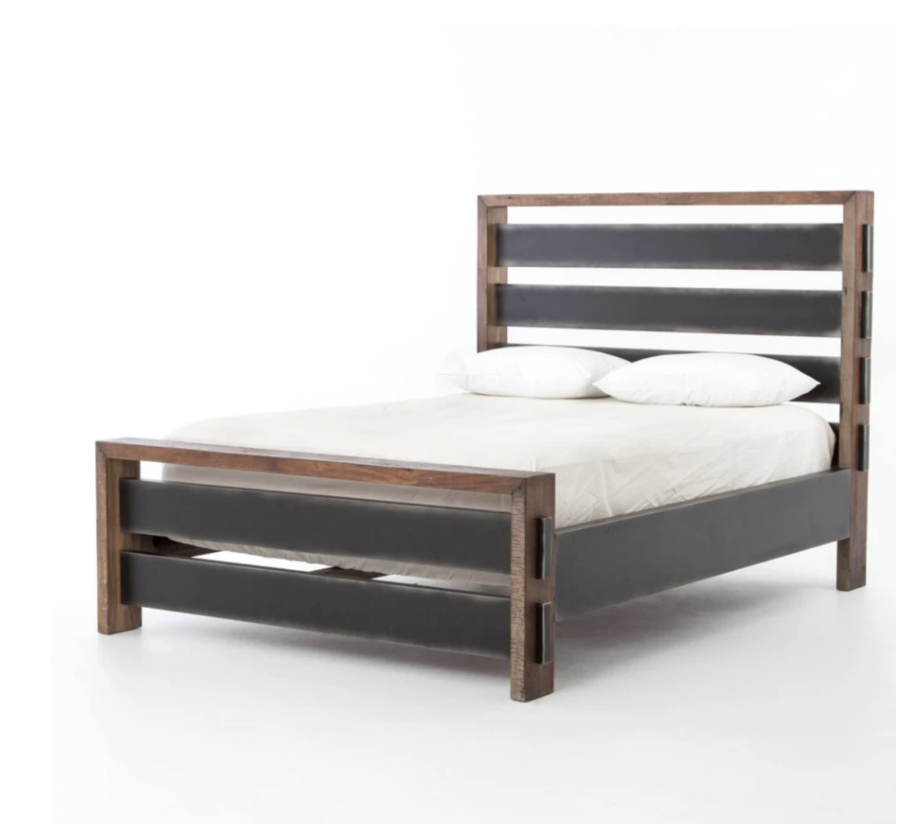
4. PICK THE PERFECT BED
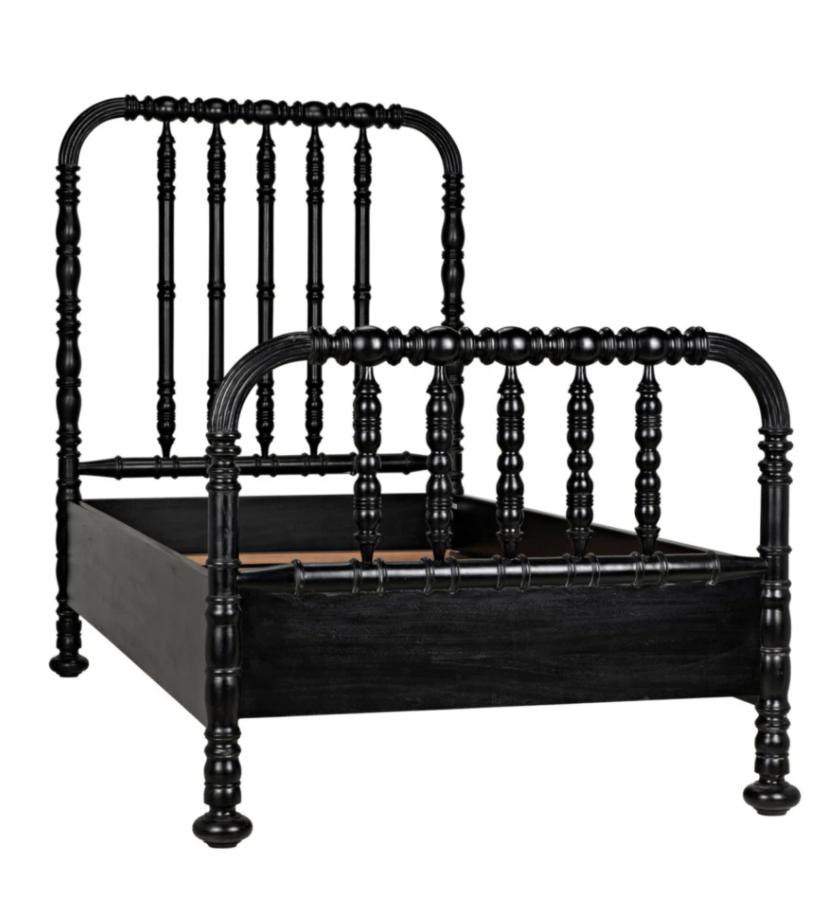
I’m a big believer that a good bed and rug really anchor the room of a boys bedroom and well, any bedroom for that matter. My three favorite beds two use in boys bedrooms are as follows (all available in CC and Mike THE SHOP).
THE BLACK JENNY LIND STYLE BED – I especially LOVE these beds when doing two twin or full beds in a room. As you can see from the design board below, that is the look I went for in the Beaver Lake project and although we haven’t revealed it yet, I can tell you that it is AMAZING and is one of my favorite ever — if not THE favorite ever — boys bedrooms I’ve ever designed.
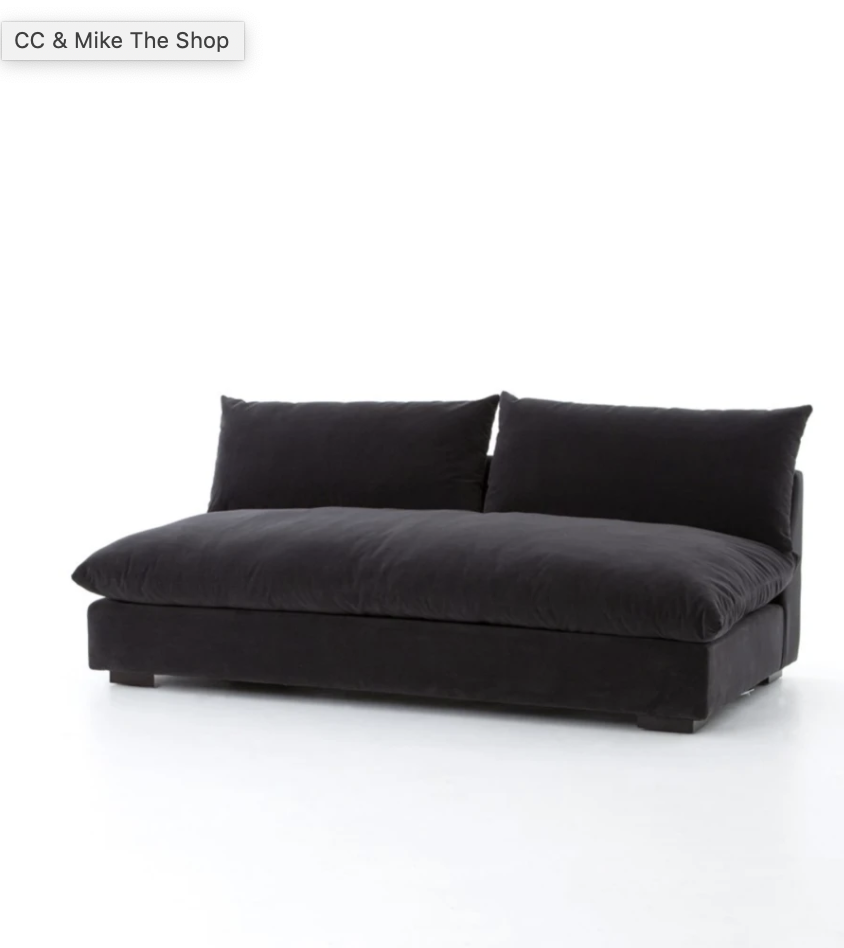
Some of the other furniture we are also incorporating in this room design from CC and Mike THE SHOP is the GRANT SOFA for the foot of his bed. It’s so cozy and soft and fits perfectly at the end of a queen bed.
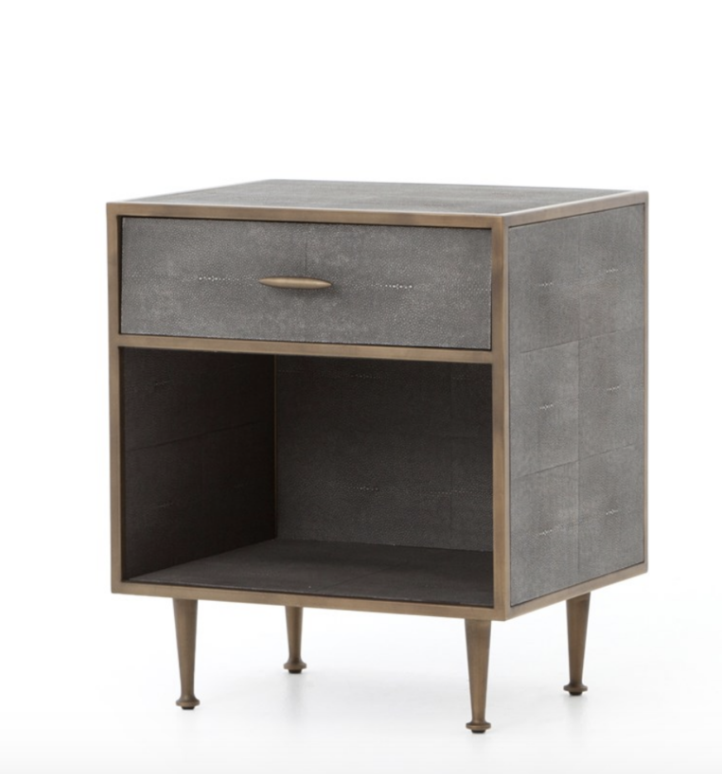
We will also be using these new shagreen night stands on either side of the reclaimed wood bed. I love the mixture of the wood bed, charcoal grant sofa, and these new night stands!
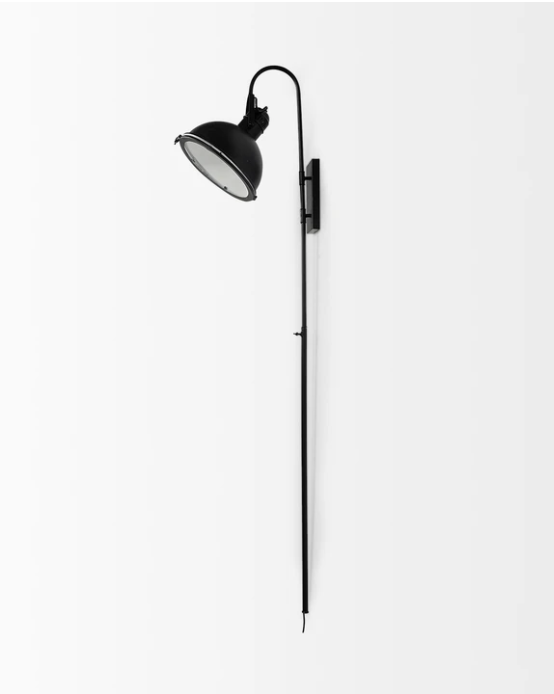
The night stands and bed will go on the brick accent wall we are doing and we will also be hanging THESE SCONCES above the night stands. I LOVE these sconces so much and they are also new to CC and Mike THE SHOP. They are plug in sconces so no hardwiring necessary and boy do they pack a punch!
5. ACCESORIZE LIKE A CHAMP
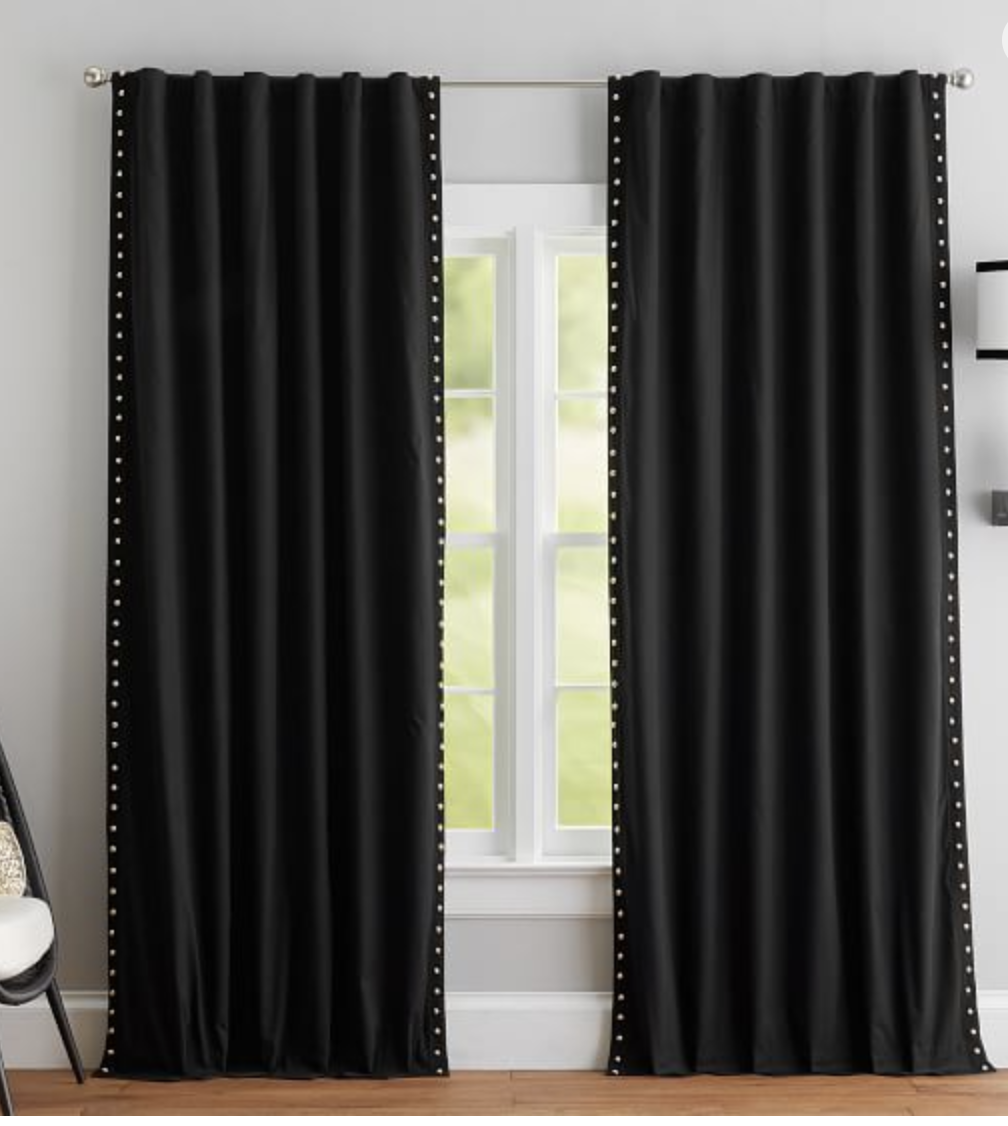
The final result really is about the accessories and it Easton’s bedroom design we are adding some fun pillows, art, sconces and more! I’m also super excited about the studded black window curtains we are using and the curtain hardware I found from Anthropologie. We can’t wait to reveal the entire room for you guys.
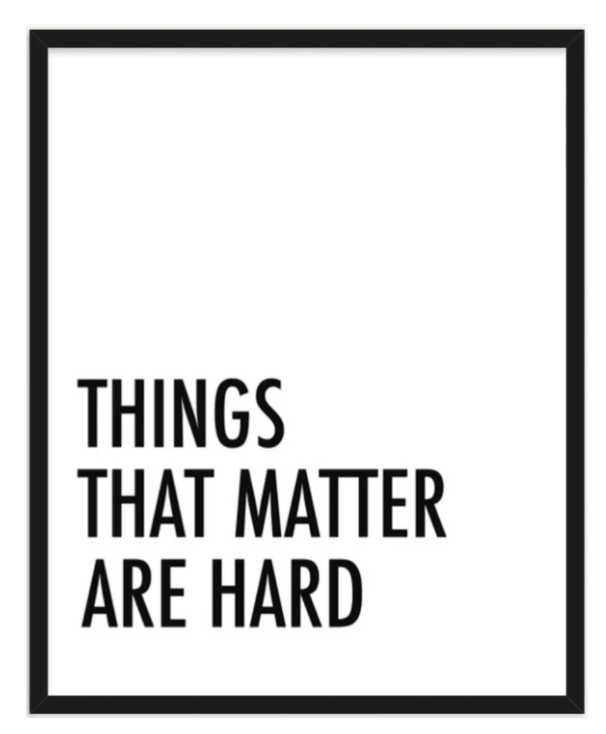
We just added two new quotes to CC and Mike THE SHOP. We will be using one fo these framed sayings in Easton’s room but haven’t chosen which one yet. (THINGS THAT MATTER ARE HARD – one of our pastor’s favorite quotes and something I repeatedly say to this kids, that all the best things in life are things that they will have to work hard for) and HARD WORK BEATS TALENT WHEN TALENT DOESN’T WORK HARD.
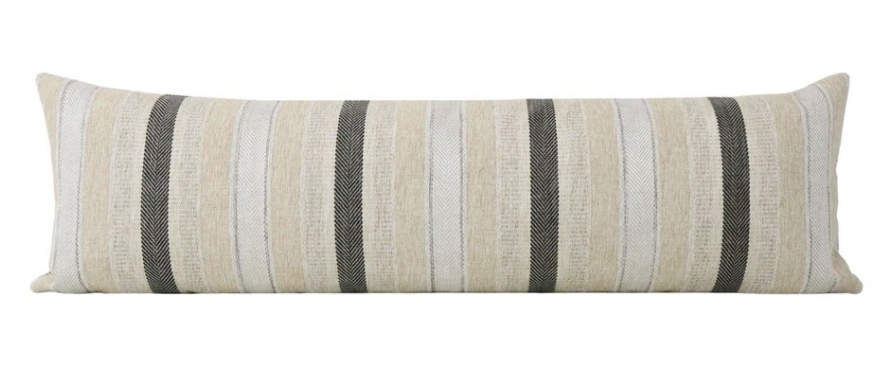
Another accessory I’m super excited about is this striped bolster! I love how it looks in front of the green velvet pillows we also have pictured. I think this is going to look so incredible with the black studded curtain panels I have picked out.
The studded curtain panels I mentioned are from POTTERY BARN KIDS. They come in pink, black, and white. I have actually used them in several projects and just got them for Easton’s room and for our homework room project. I’m pairing the panels with this awesome black and gold midcentury modern curtain hardware I found from Anthro.
SHOP EASTON’S ROOM ACCESSORIES HERE:
Hope you enjoyed this Sneak Peek of what we will be working on this weekend – Easton’s new teen room makeover. We will be sharing stories throughout the process if you want to follow along with us on Instagram


{
var e, p = /^http:/.test(d.location) ? 'http' : 'https';
if(!d.getElementById(id)) {
e = d.createElement(s);
e.id = id;
e.src = p + '://widgets.rewardstyle.com/js/shopthepost.js';
d.body.appendChild(e);
}
if(typeof window.__stp === 'object') if(d.readyState === 'complete') {
window.__stp.init();
}
}(document, 'script', 'shopthepost-script');
</script>
<div class="rs-adblock">
<img src="//assets.rewardstyle.com/images/search/350.gif" style="width:15px;height:15px;" onerror="this.parentNode.innerHTML='Turn off your ad blocker to view content'" />
<noscript>Turn on your JavaScript to view content</noscript>
</div>
</div>)